Samsung WB250F User Manual Ver.1.0 (English) - Page 122
Select a backup PC., Select, Cancel, down PC after backup
 |
View all Samsung WB250F manuals
Add to My Manuals
Save this manual to your list of manuals |
Page 122 highlights
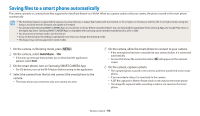
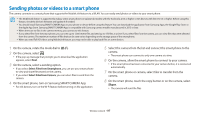
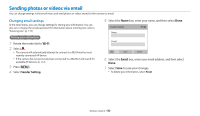
Using Auto Backup to send photos or videos 3 Select a backup PC. • If you have performed a backup before, skip to step 4. 4 Select OK. • To cancel sending, select Cancel. • You cannot select individual files to backup. This function backs up only new files on the camera. • The backup's progress will be shown on the PC monitor. • When the transfer is completed, the camera will turn off automatically in approximately 30 seconds. Select Cancel to return to the previous screen and prevent the camera from turning off automatically. • To turn off your PC automatically after the transfer is complete, select Shut down PC after backup “ On. • To change the backup PC, select . • When you connect the camera to the WLAN, select the AP that is connected to the PC. • The camera will search for available access points even if you are connecting to the same access point again. • If you turn off the camera or remove the battery while sending files, the file transfer will be interrupted. • While you are using this feature, the shutter control is disabled on your camera. • You can connect only one camera to the PC at a time for sending files. • The backup may be canceled due to network conditions. • Photos or videos can be sent to a PC one time only. Files cannot be sent again even if you reconnect your camera to another PC. • When there are no files in the camera memory, you cannot use this feature. • You must turn off Windows Firewall and any other firewalls before using this feature. • You can send up to 1,000 recent files. • On the PC software, the server name must be entered in the Latin alphabet and can contain no more than 48 characters. • When multiple file types are created at once, only the image files (JPG) will be sent to the PC with this feature. Wireless network 121
-
 1
1 -
2
-
3
-
4
-
5
-
6
-
7
-
8
-
9
-
10
-
11
-
12
-
13
-
14
-
15
-
16
-
17
-
18
-
19
-
20
-
21
-
22
-
23
-
24
-
25
-
26
-
27
-
28
-
29
-
30
-
31
-
32
-
33
-
34
-
35
-
36
-
37
-
38
-
39
-
40
-
41
-
42
-
43
-
44
-
45
-
46
-
47
-
48
-
49
-
50
-
51
-
52
-
53
-
54
-
55
-
56
-
57
-
58
-
59
-
60
-
61
-
62
-
63
-
64
-
65
-
66
-
67
-
68
-
69
-
70
-
71
-
72
-
73
-
74
-
75
-
76
-
77
-
78
-
79
-
80
-
81
-
82
-
83
-
84
-
85
-
86
-
87
-
88
-
89
-
90
-
91
-
92
-
93
-
94
-
95
-
96
-
97
-
98
-
99
-
100
-
101
-
102
-
103
-
104
-
105
-
106
-
107
-
108
-
109
-
110
-
111
-
112
-
113
-
114
-
115
-
116
-
 117
117 -
 118
118 -
 119
119 -
 120
120 -
 121
121 -
 122
122 -
 123
123 -
 124
124 -
 125
125 -
 126
126 -
 127
127 -
128
-
129
-
130
-
131
-
132
-
133
-
134
-
135
-
136
-
137
-
138
-
139
-
140
-
141
-
142
-
143
-
144
-
145
-
146
-
147
-
148
-
149
-
150
-
151
-
152
-
153
-
154
-
155
-
156
-
157
-
158
-
159
-
160
-
161
-
162
-
163
-
164
-
165
-
166
 |
 |