Seagate STBN100 Seagate Business Storage 1-Bay, 2-Bay, and 4-Bay NAS Administr - Page 13
Creating User Groups, Users & Groups > Shared Folder Permissions
 |
View all Seagate STBN100 manuals
Add to My Manuals
Save this manual to your list of manuals |
Page 13 highlights
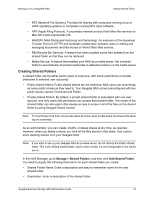
Setting Up Your Seagate® NAS Getting Started Tasks • Services: Click the service(s) you want for this new shared folder. Note: Review a detailed explanation in "Creating User Accounts" on page 11 • Volume: Select the volume in which to create the shared folder. • Recycle Bin Service: Protect files on the share from being accidentally deleted. Deleted files can be restored by the administrator. • Media Service: Use your Seagate NAS to share digital photos, videos and music with people on your local network and stream iTunes music. • Encrypt Shared Folder: Protect the shared folder so that it is only accessible with the use of an encryption key. The encryption process places the security key on a user-supplied USB drive that is connected to the NAS. If the NAS is powered off, you must insert the USB drive into the NAS's port to "unlock" the secured share. The USB drive can be removed after the share is encrypted, but must be used if the NAS is restarted. • Shared Folder Access: Set up access control after creating this shared folder. In the NAS Manager, go to Users & Groups > Shared Folder Permissions to set up access control. Click the Edit icon next to the shared folder you want to modify. Ensure that the Public Access checkbox is not selected. Options display allowing you to: • Grant access to specified users only. • Limit some users to read-only access. Read-only access means that a user can view files on the shared folder, but can't edit those files or upload files to the shared folder. • Granting full access to the shared folder, which allows the user to save and back up files to the shared folder, edit files on the shared folder, and download any files from the shared folder to a computer or to a USB/USM drive connected to the NAS. Creating User Groups You can make it faster and easier to manage shared folder access by sorting Seagate NAS users into groups. In the NAS Manager, go to Users & Groups > Groups. Click Add Group. You need to supply the following information for each group that you create. • Group Name: Enter a name for the group that makes it easy to identify and remember. Spaces are not allowed in group names. • Description: Enter a description of the group (for instance, a common function, a common location in the office, access to common shares, etc.) • Users: Select the users you want to be part of the group. Seagate Business Storage NAS Administrator Guide 13
-
 1
1 -
2
-
3
-
4
-
5
-
6
-
7
-
 8
8 -
 9
9 -
 10
10 -
 11
11 -
 12
12 -
 13
13 -
 14
14 -
 15
15 -
 16
16 -
 17
17 -
 18
18 -
19
-
20
-
21
-
22
-
23
-
24
-
25
-
26
-
27
-
28
-
29
-
30
-
31
-
32
-
33
-
34
-
35
-
36
-
37
-
38
-
39
-
40
-
41
-
42
 |
 |