Seagate STBN100 Seagate Business Storage 1-Bay, 2-Bay, and 4-Bay NAS Administr - Page 19
Customizing Your Seagate® NAS, Working with Volumes, Creating New Volumes - hard disk
 |
View all Seagate STBN100 manuals
Add to My Manuals
Save this manual to your list of manuals |
Page 19 highlights
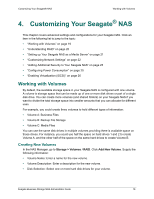
Customizing Your Seagate® NAS Working with Volumes 4. Customizing Your Seagate® NAS This chapter covers advanced settings and configurations for your Seagate NAS. Click an item in the following list to jump to the topic: • "Working with Volumes" on page 19 • "Understanding RAID" on page 20 • "Setting up Your Seagate NAS as a Media Server" on page 21 • "Customizing Network Settings" on page 22 • "Adding Additional Security to Your Seagate NAS" on page 25 • "Configuring Power Consumption" on page 25 • "Enabling Virtualization (iSCSI)" on page 26 Working with Volumes By default, the available storage space in your Seagate NAS is configured with one volume. A volume is storage space that can be made up of one or more disk drives or part of a single disk drive. You can create more volumes (and shared folders) on your Seagate NAS if you want to divide the total storage space into smaller amounts that you can allocate for different uses. For example, you could create three volumes to hold different types of information: • Volume A: Business Files • Volume B: Backup File Storage • Volume C: Media Files You can use the same disk drives in multiple volumes providing there is available space on those drives. For instance, you could use half the space on hard drives 1 and 2 to create Volume A, and the other half of the space on the same hard drives to create Volume B. Creating New Volumes In the NAS Manager, go to Storage > Volumes / RAID. Click Add New Volume. Supply the following information: • Volume Name: Enter a name for the new volume. • Volume Description: Enter a description for the new volume. • Disk Selection: Select one or more hard disk drives for your volume. Seagate Business Storage NAS Administrator Guide 19
-
 1
1 -
2
-
3
-
4
-
5
-
6
-
7
-
8
-
9
-
10
-
11
-
12
-
13
-
 14
14 -
 15
15 -
 16
16 -
 17
17 -
 18
18 -
 19
19 -
 20
20 -
 21
21 -
 22
22 -
 23
23 -
 24
24 -
25
-
26
-
27
-
28
-
29
-
30
-
31
-
32
-
33
-
34
-
35
-
36
-
37
-
38
-
39
-
40
-
41
-
42
 |
 |
