Seagate STBN100 Seagate Business Storage 1-Bay, 2-Bay, and 4-Bay NAS Administr - Page 9
Setting Up Your Seagate® NAS, Connecting Your NAS and Installing Software - review
 |
View all Seagate STBN100 manuals
Add to My Manuals
Save this manual to your list of manuals |
Page 9 highlights
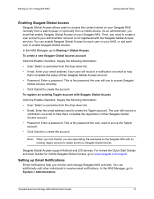
Setting Up Your Seagate® NAS Connecting Your NAS and Installing Software 3. Setting Up Your Seagate® NAS Your Seagate NAS comes with many default values to help you quickly set up your NAS and start protecting and sharing your data. Connecting Your NAS and Installing Software Before you begin, verify the following: • Your computer meets the requirements listed on page 5. • You have a solid, flat, stable surface for the NAS to sit on in an area with reliable ventilation. • The NAS's vents will not be covered or blocked and that the NAS is not placed near a heat source. • The NAS won't be in an area where liquids may be spilled on it. 1. Use the Ethernet cable included in the kit to connect the Seagate NAS to a switch or router on your local network. Connect the Ethernet cable to the LAN port. 2. Use the power adapter included in the kit to connect the Seagate NAS to a grounded power outlet. The NAS powers on automatically and the LED lights on the front panel of the NAS illuminate. 3. Insert the installation DVD into your computer. The software will detect the operating system of your personal computer and launch the appropriate software. If you encounter any issues, please review the steps provided in your Quick Start Guide or visit www.seagate.com/support. The DVD includes information that will step you through the process of discovering your Seagate NAS and completing an initial setup: • Install the Seagate software (Discovery, Backup, and Rescue Media Builder): Seagate recommends that you choose to install all software provided on the DVD. After you install the software, you'll be asked if you want to launch the Discovery software. • Discover your Seagate NAS: When you launch the Discovery software, the software searches your LAN for all attached Seagate NASs. • Complete Setup Wizard: After you select the NAS you want to set up, click Next. The NAS Manager launches automatically and you start a wizard. This three-step setup wizard walks you through the steps of 1) changing the admin password, 2) completing a general setup (select a web protocol, time zone, and current date and time), and 3) configuring your network. TIP: Online Help is available on every page in the NAS Manager application. Click the Learn more link for detailed information about each page. Seagate Business Storage NAS Administrator Guide 9
-
 1
1 -
2
-
3
-
 4
4 -
 5
5 -
 6
6 -
 7
7 -
 8
8 -
 9
9 -
 10
10 -
 11
11 -
 12
12 -
 13
13 -
 14
14 -
15
-
16
-
17
-
18
-
19
-
20
-
21
-
22
-
23
-
24
-
25
-
26
-
27
-
28
-
29
-
30
-
31
-
32
-
33
-
34
-
35
-
36
-
37
-
38
-
39
-
40
-
41
-
42
 |
 |