Sony DEV5 Digital Recording Binoculars Handbook - Page 15
Step 3: Turning the power on, and setting up this product
 |
View all Sony DEV5 manuals
Add to My Manuals
Save this manual to your list of manuals |
Page 15 highlights
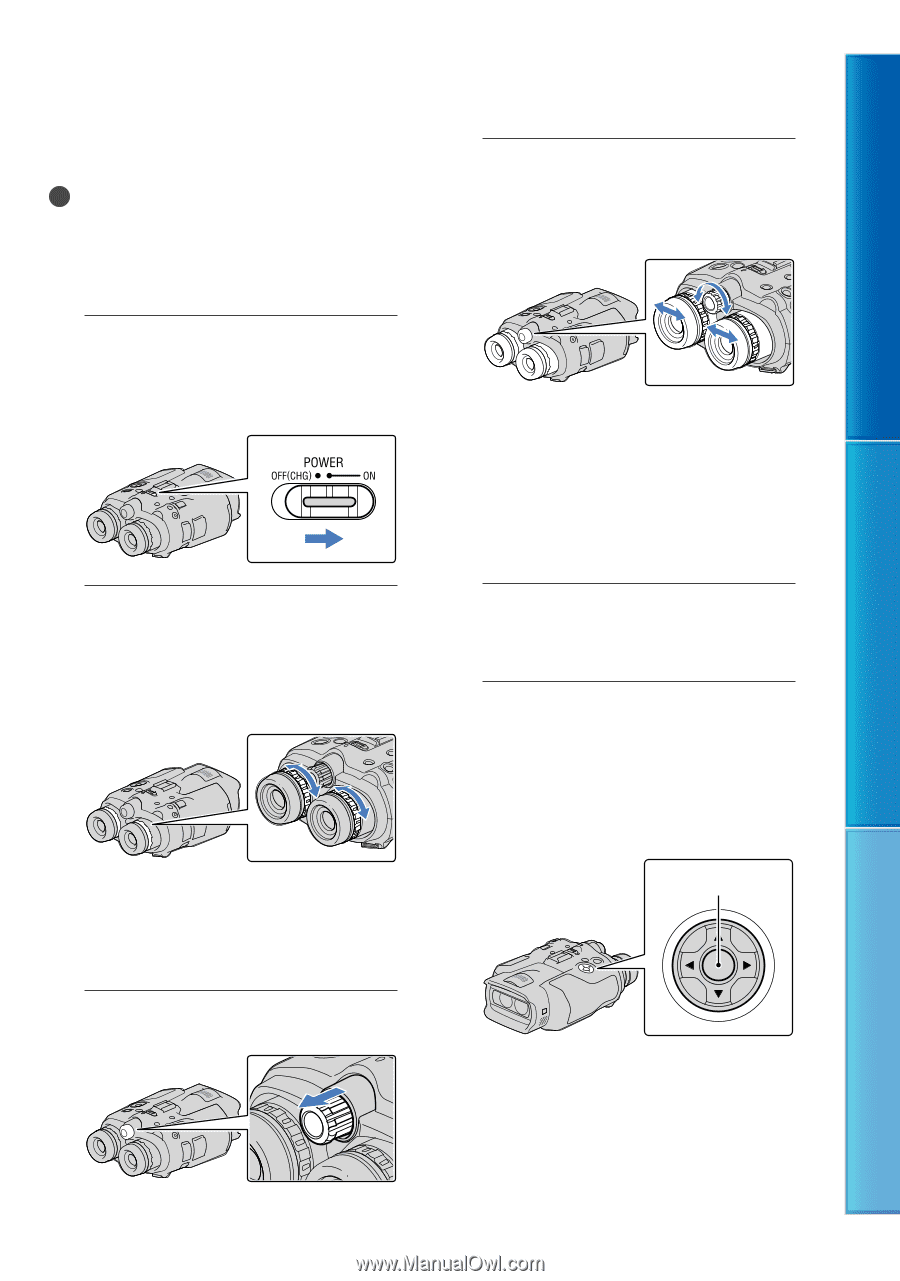
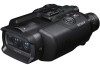
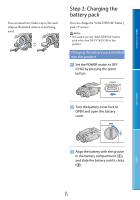
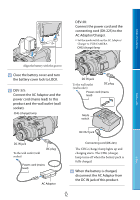
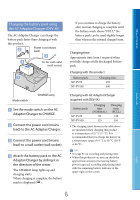
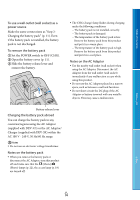
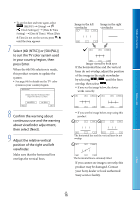
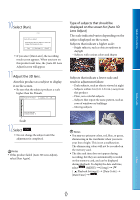
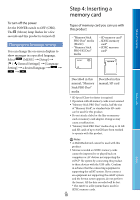
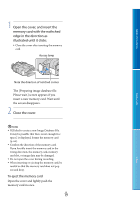
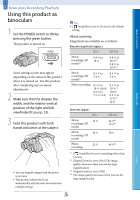
Table of Contents Step 3: Turning the power on, and setting up this product Notes Do not turn the power on with the USB cable connected. Do not connect the USB cable until the following procedure is completed. 1 Set the POWER switch to ON by pressing the green button. This product is turned on. 2 Adjust the diopter until you can see a clear image with each eye by turning the diopter adjustment dial. If this product is used by more than one person, adjust the diopter each time the user changes. Adjust the diopter for each eye separately. 3 Pull out the IPD ADJ dial. 4 Adjust the width between the left and right viewfinder to fit your eyes using the IPD ADJ dial. Adjust the width so that left and right images overlap. Make sure that the image in the viewfinder does not look like it has a double image. If this product is used by more than one person, adjust the width each time the user changes. 5 Push the IPD ADJ dial back into this product. 6 Set the language, area, summer time, date & time format, and date & time using the Enter button, then confirm each setting. Enter button When each setting have been completed, select [Next] and press Enter. Menu Lists Index GB 15
-
 1
1 -
2
-
3
-
4
-
5
-
6
-
7
-
8
-
9
-
 10
10 -
 11
11 -
 12
12 -
 13
13 -
 14
14 -
 15
15 -
 16
16 -
 17
17 -
 18
18 -
 19
19 -
 20
20 -
21
-
22
-
23
-
24
-
25
-
26
-
27
-
28
-
29
-
30
-
31
-
32
-
33
-
34
-
35
-
36
-
37
-
38
-
39
-
40
-
41
-
42
-
43
-
44
-
45
-
46
-
47
-
48
-
49
-
50
-
51
-
52
-
53
-
54
-
55
-
56
-
57
-
58
-
59
-
60
-
61
-
62
-
63
-
64
-
65
-
66
-
67
-
68
-
69
-
70
-
71
-
72
-
73
-
74
-
75
-
76
-
77
-
78
-
79
-
80
-
81
-
82
-
83
-
84
-
85
-
86
-
87
-
88
-
89
-
90
-
91
-
92
-
93
-
94
-
95
-
96
-
97
-
98
 |
 |