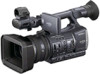
Sony HDR-AX2000 Operating Guide (Large File - 11.29 MB) - Page 78
Expanded Focus Type, Camera Data Display, Audio Level Display, Lcd Bright, Lcd Color
 |
UPC - 027242781733
View all Sony HDR-AX2000 manuals
Add to My Manuals
Save this manual to your list of manuals |
Page 78 highlights
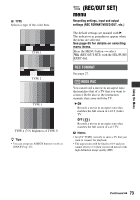
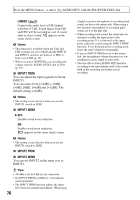
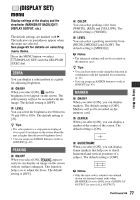
Press the MENU button t select (DISPLAY SET) with the SEL/PUSH EXEC dial. • You cannot display markers under following conditions: - [EXPANDED FOCUS] - During [SMOOTH SLOW REC] - When the current time is displayed after the power is turned on • You can display markers only on the LCD panel and viewfinder. You cannot display them on an external device. z Tips • You can display all types of markers at the same time. • You can obtain a balanced composition by positioning the subject at the cross points of the guideframe marker. • You can assign an ASSIGN button to work as [ON/OFF] (p. 43). EXPANDED FOCUS TYPE You can set a type of the expanded focus display. B TYPE 1 Simply enlarges images. TYPE 2 Enlarges and shows images in black and white. CAMERA DATA DISPLAY When you set this function to [ON], you can constantly display the iris, gain and shutter speed settings on the screen. The default setting is [OFF]. Iris value Shutter speed value Gain value z Tips • The settings appear on the screen during the manual adjustment regardless of the settings of this function. • indicates that the settings are automatically adjusted values. • The displayed settings are different from the settings that will be displayed when you press the DATA CODE button (p. 49). AUDIO LEVEL DISPLAY When you set this function to [ON], you can display the audio level meter on the screen. The default setting is [ON]. Audio level meter LCD BRIGHT You can adjust the brightness of the LCD screen. Changes in the LCD brightness will not affect the brightness of recording images. z Tips • You can also turn off the LCD backlight (p. 20). LCD COLOR You can adjust the color level of the LCD panel. Changes in the LCD color level will not affect the color level of recording images. LCD BACKLIGHT LEVEL You can adjust the backlight level of the LCD screen. 78
-
 1
1 -
2
-
3
-
4
-
5
-
6
-
7
-
8
-
9
-
10
-
11
-
12
-
13
-
14
-
15
-
16
-
17
-
18
-
19
-
20
-
21
-
22
-
23
-
24
-
25
-
26
-
27
-
28
-
29
-
30
-
31
-
32
-
33
-
34
-
35
-
36
-
37
-
38
-
39
-
40
-
41
-
42
-
43
-
44
-
45
-
46
-
47
-
48
-
49
-
50
-
51
-
52
-
53
-
54
-
55
-
56
-
57
-
58
-
59
-
60
-
61
-
62
-
63
-
64
-
65
-
66
-
67
-
68
-
69
-
70
-
71
-
72
-
 73
73 -
 74
74 -
 75
75 -
 76
76 -
 77
77 -
 78
78 -
 79
79 -
 80
80 -
 81
81 -
 82
82 -
 83
83 -
84
-
85
-
86
-
87
-
88
-
89
-
90
-
91
-
92
-
93
-
94
-
95
-
96
-
97
-
98
-
99
-
100
-
101
-
102
-
103
-
104
-
105
-
106
-
107
-
108
-
109
-
110
-
111
-
112
-
113
-
114
-
115
-
116
-
117
-
118
-
119
-
120
-
121
-
122
-
123
-
124
-
125
-
126
-
127
-
128
-
129
-
130
-
131
-
132
 |
 |
