Sony HXRNX80 Operating Instructions
Sony HXRNX80 Manual
 |
View all Sony HXRNX80 manuals
Add to My Manuals
Save this manual to your list of manuals |
Sony HXRNX80 manual content summary:
- Sony HXRNX80 | Operating Instructions - Page 1
4-731-568-13(1) Solid-State Memory Camcorder Operating Guide Identifying Parts and Controls Getting Started Recording Playback Using Network Functions Editing Using the Menu Troubleshooting Additional Information ® HXR-NX80 - Sony HXRNX80 | Operating Instructions - Page 2
Read this first Before operating this unit, please read this manual thoroughly, and retain it for future reference. Precautions when using the camcorder • Do not hold the camcorder by the following parts, and also do not - Sony HXRNX80 | Operating Instructions - Page 3
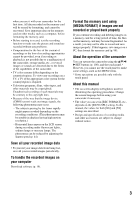
function to make sure the picture and sound are recorded without any problems. • Compensation for the loss of the content of recordings or the . * Some operations are possible only with the touch panel. About this manual • The on-screen display in English is used for illustrating the operating - Sony HXRNX80 | Operating Instructions - Page 4
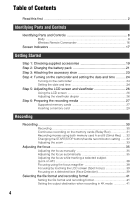
the viewfinder diopter 26 Step 6: Preparing the recording media 27 Supported memory cards 27 Inserting a memory card 29 Recording Recording 30 Adjusting the zoom 33 Adjusting the focus 35 Adjusting the focus manually 35 Adjusting the focus automatically 35 Adjusting the focus while tracking - Sony HXRNX80 | Operating Instructions - Page 5
Proxy recording 42 Notes on proxy recording 42 Proxy recording 42 Adjusting the brightness 43 Adjusting the iris 43 Adjusting the ISO sensitivity/gain 44 Adjusting the shutter speed 44 Adjusting the exposure 45 Adjusting the light level (ND Filter 45 Adjusting the color tone 46 Adjusting - Sony HXRNX80 | Operating Instructions - Page 6
an access point using the WPS function 78 Registering an access point using the WPS PIN method 79 Registering an access point manually 80 Changing the device name 81 Configuring a wired LAN 82 Using the streaming function (STREAMING 83 Streaming formats 83 Configuring streaming (preset - Sony HXRNX80 | Operating Instructions - Page 7
Troubleshooting 136 Warning indicators and messages 144 Additional Information Recording time 149 Function limitations when recording 151 Limitations for each file format 151 Slow & Quick Motion and Super Slow Motion recording limitations 152 Streaming, RTMP/RTMPS, and USTREAM supported - Sony HXRNX80 | Operating Instructions - Page 8
Identifying Parts and Controls Identifying Parts and Controls Body The numbers in ( ) are reference pages. A ASSIGN4/FOCUS MAGNIFIER button (p. 38) B Accessory shoe mount (p. 23) C XLR handle unit D Microphone fixing clamper E Microphone holder F Accessory shoe G ASSIGN5/IRIS PUSH AUTO button (p. - Sony HXRNX80 | Operating Instructions - Page 9
Identifying Parts and Controls Attaching the XLR handle unit 1 Remove the Multi Interface Shoe cap. 2 Remove the handle shoe cap. 4 Press and turn the handle mounting screws to tighten them. 3 Align the mark on the XLR handle with the one on the camcorder, and insert the XLR handle unit in the - Sony HXRNX80 | Operating Instructions - Page 10
Identifying Parts and Controls (Continued) the Multi Interface Shoe or cause the camcorder to detach and fall. Detaching the XLR handle unit To detach the XLR handle unit, perform the attachment procedure in reverse. Attaching the microphone (sold separately) Use the following procedure to attach - Sony HXRNX80 | Operating Instructions - Page 11
A Manual lens ring (p. 34) B Lens hood C Lens (ZEISS lens) D REC CH SELECT (INPUT1) switch (p. 50) E ATT (INPUT1 (INPUT2) switch (p. 51) O Internal microphone P ZOOM/FOCUS switch (p. 35) Q AF/MF button (p. 35) R MENU button (p. 100) S MANUAL dial (p. 43) Continued , 11 Identifying Parts and Controls - Sony HXRNX80 | Operating Instructions - Page 12
Identifying Parts and Controls (Continued) Attaching the lens hood Align the mark on the lens hood to the mark on the camcorder, and turn the lens hood in the direction of the arrow 2 until it is locked. z Tip • If you attach or remove a 62 mm PL filter or MC protector, remove the lens hood. 12 - Sony HXRNX80 | Operating Instructions - Page 13
record button (p. 30) H INPUT2 jack (p. 50) I INPUT1 jack (p. 50) J ASSIGN6 button K REMOTE jack L POWER/CHG lamp M Grip belt N Tripod receptacles (1/4 inch) Supports 1/4-20UNC screws. For mounting on a tripod (sold separately, screw length 5.5 mm or shorter). The camcorder may not be able to mount - Sony HXRNX80 | Operating Instructions - Page 14
Identifying Parts and Controls (Continued) A Handle zoom speed switch (p. 33) B Eye sensor C Viewfinder (p. 26) D Large eyecup (p. 26) E AUTO/MANUAL switch (p. 43) F ND FILTER switch (p. 45) G Battery slot (p. 21) H i (headphones) jack I SHUTTER SPEED button (p. 44) J ISO/GAIN (ISO sensitivity/gain) - Sony HXRNX80 | Operating Instructions - Page 15
Identifying Parts and Controls A SLOT SELECT button (p. 29) B THUMBNAIL/ button (p. 65) C LCD screen/touch panel (p. 26) D Memory card slot A/Memory card access lamp (p. 29) E Memory card slot B/Memory card access lamp (p. 29) F DISPLAY button (p. 67) G ASSIGN3/PICTURE PROFILE button (p. 54) H - Sony HXRNX80 | Operating Instructions - Page 16
Identifying Parts and Controls (Continued) Wireless Remote Commander Remove the insulation sheet before using the Wireless Remote Commander. Insulation sheet b Notes • Aim the Wireless Remote Commander towards the remote sensor to operate your camcorder. • Point the remote sensor away from strong - Sony HXRNX80 | Operating Instructions - Page 17
-Fi connection status indicator (p. 92) Meaning Face detection [ON] (p. 39) Peaking (p. 118) Zebra (p. 118) NFC active (p. 75) Airplane mode [ON] (p. 124) Image stabilization ( STEADYSHOT) (p. 104) Manual focus (p. 35) Picture profile (p. 54) Iris (p. 43) Continued , 17 - Sony HXRNX80 | Operating Instructions - Page 18
-2.0EV / n A B 6500K Meaning ISO sensitivity (p. 44) Gain (p. 44) Shutter speed (p. 44) AVCHD audio format (p. 116) AE shift (p. 104) Auto setting/manual setting (p. 43) White balance (p. 46) Histogram (p. 118) LOW LUX (p. 54) Audio level display (p. 120) Digital extender (p. 104) REC LEVEL MODE - Sony HXRNX80 | Operating Instructions - Page 19
-type lithium battery is already installed. Large eyecup (p. 26) Lens hood (p. 12) Lens cap (Attached to lens) CD-ROM "Manuals for Solid-State Memory Camcorder" Operating Guide (2) Software Downloads When the unit is used with a PC connection, download any device drivers, plug-ins, and application - Sony HXRNX80 | Operating Instructions - Page 20
separately) is required. • After purchasing the option, connect the camcorder to a computer using USB to use the auto detect function, and install by following the instructions on the PC. 20 - Sony HXRNX80 | Operating Instructions - Page 21
Getting Started Step 2: Charging the battery pack You can charge the "InfoLITHIUM" battery pack (V series) with the supplied AC Adaptor. b Note • You can use an NP-FV100A large capacity battery pack (sold separately) with your camcorder. You cannot use an NP-FV50A. 1 Close the LCD screen and store - Sony HXRNX80 | Operating Instructions - Page 22
Step 2: Charging the battery pack (Continued) On the AC Adaptor • Do not short-circuit the DC plug of the AC Adaptor or battery terminal with any metallic objects. This may cause a malfunction. To store the battery pack If the battery pack is not in use for a while, run down the battery and store - Sony HXRNX80 | Operating Instructions - Page 23
Step 3: Attaching the accessory shoe To mount the accessory shoe Mount the accessory shoe on the accessory shoe mount as illustrated. Accessory shoe plate Getting Started Accessory shoe Accessory shoe Accessory shoe plate 1 Lift the edge of the accessory shoe plate and pull it in the direction - Sony HXRNX80 | Operating Instructions - Page 24
to its original position. You can also turn off the power by pressing the 1 (On/Standby) button. b Notes • If a warning message is displayed, follow the instructions. • When recording movies or when connected to another device via USB, the camcorder does not turn off even if the LCD screen is closed - Sony HXRNX80 | Operating Instructions - Page 25
Getting Started The clock starts. • Set [SUMMERTIME] to [ON] to move the time forward 1 hour. • You can set any year up to the year 2037. • Midnight is indicated as 12:00 AM, and noon as 12:00 PM. z Tip • The date and time are automatically recorded on the selected memory card, and can be displayed - Sony HXRNX80 | Operating Instructions - Page 26
Step 5: Adjusting the LCD screen and viewfinder Using the LCD screen The LCD screen can be rotated in the range as illustrated below, allowing a person other than the camera operator to see the image. 180° (max.) Open 90° 90° (max.) Adjusting the viewfinder diopter When using the viewfinder, extend - Sony HXRNX80 | Operating Instructions - Page 27
MOTION 60Mbps or slower XAVC S HD 100Mbps S&Q MOTION SUPER SLOW MOTION 60Mbps or slower XAVC S 4K 100Mbps S&Q MOTION SUPER SLOW MOTION "Memory Stick" media Supported memory cards SD/SDHC/SDXC memory cards (Class 4 or U1 or faster) SDHC/SDXC memory cards (Class 10 or U1 or faster) SDHC/SDXC - Sony HXRNX80 | Operating Instructions - Page 28
Continued) "Memory Stick XC-HG Duo" media and SDXC memory cards. Confirm in advance that the connecting equipment is supporting the exFAT file system. If you connect equipment not supporting the exFAT file system and the format screen appears, do not perform the format. All the data recorded will be - Sony HXRNX80 | Operating Instructions - Page 29
, p. 31). If a repair memory card prompt screen appears There may have been a problem recording to the memory card during the most-recent recording. Select [OK] to repair the when repair is executed. • Repair is not supported if an error occurs when recording in XAVC S format. 29 Getting Started - Sony HXRNX80 | Operating Instructions - Page 30
AVCHD format, the camcorder automatically divides the file and creates a new one. • The menu settings, picture profile settings, and settings made using the AUTO/MANUAL switch are saved when you close the LCD screen and turn off the camcorder. The POWER/CHG lamp flashes while the settings are being - Sony HXRNX80 | Operating Instructions - Page 31
Recording Continuous recording on the memory cards (Relay Rec) Insert memory cards each in both slots A and B so the camcorder switches memory card A (or B) just before the remaining space on the other one runs out, and continues recording on the next memory card automatically. Make the following - Sony HXRNX80 | Operating Instructions - Page 32
Recording (Continued) Recording movies using both memory card A and B (Simul Rec) You can record movies on both memory card A and memory card B simultaneously. Set (REC/OUT SET) t [REC SET] t [SIMUL/RELAY REC] t [SIMULTANEOUS REC]. b Notes • If an SDHC memory card is inserted in memory card slot - Sony HXRNX80 | Operating Instructions - Page 33
Recording Adjusting the zoom Adjusting the zoom with the power zoom lever Press the zoom lever D slightly to zoom slowly, and press it further to zoom more quickly. Wide angle view: Close view: Wide Telephoto z Tips • When focusing, the minimum distance required between the camcorder and the - Sony HXRNX80 | Operating Instructions - Page 34
ZOOM, you can zoom at the desired speed by turning the manual lens ring C. Fine adjustment is also possible. b Note • Turn the manual lens ring C at a moderate speed. If you turn it too fast, the zoom speed may lag behind the manual lens ring rotation speed, or the operation sound of the zoom - Sony HXRNX80 | Operating Instructions - Page 35
the AF/MF button C to set the focus to manual. 9 appears. 2 Move the ZOOM/FOCUS B switch, and turn the manual lens ring A. • FOCUS: You can manually adjust the focus by turning the manual lens ring. • ZOOM: You can manually adjust the zoom by turning the manual lens ring. 9 changes to when the focus - Sony HXRNX80 | Operating Instructions - Page 36
) appears for about 3 seconds in the following cases. - When you press the AF/MF button C to set the focus to manual and 9 appears on the LCD screen. - When you rotate the manual lens ring A while 9 is displayed on the LCD screen. • You can switch the focal length information between meters and feet - Sony HXRNX80 | Operating Instructions - Page 37
- When the file format is XAVC S HD and the recording format is 120p/100p - When [HIGH FRAME RATE] is enabled in [S&Q MOTION] - When using [NIGHTSHOT] - When [INTELLIGENT AUTO] is enabled • For subjects with low contrast or subjects in dark places, AF may operate at the optimum speed regardless of - Sony HXRNX80 | Operating Instructions - Page 38
Adjusting the focus (Continued) Adjusting the focus while tracking a selected subject (Lock-on AF) You can touch the screen to select a subject to track for focusing (default setting is [OFF]). 1 Press the MENU button D. 2 Select (CAMERA SET) t [LOCK-ON AF] t [ON]. 3 Touch the subject you want - Sony HXRNX80 | Operating Instructions - Page 39
Priority face frame (double frame) Recording 3 Touch the point to be focused on the LCD screen. b Note • [SPOT FOCUS] is available only with manual focus. To cancel the spot focus Press the MENU button D. Focusing on a detected face (Face Detection) The camcorder detects faces and focuses on one - Sony HXRNX80 | Operating Instructions - Page 40
Adjusting the focus (Continued) • For details about limitations of face detection, see "Function limitations when recording" (p. 151) and "Slow & Quick Motion and Super Slow Motion recording limitations" (p. 152). • When [LOCK-ON AF] is set to [ON], the selection cursor is not displayed, and a - Sony HXRNX80 | Operating Instructions - Page 41
Selecting the file format and recording format Recording Setting the file format and recording format Set the file format in (REC/OUT SET) t [REC SET] t [FILE FORMAT] and the recording format (bit rate, picture size, frame rate, scanning method) in (REC/ OUT SET) t [REC SET] t [REC FORMAT] (p. 111 - Sony HXRNX80 | Operating Instructions - Page 42
functions on the camcorder may be unavailable when proxy recording. For details, see "Function limitations when recording" (p. 151). Proxy recording supported formats Proxy recording is supported when the file format is set to other than AVCHD. There are also limitations on the size of the original - Sony HXRNX80 | Operating Instructions - Page 43
image brightness by adjusting the iris, ISO sensitivity/gain or shutter speed, or by adjusting the light level with the ND filter E. 3 Turn the MANUAL dial A to adjust the value. The light level increases the more that you open the aperture (decreasing F value). The light level decreases the more - Sony HXRNX80 | Operating Instructions - Page 44
C. The or next to the ISO value or gain value disappears, and the value is highlighted. Adjusting the shutter speed 1 Set the AUTO/MANUAL switch F to MANUAL. 2 Press the SHUTTER SPEED button D. The or next to the shutter speed value disappears, and the shutter speed value is highlighted. ISO value - Sony HXRNX80 | Operating Instructions - Page 45
Level 18 19 20 60i/60p/30p 4000 6000 10000 24p 2400 4800 10000 50i/50p/25p 3500 6000 10000 Adjusting the exposure AUTO ( ) MANUAL ( ) MANUAL (all) 1 When you switch to AUTO/MANUAL in [SPOT METER] or [SPOT METER/ FOCUS]. 2 When all of iris, ISO sensitivity/gain, and shutter speed are set to - Sony HXRNX80 | Operating Instructions - Page 46
disappear from the screen. b Notes • If you change the ND filter E during recording, the movie and sound may become distorted. • When adjusting the iris manually, the ND filter icon does not flash even if the light level should be adjusted with the ND filter. • If the camcorder cannot detect the - Sony HXRNX80 | Operating Instructions - Page 47
[50i] is selected), then try adjusting the white balance again. To restore automatic adjustment Press the WHITE BALANCE button A. b Note • When you set the AUTO/MANUAL switch B to AUTO, iris, ISO sensitivity/gain, shutter speed, and white balance are adjusted automatically. You cannot adjust - Sony HXRNX80 | Operating Instructions - Page 48
Using Direct Menu Direct Menu allows you to change settings directly while recording using the v/V/b/ B/SET buttons. The following items can be configured. • Focus value (p. 35) • AE shift level value (p. 104) • Iris value (p. 43) • ISO sensitivity/gain value (p. 44) • Shutter speed value (p. 44) • - Sony HXRNX80 | Operating Instructions - Page 49
5 Move the v/V/b/B/SET button up/ down to display the desired value. • If an item (such as iris value or focus value) is changed using buttons or switches while Direct Menu is displayed, the Direct Menu may be canceled. Recording Changed shutter speed value 6 To set another item, repeat steps 3 - Sony HXRNX80 | Operating Instructions - Page 50
Audio setup Recording sound from the internal microphone You can record sound in stereo using the camcorder's internal microphone. Internal microphone Select [INT MIC] in the [MIC SELECT] menu. z Tip • To reduce wind noise, set [INT MIC WIND] to [ON]. Recording sound from an external audio device - Sony HXRNX80 | Operating Instructions - Page 51
L: AUDIO LEVEL (CH2) dial Wind noise reduction switches G: LOW CUT (INPUT1) switch M: LOW CUT (INPUT2) switch When using a microphone with XLR-type connector (sold separately) or external audio device (such as a mixer), configure the settings as described below. 1 Select the audio input source. • - Sony HXRNX80 | Operating Instructions - Page 52
(sold separately) You can adjust the audio level for the sound that is input from the internal microphone or an external microphone (sold separately). 1 Select [MANUAL] in the [REC LEVEL MODE] menu in [AUDIO REC LEVEL]. 2 During recording or standby, adjust the microphone volume in the - Sony HXRNX80 | Operating Instructions - Page 53
functions Recording Selecting suitable settings automatically (auto mode setting) You can make optimal recordings in various situations. 1 Set the AUTO/MANUAL switch B to AUTO. 2 Press the MENU button A. 3 Select (CAMERA SET) t [AUTO MODE SET]. 4 Select [AUTO], [INTELLIGENT AUTO], or [SCENE - Sony HXRNX80 | Operating Instructions - Page 54
. 2 Select (CAMERA SET) t [NIGHTSHOT] t [ON]. • is displayed. • To cancel, set [NIGHTSHOT] to [OFF]. b Notes • NIGHTSHOT can only be used when the AUTO/MANUAL switch is set to AUTO. • NIGHTSHOT uses infrared light. Make sure that your finger does not cover the NightShot light when shooting - Sony HXRNX80 | Operating Instructions - Page 55
Picture profile number PP1 PP2 PP3 PP4 PP5 PP6 PP7 PP8 PP9 PP10 Example setting Example settings of a color tone with [STANDARD] gamma Example settings of a color tone with [STILL] gamma Example settings of natural color tone with [ITU709] gamma Example settings of a color tone that is faithful to - Sony HXRNX80 | Operating Instructions - Page 56
stored in the video file. On devices used for playback and display that support the metadata, the video is displayed 56 automatically with the appropriate settings. On devices that do not support the metadata, manual configuration is required. • AVCHD format recording AVCHD format recordings do not - Sony HXRNX80 | Operating Instructions - Page 57
are not output correctly when [BT.2020] is selected. Using the gamma display assist function The viewfinder and LCD screen of the camcorder do not support HDR, and so are not appropriate for displaying HDR. However, they can display an image to aid shooting using the gamma display assist function - Sony HXRNX80 | Operating Instructions - Page 58
using HDMI or SDI, the image quality settings of the TV must be adjusted manually for appropriate display. Set the image quality settings of the TV to a gamma setting that supports HLG and a color mode setting that supports BT.2020 or 709. 58 Thumbnail screen "HLG" icon* * Only files recorded in - Sony HXRNX80 | Operating Instructions - Page 59
2 Select [PRESET]. 3 Select the first two digits. You can set the timecode within the following range. When [60i] is selected: 00:00:00:00 to 23:59:59:29 • When setting 24p, you can set the last 2 timecode digits of the frames in multiples of 4, between 0 and 23. When [50i] is selected: 00:00:00:00 - Sony HXRNX80 | Operating Instructions - Page 60
restores the previous setting. To cancel Slow & Quick Motion recording Press the ASSIGN1/S&Q button or the MENU button during standby. b Notes • The supported memory cards that can be used vary depending on the file format (p. 27). • In quick motion recording, the camcorder may continue recording - Sony HXRNX80 | Operating Instructions - Page 61
and select (CAMERA SET) t [SLOW & QUICK] t [SUPER SLOW MOTION] t [EXECUTE] to switch to Super Slow Motion shooting mode. To determine the recording time manually When [REC TIMING] is set to [START TRIGGER], press the START/STOP button again while recording to stop recording. To change the frame rate - Sony HXRNX80 | Operating Instructions - Page 62
2 sec. Approx. Approx. 5 sec. 2 sec. b Notes • The supported memory cards that can be used vary depending on the file format (p. 27). • Available only when the AUTO/MANUAL switch is set to MANUAL. Note that iris, ISO sensitivity/gain, and shutter speed are fixed to manual. • When the [FRAME - Sony HXRNX80 | Operating Instructions - Page 63
Recording After you stop recording, press the ASSIGN button to which [LAST SCENE REVIEW] is assigned. The camcorder plays from the start to the end of the most recently recorded scene, then returns to standby mode. To stop reviewing the last scene Press the ASSIGN button to which [LAST SCENE REVIEW - Sony HXRNX80 | Operating Instructions - Page 64
Assigning functions to the ASSIGN buttons Some functions can be assigned to the ASSIGN buttons. You can assign a single function to each of the ASSIGN1 to 6 buttons. Function assignments are performed using (OTHERS) t [ASSIGN BUTTON]. For details about each function, see "Menu items" (p. 101). - Sony HXRNX80 | Operating Instructions - Page 65
Playback Playback Playback 1 Insert a memory on which a movie has been recorded, and press the THUMBNAIL button (p. 15). The THUMBNAIL screen appears after a few seconds. Memory card Playback mode Back Next Thumbnails Current movie data (p. 65) • You can turn on or off the date and time - Sony HXRNX80 | Operating Instructions - Page 66
will not be displayed correctly when you play back a memory card with no timecode, or a memory card with timecode that your camcorder does not support. G HLG recording Displayed when recording movies using HLG gamma. H DOLBY DIGITAL recording Displayed when audio is recorded in Dolby Digital format - Sony HXRNX80 | Operating Instructions - Page 67
Changing/checking the settings in your camcorder Playback Changing the screen display You can display information such as timecode, etc., on the image. Press the DISPLAY button (A). The screen indicators turn on (displayed) y off (not displayed) each time you press the button. In recording mode, - Sony HXRNX80 | Operating Instructions - Page 68
Changing/checking the settings in your camcorder (Continued) recorded with the iris, ISO sensitivity/ gain, and shutter speed manually adjusted. F Camera shake correction (STEADYSHOT) b Note • When you play back the memory card on other devices, the camera data may be displayed incorrectly. - Sony HXRNX80 | Operating Instructions - Page 69
Connecting to a monitor or a TV Playback image quality depends on the type of monitor or TV, and the jacks used to make the connection. Playback HDMI cable (sold separately) Monitor/TV To HDMI input jack Signal flow AV cable (sold separately) Monitor/TV To video input jack To audio input jack - Sony HXRNX80 | Operating Instructions - Page 70
Connecting to a monitor or a TV (Continued) • If you display the edit screen while outputting signals to a monitor or TV, the menu may not be displayed correctly. • This camcorder is not compatible with "BRAVIA" sync. Output signal formats The signal format of the outputs from the HDMI OUT jack - Sony HXRNX80 | Operating Instructions - Page 71
Menu item Recording format REC/OUT SET> REC SET> REC FORMAT 2160/30p HDMI REC/OUT SET> VIDEO OUT>HDMI AUTO 2160p/1080p/480i 2160p/720p/480i 2160p/1080i/480i 1080p/480i 720p/480i 1080i/480i 480p 480i XAVC S HD/AVCHD Menu item Recording format REC/OUT SET> REC SET> REC FORMAT 1080/24p HDMI REC/OUT - Sony HXRNX80 | Operating Instructions - Page 72
/60i > 720/60p > 480/60p*1 1080/60p 720/60p 1080/60i 1080/60p 720/60p 1080/60i 480/60p 480/60i *1 Output in the format supported by the monitor or TV according to the priority order. *2 In Slow & Quick Motion mode, the output is 2160/30p. *3 In Slow & Quick Motion mode - Sony HXRNX80 | Operating Instructions - Page 73
1080/50p 720/50p 1080/50i 1080/50p 720/50p 1080/50i 576/50p 576/50i * Output in the format supported by the monitor or TV according to the priority order. Multi/micro USB jack output format (when [50i] is HD/AVCHD mode on pages 71 and 73. Super Slow Motion is not supported in XAVC S 4K mode. 73 - Sony HXRNX80 | Operating Instructions - Page 74
operate the camcorder remotely by a smartphone. • Google Play may not be supported depending on the country or region. In this case, search for "Content . • Proper operation of the Wi-Fi function detailed in this manual is not guaranteed for all smartphones or tablet computers. • Operations - Sony HXRNX80 | Operating Instructions - Page 75
when recording" (p. 151). Functions that can be controlled using [CTRL W/SMARTPHONE] • Recording start/stop • Touch focus - Available when using manual focus. • Zoom • Iris adjustment b Note • You cannot perform other operations during touch focus. Connecting the camcorder to an Android smartphone - Sony HXRNX80 | Operating Instructions - Page 76
Using with a Smartphone (Continued) 3 Touch the smartphone on the camcorder. The smartphone connects to the camcorder, and "Content Browser Mobile" is activated. [CTRL W/SMARTPHONE] starts on the camcorder. z Tips • Cancel sleep mode and screen lock of the smartphone beforehand. • Continue to touch - Sony HXRNX80 | Operating Instructions - Page 77
is displayed. 3 Select an access point to register. If an access point you want to register is not displayed, select [Manual setting] and configure settings manually (p. 80). 4 Enter the password, and select [Next]. Password entry is not required for access points that do not display . Continued - Sony HXRNX80 | Operating Instructions - Page 78
access point settings. IP address Select the IP address configuration method. When [Manual] is selected, enter the IP address configuration items displayed on the screen, access point quickly if the access point supports the WPS function. 1 Turn on the access point. 2 Turn on the camcorder. 3 Press - Sony HXRNX80 | Operating Instructions - Page 79
in step 4. 6 Select , and press the MENU button to close the menu screen. b Notes • For details about the functions and settings supported by your access point, refer to the manual for the access point or contact the access point administrator. • The camcorder and access point may not connect or the - Sony HXRNX80 | Operating Instructions - Page 80
) 5 Select t , and press the MENU button to close the menu screen. b Notes • For details about the functions and settings supported by your access point, refer to the manual for the access point or contact the access point administrator. • The camcorder and access point may not connect or the - Sony HXRNX80 | Operating Instructions - Page 81
Using Network Functions • [Registered.] appears when the access point is registered successfully. The SSID and frequency band of the registered access point is also displayed. 8 Select . After a short delay, a list of access points that can be connected is displayed. The following registered icons - Sony HXRNX80 | Operating Instructions - Page 82
NETWORK SET) t [WIRED LAN SET] t [IP ADDRESS SET]. 5 Configure the access point settings. IP address Select the IP address configuration method. When [Manual] is selected, enter the IP address configuration items displayed on the screen, and select [OK]. z Tip • Selecting [DNS server setting] on the - Sony HXRNX80 | Operating Instructions - Page 83
• Camcorder streaming uses MPEG2-TS/UDP transport stream. To view the streamed video and audio, use devices that supports this transport stream format. For details, refer to the instruction manuals of each device. Streaming formats There are limitations on the size of the original file movie and the - Sony HXRNX80 | Operating Instructions - Page 84
SUPER SLOW MOTION) - NIGHTSHOT - FOCUS MAGNIFIER - AUTO MODE SET - WB SET (during streaming) - Other network functions - STATUS CHECK • Only wired LAN connection is supported when [AIRPLANE MODE] is set to [ON]. • During streaming, the camcorder does not turn off even if the LCD screen is closed and - Sony HXRNX80 | Operating Instructions - Page 85
The following functions are enabled during streaming. Use the hardware switches and buttons to control the camcorder. Operation from the menu is not supported. • Zoom • Focusing • To adjust the output audio level, adjust the input level using the AUDIO LEVEL dial of the XLR handle unit. • Exposure - Sony HXRNX80 | Operating Instructions - Page 86
the RTMP/RTMPS protocol. b Note • To view RTMP/RTMPS streamed video and audio, use devices that support this transport stream format. For details, refer to the instruction manuals of each device. Configuring RTMP/RTMPS streaming (preset registration) You configure RTMP/RTMPS streaming settings and - Sony HXRNX80 | Operating Instructions - Page 87
function is on. - Functions listed in "Unavailable functions during streaming" (p. 84) in "Using the streaming function (STREAMING)" • Only wired LAN connection is supported when [AIRPLANE MODE] is set to [ON]. • During RTMP/RTMPS streaming, the camcorder does not turn off even if the LCD screen is - Sony HXRNX80 | Operating Instructions - Page 88
functions are enabled during RTMP/RTMPS streaming. Use the hardware switches and buttons to control the camcorder. Operation from the menu is not supported. • Zoom • Focusing • To adjust the output audio level, adjust the input level using the AUDIO LEVEL dial of the XLR handle unit. • Exposure - Sony HXRNX80 | Operating Instructions - Page 89
Using Network Functions • Resetting network settings (p. 95) will delete the RTMPS certificate imported from the memory card, and will initialize the RTMPS certificate of the camcorder. Streaming movies using USTREAM You can distribute movies using the USTREAM video sharing site. USTREAM user - Sony HXRNX80 | Operating Instructions - Page 90
Streaming movies using USTREAM (Continued) z Tip • A confirmation message appears if you have already configured authentication. You can switch the account used for streaming, if required. Configuring using the menu Configure the following items in (NETWORK SET) t [USTREAM]. SIZE Select the image - Sony HXRNX80 | Operating Instructions - Page 91
function is on. - Functions listed in "Unavailable functions during streaming" (p. 84) in "Using the streaming function (STREAMING)". • Only wired LAN connection is supported when [AIRPLANE MODE] is set to [ON]. • During USTREAM streaming, the camcorder does not turn off even if the LCD screen is - Sony HXRNX80 | Operating Instructions - Page 92
detect function, and install by following the instructions on the PC. b Note • A smartphone that supports the tethering function is required to use to tethering mode. For details about configuring tethering, refer to the instruction manual for your smartphone. 92 3 Launch "Content Browser Mobile" on - Sony HXRNX80 | Operating Instructions - Page 93
the SSID of a smartphone that has tethering mode enabled. If the smartphone SSID is not displayed, select [Manual setting] and configure settings manually (p. 80). 6 Select [WIRELESS TC LINK] t [ON] t [OK]. 7 Select [Register]. • The smartphone connection starts. • When connection is successful - Sony HXRNX80 | Operating Instructions - Page 94
Synchronizing the timecode of multiple cameras using a smartphone (Continued) - SLOW & QUICK (S&Q MOTION, SUPER SLOW MOTION - NIGHTSHOT - FOCUS MAGNIFIER - AUTO MODE SET - Other network functions • During Wireless TC LINK execution, [TC RUN] is set to [FREE RUN]. After the function is stopped, the - Sony HXRNX80 | Operating Instructions - Page 95
other vulnerabilities, confirm that the wireless LAN is always secure. • It is very important to set up security on a wireless LAN. • If a problem occurs due to inadequate security measures or due to foreseeable circumstances, Sony Corporation is not responsible for any resulting damage. Resetting - Sony HXRNX80 | Operating Instructions - Page 96
disappears. in step 3. Returns to the beginning of the selected movie. 4 Touch , successively, according to the screen display. b Notes • Dividing movies is supported for AVCHD only. • You cannot restore movies once they are divided. • Do not remove the battery pack, the AC Adaptor or the memory - Sony HXRNX80 | Operating Instructions - Page 97
Deleting movies You can free media space by deleting movies from a memory card. b Notes • You cannot restore images once they are deleted. • Do not remove the battery pack, the AC Adaptor, or the memory card from your camcorder during the operation. It may damage the memory card. • You cannot - Sony HXRNX80 | Operating Instructions - Page 98
Formatting a memory card Formatting deletes data from the memory card to recover recordable free space. b Notes • Connect your camcorder to the wall outlet (wall socket) using the supplied AC Adaptor to prevent your camcorder from running out of power during the operation. • To avoid the loss of - Sony HXRNX80 | Operating Instructions - Page 99
b Notes • It may take from several minutes to several hours to empty a memory card, depending on the capacity. You can check the actual time required on the LCD screen. • If you stop the operation while [Executing...] is displayed, be sure to complete the operation by performing [MEDIA FORMAT] or - Sony HXRNX80 | Operating Instructions - Page 100
Using the Menu Operating the menu You can change various settings or make detailed adjustments using the menu items displayed on the LCD screen. b Notes • The available menu items vary depending on the context of your camcorder during recording or playback. • Items and setting values not available - Sony HXRNX80 | Operating Instructions - Page 101
Menu items CAMERA SET ISO/GAIN SEL AUTO ISO LIMIT AGC LIMIT WB PRESET WB OUTDOOR LEVEL WB TEMP SET WB SET AE SHIFT D. EXTENDER ZOOM SET STEADYSHO T FOCUS AREA AF DRIVE SPEED AF SUBJ. TRACK SET LOCK-ON AF FACE DETECTION SLOW & QUICK AUTO MODE SET SCENE SELECTION SET SPOT METER/FOCUS SPOT METER SPOT - Sony HXRNX80 | Operating Instructions - Page 102
Menu items (Continued) NETWORK SET CTRL W/SMARTPHONE RTMP/RTMPS STREAMING USTREAM WIRELESS TC LINK WIRED LAN SET Wi-Fi SET AIRPLANE MODE ROOT CERTIFICATE NETWORK RESET OTHERS STATUS CHECK CAMERA PROFILE S&Q BUTTON SETTING ASSIGN BUTTON CLOCK SET AREA SET SUMMERTIME LANGUAGE DATE REC BEEP REC LAMP - Sony HXRNX80 | Operating Instructions - Page 103
]. OFF, 24dB to 0dB Selects the upper limit for the Auto Gain Control (AGC). • This function is not active while you adjust the gain manually. • The setting is enabled when [ISO/GAIN SEL] is set to [GAIN]. OUTDOOR, INDOOR, Selects a preset white balance setting (p. 46). MANU WB TEMP -7 to - Sony HXRNX80 | Operating Instructions - Page 104
AE shift function on/off. Adjusts the brightness. • This function is not active while you adjust the iris, shutter speed, ISO sensitivity/gain all manually. You can use 2× magnification when recording. • This function is not available for XAVC S 4K. Selects the type of zoom used when operating the - Sony HXRNX80 | Operating Instructions - Page 105
CAMERA SET Menu item FOCUS AREA Sub-items/Settings WIDE Description Adjusts the focus automatically basically for the whole screen. ZONE • When phase detection AF frames are displayed, you can specify the subject for focusing by touch. Adjusts the focus automatically within a specified zone. • - Sony HXRNX80 | Operating Instructions - Page 106
Menu items (Continued) CAMERA SET Menu item FOCUS AREA Sub-items/Settings CENTER Description Adjusts the focus automatically on the subject in the vicinity of the center of the screen. FLEXIBLE SPOT • The auto focus operating range is indicated by the focus area frame. Adjusts the focus - Sony HXRNX80 | Operating Instructions - Page 107
CAMERA SET Menu item SLOW & QUICK Sub-items/Settings S&Q MOTION HIGH FRAME RATE OFF, ON REC FORMAT Description Sets Slow & Quick Motion recording. Sets slow-motion recording at high frame rate (HFR) (p. 60). Sets the recording format for Slow & Quick Motion. XAVC S 4K When [60i] is selected When [ - Sony HXRNX80 | Operating Instructions - Page 108
Menu items (Continued) CAMERA SET Menu item SLOW & QUICK Sub-items/Settings FRAME RATE Description Sets the frame rate for Slow & Quick Motion recording. XAVC S 4K When [60i] is selected When [50i] is selected 30fps 25fps 15fps 12fps 8fps 6fps 4fps 3fps 2fps 2fps 1fps 1fps XAVC S HD - Sony HXRNX80 | Operating Instructions - Page 109
CAMERA SET Menu item SLOW & QUICK Sub-items/Settings REC FORMAT Description Sets the recording format for Super Slow Motion. XAVC S HD When [60i] is selected When [50i] is selected 1080/60p 50Mbps 1080/50p 50Mbps 1080/30p 50Mbps 1080/25p 50Mbps 1080/24p 50Mbps - FRAME RATE AVCHD When [60i] is - Sony HXRNX80 | Operating Instructions - Page 110
Menu items (Continued) CAMERA SET Menu item LOW LUX Sub-items/Settings OFF, ON AUTO BACK LIGHT NIGHTSHOT NIGHTSHOT LIGHT OFF, ON ON, OFF ON, OFF COLOR BAR ON/OFF OFF, ON TONE OFF, ON PICTURE PROFILE Description Turns the function for shooting brighter colors in dark areas on/off. This - Sony HXRNX80 | Operating Instructions - Page 111
REC/OUT SET menu REC/OUT SET Menu item REC SET Sub-items/Settings FILE FORMAT XAVC S 4K, XAVC S HD, AVCHD REC FORMAT Description Selects the file format. Sets the recording format. The settings vary depending on the FILE FORMAT setting. • When [60i] is selected, the frame rate displayed on the - Sony HXRNX80 | Operating Instructions - Page 112
Menu items (Continued) REC/OUT SET Menu item REC SET Sub-items/Settings When FILE FORMAT is AVCHD Description When [60i] is selected 1080/60p PS 1080/60i FX 1080/60i FH 1080/60i LP 1080/30p FX 1080/24p FX 720/60p HQ When [50i] is selected 1080/50p PS 1080/50i FX 1080/50i FH 1080/50i LP 1080/25p - Sony HXRNX80 | Operating Instructions - Page 113
REC/OUT SET Menu item VIDEO OUT Sub-items/Settings OUTPUT SELECT 4K REC OUTPUT VF/LCD PANEL, EXTERNAL OUTPUT HDMI When [60i] is selected: AUTO, 2160p/1080p/480i, 2160p/720p/480i, 2160p/1080i/480i, 1080p/480i, 720p/480i, 1080i/480i, 480p, 480i When [50i] is selected: AUTO, 2160p/1080p/576i, 2160p/ - Sony HXRNX80 | Operating Instructions - Page 114
Menu items (Continued) REC/OUT SET Menu item VIDEO OUT Sub-items/Settings Description DOWN CONVERT TYPE Sets the video output signal format. SQUEEZE, LETTER Use this function for outputting movies BOX(16:9), EDGE recorded in 16:9 under the following CROP conditions. • Output from VIDEO OUT • - Sony HXRNX80 | Operating Instructions - Page 115
REC/OUT SET Menu item VIDEO OUT Sub-items/Settings HDMI REC CONTROL OFF, ON Description When the camcorder is connected to an external recorder, this sets whether to record to the external recorder based on the camcorder's operation. ON: Record based on the camcorder operation. OFF: Does not - Sony HXRNX80 | Operating Instructions - Page 116
item VOLUME AVCHD AUDIO FORMAT AUDIO REC LEVEL INT MIC WIND Sub-items/Settings LINEAR PCM, DOLBY DIGITAL REC LEVEL MODE NORMAL, HIGH, MANUAL MANUAL REC LEVEL 1 to 31 (21) OFF, ON Description Adjusts the volume. Switches the recording audio format. LINEAR PCM ( ): Records in linear PCM format - Sony HXRNX80 | Operating Instructions - Page 117
AUDIO SET Menu item MIC SELECT AUDIO OUTPUT TIMING Sub-items/Settings AUTO, INT MIC, MI SHOE MIC, STEREO MINI MIC LIVE, LIP SYNC Description Selects the microphone to use for recording audio. AUTO: The microphone used for recording audio is automatically selected based on the microphone that is - Sony HXRNX80 | Operating Instructions - Page 118
Menu items (Continued) DISPLAY SET menu DISPLAY SET Menu item HISTOGRAM ZEBRA PEAKING PHASE AF FRAMES PHASE DETECT. AF AREA Sub-items/Settings Description OFF, ON, ON[ZEBRA POINT] Sets the histogram display. OFF: Does not display a histogram. ON: Displays a histogram. A line appears at the 100 - Sony HXRNX80 | Operating Instructions - Page 119
DISPLAY SET Menu item MARKER Sub-items/Settings ON/OFF OFF, ON CENTER ON, OFF ASPECT OFF, 4:3, 13:9, 14:9, 15:9, 1.66:1, 1.85:1, 2.35:1 SAFETY ZONE OFF, 80%, 90% GUIDEFRAME OFF, ON FOCUS MAG RATIO ×4.0, ×8.0, ×4.0/×8.0 Description Sets the marker display. You can display multiple types of markers - Sony HXRNX80 | Operating Instructions - Page 120
FOCUS DISPLAY METER, FEET SHUTTER DISPLAY SECOND, DEGREE Iris value Shutter speed value ISO sensitivity/gain value • The settings appear during manual adjustment, regardless of the setting of this function. • indicates that the settings are automatically adjusted values. The indicator changes to - Sony HXRNX80 | Operating Instructions - Page 121
live monitoring difficult. Movies shot using HLG/ HLG1/HLG2/HLG3 also have low contrast when displayed on the viewfinder or LCD screen, which do not support HDR, and movies shot using BT.2020 color mode have washed out colors. To counter this, you can use [GAMMA DISP ASSIST] to obtain the - Sony HXRNX80 | Operating Instructions - Page 122
Menu items (Continued) DISPLAY SET Menu item DISPLAY OUTPUT Sub-items/Settings LCD PANEL, ALL OUTPUT TC/UB SET menu TC/UB SET Menu item TC/UB DISPLAY TC PRESET UB PRESET TC FORMAT Sub-items/Settings TC, U-BIT PRESET, RESET PRESET, RESET DF, NDF Description Sets the output to display - Sony HXRNX80 | Operating Instructions - Page 123
Using the Menu TC/UB SET Menu item TC RUN TC MAKE UB TIME REC Sub-items/Settings REC RUN, FREE RUN PRESET, REGENERATE OFF, ON Description Sets how the timecode advances. REC RUN: Advances the timecode only during recording. Select this setting to record the timecode sequentially from the last - Sony HXRNX80 | Operating Instructions - Page 124
82). • Selects and configures an access point (p. 77). • Registers an access point using the WPS PIN method (p. 79). • Registers an access point manually (p. 80). Registers an access point using the WPS function (p. 78). Edits the device name (p. 81). Resets the connection information. When [OK] is - Sony HXRNX80 | Operating Instructions - Page 125
OTHERS menu OTHERS Menu item STATUS CHECK CAMERA PROFILE S&Q BUTTON SETTING ASSIGN BUTTON CLOCK SET AREA SET SUMMERTIME LANGUAGE Using the Menu Sub-items/Settings MEMORY CARD A, MEMORY CARD B S&Q/SUPER SLOW, S&Q MOTION, SUPER SLOW MOTION ASSIGN1, ASSIGN2, ASSIGN3, ASSIGN4, ASSIGN5, ASSIGN6 OFF, - Sony HXRNX80 | Operating Instructions - Page 126
. Checks the installation status of options sold separately. Also used to start installation after purchasing option software. • For details about installation, refer to the installation guide for the option software. 126 - Sony HXRNX80 | Operating Instructions - Page 127
OTHERS Menu item VERSION DISPLAY Sub-items/Settings CALIBRATION INITIALIZE Description Displays the version of your camcorder. • Be sure to check for firmware updates. • To perform an update, use the AC Adaptor. Calibrates the touch panel (p. 161). Resets all settings, including the clock setting - Sony HXRNX80 | Operating Instructions - Page 128
Menu items (Continued) Item GAMMA Sub-items 128 Settings Description STANDARD, Selects a gamma curve. STILL, CINE1, CINE2, CINE3, CINE4, STANDARD: Standard gamma curve for movies. STILL: Gamma curve for still image capture. CINE1: Softens the contrast in dark parts and accentuates gradation - Sony HXRNX80 | Operating Instructions - Page 129
90% to 100% MAX POINT: Sets the maximum value of the knee point. SENSITIVITY HIGH, MIDDLE, LOW SENSITIVITY: Sets the sensitivity. MANUAL SET Settings when [MANUAL] is selected. POINT 75% to 105% POINT: Sets the knee point. SLOPE -5 (gentle) to SLOPE: Sets the knee slope. +5 (steep) • [KNEE - Sony HXRNX80 | Operating Instructions - Page 130
Menu items (Continued) Item COLOR MODE Sub-items SATURATION 130 Settings STANDARD, STILL, CINEMA, PRO, ITU709 MATRIX, B/W, S-GAMUT/ 3200K, S-GAMUT/ 4300K, S-GAMUT/ 5500K, S-GAMUT3. CINE/3200K, S-GAMUT3. CINE/4300K, S-GAMUT3. CINE/5500K, S-GAMUT3/ 3200K, S-GAMUT3/ 4300K, S-GAMUT3/ 5500K, BT.2020, - Sony HXRNX80 | Operating Instructions - Page 131
Item COLOR PHASE COLOR DEPTH Sub-items R G B C M Y Settings Description -7 (greenish) Sets the color phase. to +7 (reddish) -7 (light red) Sets the color depth for each to +7 (deep color phase. red) The darker the color, the greater -7 (light green) the effect. No effect is applied to - Sony HXRNX80 | Operating Instructions - Page 132
recording. • During the automatic white balance adjustment, the white balance value automatically varies according to the lighting of the subject. Manual white balance adjustment is recommended when you use [COLOR CORRECTION]. TYPE OFF, COLOR REVISION, COLOR EXTRACT Selects the color correction - Sony HXRNX80 | Operating Instructions - Page 133
Item Sub-items COLOR MEMORY1 CORRECTION COLOR MEMORY1 REVISION MEMORY2 COLOR MEMORY2 REVISION Settings Description PHASE 0 (purple) to 8 (red) to 16 (yellow) to 24 (green) to 31 (blue) Sets the color phase of memory 1. PHASE RANGE 0 (no color Sets the phase range of memory selection), 1 - Sony HXRNX80 | Operating Instructions - Page 134
) to +9 (high B level) Sets the detail. LEVEL -7 to +7 Sets the DETAIL level. MANUAL SET ON/OFF ON, OFF Turns manual DETAIL adjustment on/off. Set to [ON] to enable manual DETAIL adjustment (automatic optimization will not be performed). V/H BALANCE -2 (stronger vertical (V) DETAIL) to - Sony HXRNX80 | Operating Instructions - Page 135
Item DETAIL COPY RESET Sub-items Settings Description LIMIT 0 (low limit Sets the limit level of the level (likely to DETAIL. be limited)) to 7 (high limit level (not likely to be limited)) CRISPENING 0 (shallow crispening level) to 7 (deep crispening level) Sets the crispening level. HI- - Sony HXRNX80 | Operating Instructions - Page 136
Troubleshooting Troubleshooting If you run into any problems using your camcorder, follow the flow chart below the date, time, and area settings. 4 Consult your Sony dealer or local authorized Sony service facility. • Power sources/LCD screen/Wireless Remote Commander (p. 136) • Memory cards (p. 138 - Sony HXRNX80 | Operating Instructions - Page 137
low. • Reattach the battery pack correctly. • If the lamp continues to flash, there may be a problem with the camcorder. Disconnect the plug from the power outlet, and contact a service representative. The remaining battery indicator does not indicate the correct figure. • Ambient temperature is too - Sony HXRNX80 | Operating Instructions - Page 138
Troubleshooting (Continued) Another video device malfunctions when you use the supplied Wireless play back or memory card is not recognized on another device. • The playback device does not support playback of the memory card. Recording The recording does not start when you press the START/STOP - Sony HXRNX80 | Operating Instructions - Page 139
Troubleshooting The handle zoom does not work. • Set the handle zoom speed switch to . • Press the AF/MF button (p. 35) to set the focus to automatic adjustment. • Adjust the focus manually if the automatic focus does not work properly (p. 35). The phase detection AF frame display is not visible. • - Sony HXRNX80 | Operating Instructions - Page 140
Troubleshooting (Continued) • SteadyShot image stabilization may not be able to (menu disabled) Situation [ON/OFF] of [AE SHIFT] All of iris, ISO sensitivity/gain, and shutter speed are set manually. [ZEBRA], [PEAKING] [COLOR BAR] is set to [ON]. [ON/OFF] of [MARKER] [FOCUS MAGNIFIER] is set - Sony HXRNX80 | Operating Instructions - Page 141
Troubleshooting Black bands appear when you record a TV screen or computer screen. • Adjust the data file name is incorrect, or flashing. • The file is damaged. • The file format is not supported on your camcorder (p. 157). • Only the file name is displayed, if the folder structure does not conform - Sony HXRNX80 | Operating Instructions - Page 142
Troubleshooting (Continued) Audio is not recorded properly. • If an external microphone or other device is connected or disconnected while recording a movie, the audio may not be - Sony HXRNX80 | Operating Instructions - Page 143
to the computer. • Disconnect the cable from the computer, then connect it again. • Software must be installed to copy movies to your computer (p. 19). 143 Troubleshooting - Sony HXRNX80 | Operating Instructions - Page 144
on the LCD screen or in the viewfinder. You can fix some problems associated with the symptoms yourself. If the problem persists even after you have tried a couple of times, contact your Sony dealer or local authorized Sony service facility. C:04:ss • The battery pack is not an "InfoLITHIUM" battery - Sony HXRNX80 | Operating Instructions - Page 145
the LCD screen. Description of warning messages If a warning message is displayed, follow the instructions. Memory cards Inconsistencies found in image database file. Do you want to repair the image movies. • Use a memory card recommended for your camcorder (p. 27). Continued , 145 Troubleshooting - Sony HXRNX80 | Operating Instructions - Page 146
damaged. • Reinsert the memory card, and follow the instructions on the LCD screen. Other Maximum number of images already messages may appear if trouble occurs during streaming distribution connection WIRED LAN SET], and specify the IP address manually. Failed to acquire an IP address. Check the - Sony HXRNX80 | Operating Instructions - Page 147
address setting of the camcorder. Cannot execute functions. Restart the camcorder. If the problem persists, contact a service representative. Failed to connect to the Ustream server. Check the "CLOCK SET". (NETWORK SET) t [RTMP/RTMPS] t [DESTINATION SET] settings. Continued , 147 Troubleshooting - Sony HXRNX80 | Operating Instructions - Page 148
Warning indicators and messages (Continued) Closes the function since an error occurred. The function terminated due to an error occurring. 148 - Sony HXRNX80 | Operating Instructions - Page 149
Additional Information Recording time Estimated time of recording and playback with each battery pack Approximate time available when you use a fully charged battery pack. Recording time (Unit: minute) Battery pack NP-FV70A Continuous recording time 155 Typical recording time 75 b Notes • - Sony HXRNX80 | Operating Instructions - Page 150
Recording time (Continued) AVCHD x When [AVCHD AUDIO FORMAT] is set to [LINEAR PCM] (Unit: minute) 16GB 70 80 110 180 285 (70) (80) (110) (140) (250) 32GB 140 165 220 370 585 (140) (165) (220) (290) (505) 64GB 290 335 450 750 1185 (290) (335) (450) (585) (1020) x When [AVCHD AUDIO FORMAT] is set to - Sony HXRNX80 | Operating Instructions - Page 151
(p. 110) DATE REC (p. 126) XAVC S 4K Yes Yes Yes Yes Yes Yes No Yes No Yes (60 Mbps only) No No No No Yes: Supported, No: Not supported XAVC S HD AVCHD Yes Yes Yes Yes Yes Yes Yes No (60fps or lower) Yes No (60fps or lower) Yes No (60fps or lower - Sony HXRNX80 | Operating Instructions - Page 152
Function limitations when recording (Continued) Slow & Quick Motion and Super Slow Motion recording limitations Yes: Supported, No: Not supported Functions Slow & Quick Motion Slow motion at high frame rate Super Slow Motion FACE DETECTION No No No LOCK-ON AF Yes No No COLOR - Sony HXRNX80 | Operating Instructions - Page 153
the original file is in 4K format with bit rate of 60Mbps. • Proxy recording is not supported in the following cases. - If the original file is in 4K format with bit rate of 100Mbps - If the frame rate of the original file - Sony HXRNX80 | Operating Instructions - Page 154
formats b Note • Proxy recording is not supported in the following cases. - When [QFHD REC OUTPUT] is set to [EXTERNAL OUTPUT] - In AVCHD format - If the frame rate of the original file is - Sony HXRNX80 | Operating Instructions - Page 155
Using your camcorder abroad Power supply You can use your camcorder in any country/region using the AC Adaptor supplied with your camcorder within the AC 100 V to 240 V, 50/60 Hz range. Viewing on TV Before recording a movie with your camcorder for viewing on a TV, set [60i/50i SEL] to the - Sony HXRNX80 | Operating Instructions - Page 156
File/folder structure on the recording media The file/folder structure is shown below. You do not usually need to acknowledge the file/ folder structure when recording/playing back movies on the camcorder. Proxy file * "Memory Stick PRO Duo" ** SD memory card, SDHC memory card, SDXC memory card A - Sony HXRNX80 | Operating Instructions - Page 157
Maintenance and precautions About the XAVC S format Recording and playback on your camcorder Your camcorder can record 4K (QFHD) and HD (high definition) based on the XAVC S format. This uses a Long-GOP video compression format for recording. Video*: MPEG-4AVC/H.264 When [60i] is selected: 3840× - Sony HXRNX80 | Operating Instructions - Page 158
be used with this camcorder. • For the latest information about memory cards that can be used, visit the home page (http:// www.sony.jp/support/r/handycam/connect/). On image data compatibility • Image data files recorded on a memory card by your camcorder conform to the "Design rule for Camera File - Sony HXRNX80 | Operating Instructions - Page 159
a long time, or if left in a fully charged state, or when the battery pack is frequently used. Use the remaining battery percent indication as a rough guide only. About storage of the battery pack • If the battery pack is not used for a long time, fully charge the battery pack and use it - Sony HXRNX80 | Operating Instructions - Page 160
• For DC or AC operation, use the accessories recommended in these operating instructions. • Do not let your camcorder get wet, for example, from rain battery electrolytic liquid has leaked, - consult your local authorized Sony service facility. - wash off any liquid that may have contacted your - Sony HXRNX80 | Operating Instructions - Page 161
x To clean the LCD screen The LCD screen is covered with a coating. The coating may be peeled off by scratching or rubbing. Maintain the LCD screen as follows. • Wipe fingerprints or hand cream off the LCD screen as soon as possible, as they may cause the coating to peel off. • If you rub the LCD - Sony HXRNX80 | Operating Instructions - Page 162
Maintenance and precautions (Continued) x Charging procedure Connect your camcorder to a wall outlet (wall socket) using the supplied AC Adaptor, and leave it with the power turned off for more than 24 hours. Note on disposal/transfer of memory cards Even if you delete data in a memory card or - Sony HXRNX80 | Operating Instructions - Page 163
Specifications General Power requirements 8.4 V DC (using AC Adaptor) 7.4 V DC (using battery pack) Power consumption While recording using viewfinder: Approx. 5.7 W While recording using the LCD screen in normal brightness: Approx. 6.1 W Operating temperature 0 °C to 40 °C (32 °F to 104 °F) - Sony HXRNX80 | Operating Instructions - Page 164
(35 mm equivalent (3:2) 32.8 mm to 393.6 mm) Iris F2.8 to F4.5 (auto/manual selectable) Focus AF/MF selectable, 10 mm to ∞ (Wide), 1000 mm to ∞ (Tele) type Filter diameter M62 mm Wireless LAN Supported standard IEEE 802.11 b/g/n Frequency band 2.4 GHz Supported security protocols WEP/WPA-PSK/ WPA2- - Sony HXRNX80 | Operating Instructions - Page 165
Storage temperature -20 °C to +60 °C (-4 °F to +140 °F) Dimensions Approx. 48 mm × 29 mm × 81 mm (1 15/16 in. × 1 3/16 in. × 3 1/4 in.) (Excluding projecting parts) (width / height / depth) Mass (body only) Approx. 170 g (6.0 oz) *1 Check the label on the AC Adaptor/charger for other specifications. - Sony HXRNX80 | Operating Instructions - Page 166
125 ASSIGN buttons 64 AUDIO LEVEL DISPLAY 120 AUDIO SET menu 116 AUTO BACK LIGHT........110 AUTO/MANUAL switch.....53 Auto mode 53 AUTO MODE SET 109 AVCHD 157 AVCHD AUDIO FORMAT 116 B 156 formatting 98 inserting/ejecting 29 notes 157 supported memory cards 27 "Memory Stick" media 27, 158 - Sony HXRNX80 | Operating Instructions - Page 167
check 68 STEADYSHOT 104 STREAMING 83, 124 Streaming 83 supported formats........153 SUMMERTIME 125 Supplied accessories 19 T TC FORMAT 122 TC MAKE 123 TC PRESET 58, 140 TC RUN 123 TC/UB SET menu 122 Telephoto 33 Trademarks 169 Troubleshooting 136 TV 69 U UB PRESET 59 UB TIME REC - Sony HXRNX80 | Operating Instructions - Page 168
Index (Continued) W Warning indicators 144 Warning messages 145 WB OUTDOOR LEVEL ...103 WB PRESET 103 WB TEMP SET 103 White balance 46 WHITE BALANCE button 46 Wi-Fi SET 124 Wide angle 33 Wired LAN 82 WIRED LAN SET 124 Wireless LAN 77 Z ZEBRA 140 Zoom 33 ZOOM DISPLAY 120 ZOOM SET 104 - Sony HXRNX80 | Operating Instructions - Page 169
names and brand names are registered trademarks or trademarks of their respective owners. Trademarked items are not indicated by ® or ™ symbols in this manual. Notes on the License THIS PRODUCT IS LICENSED UNDER THE AVC PATENT PORTFOLIO LICENSE FOR THE PERSONAL USE OF A CONSUMER OR OTHER USES IN - Sony HXRNX80 | Operating Instructions - Page 170
Establish a Mass Storage connection between the camera and a computer to read licenses in the "PMHOME" - "LICENSE" folder. 170 - Sony HXRNX80 | Operating Instructions - Page 171
http://www.sony.net/ © 2017 Sony Corporation Printed in China
-
 1
1 -
 2
2 -
 3
3 -
 4
4 -
 5
5 -
 6
6 -
 7
7 -
8
-
9
-
10
-
11
-
12
-
13
-
14
-
15
-
16
-
17
-
18
-
19
-
20
-
21
-
22
-
23
-
24
-
25
-
26
-
27
-
28
-
29
-
30
-
31
-
32
-
33
-
34
-
35
-
36
-
37
-
38
-
39
-
40
-
41
-
42
-
43
-
44
-
45
-
46
-
47
-
48
-
49
-
50
-
51
-
52
-
53
-
54
-
55
-
56
-
57
-
58
-
59
-
60
-
61
-
62
-
63
-
64
-
65
-
66
-
67
-
68
-
69
-
70
-
71
-
72
-
73
-
74
-
75
-
76
-
77
-
78
-
79
-
80
-
81
-
82
-
83
-
84
-
85
-
86
-
87
-
88
-
89
-
90
-
91
-
92
-
93
-
94
-
95
-
96
-
97
-
98
-
99
-
100
-
101
-
102
-
103
-
104
-
105
-
106
-
107
-
108
-
109
-
110
-
111
-
112
-
113
-
114
-
115
-
116
-
117
-
118
-
119
-
120
-
121
-
122
-
123
-
124
-
125
-
126
-
127
-
128
-
129
-
130
-
131
-
132
-
133
-
134
-
135
-
136
-
137
-
138
-
139
-
140
-
141
-
142
-
143
-
144
-
145
-
146
-
147
-
148
-
149
-
150
-
151
-
152
-
153
-
154
-
155
-
156
-
157
-
158
-
159
-
160
-
161
-
162
-
163
-
164
-
165
-
166
-
167
-
168
-
169
-
170
-
171
 |
 |
4-731-568-
13
(1)
®
Solid-State Memory
Camcorder
Operating Guide
HXR-NX80
Identifying Parts and
Controls
Getting Started
Recording
Playback
Using Network Functions
Editing
Using the Menu
Troubleshooting
Additional Information