Sony HXRNX80 Operating Instructions - Page 78
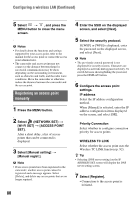
Registering an access point using the WPS function, Configuring a wireless LAN Continued
 |
View all Sony HXRNX80 manuals
Add to My Manuals
Save this manual to your list of manuals |
Page 78 highlights
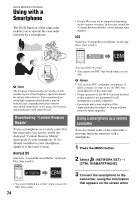
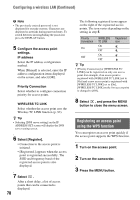
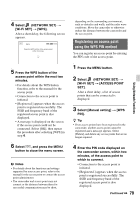
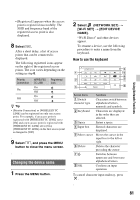
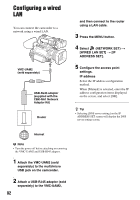
Configuring a wireless LAN (Continued) b Note • The previously entered password is not displayed for security reasons. Characters are displayed as asterisks during password entry. To switch between showing/hiding the password, press the DISPLAY button. 5 Configure the access point settings. IP address Select the IP address configuration method. When [Manual] is selected, enter the IP address configuration items displayed on the screen, and select [OK]. Priority Connection Select whether to configure connection priority for access points. WIRELESS TC LINK Select whether the access point uses the Wireless TC LINK function (p. 92). z Tip • Selecting [DNS server setting] on the IP ADDRESS SET screen will display the DNS server setting screen. 6 Select [Register]. • Connection to the access point is initiated. • [Registered.] appears when the access point is registered successfully. The SSID and frequency band of the registered access point is also displayed. 7 Select . After a short delay, a list of access points that can be connected is displayed. 78 The following registered icons appear on the right of the registered access points. The icon varies depending on the setting in step 5. Priority Connection On Off WIRELESS TC LINK On Off On Off Registered icon z Tip • [Priority Connection] or [WIRELESS TC LINK] can be registered on only one access point. For example, if an access point is registered with [WIRELESS TC LINK] set to [On] and a new access point is registered with [WIRELESS TC LINK] set to [On], [WIRELESS TC LINK] on the first access point is changed to [Off]. 8 Select , and press the MENU button to close the menu screen. Registering an access point using the WPS function You can register an access point quickly if the access point supports the WPS function. 1 Turn on the access point. 2 Turn on the camcorder. 3 Press the MENU button.
-
 1
1 -
2
-
3
-
4
-
5
-
6
-
7
-
8
-
9
-
10
-
11
-
12
-
13
-
14
-
15
-
16
-
17
-
18
-
19
-
20
-
21
-
22
-
23
-
24
-
25
-
26
-
27
-
28
-
29
-
30
-
31
-
32
-
33
-
34
-
35
-
36
-
37
-
38
-
39
-
40
-
41
-
42
-
43
-
44
-
45
-
46
-
47
-
48
-
49
-
50
-
51
-
52
-
53
-
54
-
55
-
56
-
57
-
58
-
59
-
60
-
61
-
62
-
63
-
64
-
65
-
66
-
67
-
68
-
69
-
70
-
71
-
72
-
 73
73 -
 74
74 -
 75
75 -
 76
76 -
 77
77 -
 78
78 -
 79
79 -
 80
80 -
 81
81 -
 82
82 -
 83
83 -
84
-
85
-
86
-
87
-
88
-
89
-
90
-
91
-
92
-
93
-
94
-
95
-
96
-
97
-
98
-
99
-
100
-
101
-
102
-
103
-
104
-
105
-
106
-
107
-
108
-
109
-
110
-
111
-
112
-
113
-
114
-
115
-
116
-
117
-
118
-
119
-
120
-
121
-
122
-
123
-
124
-
125
-
126
-
127
-
128
-
129
-
130
-
131
-
132
-
133
-
134
-
135
-
136
-
137
-
138
-
139
-
140
-
141
-
142
-
143
-
144
-
145
-
146
-
147
-
148
-
149
-
150
-
151
-
152
-
153
-
154
-
155
-
156
-
157
-
158
-
159
-
160
-
161
-
162
-
163
-
164
-
165
-
166
-
167
-
168
-
169
-
170
-
171
 |
 |
