Sony KD-34XBR960N Operating Instructions
Sony KD-34XBR960N - 34" Xbr Fd Trinitron Wega Televison Manual
 |
View all Sony KD-34XBR960N manuals
Add to My Manuals
Save this manual to your list of manuals |
Sony KD-34XBR960N manual content summary:
- Sony KD-34XBR960N | Operating Instructions - Page 1
4-102-730-21(1) Sony Corporation http://www.sony.net KD-34XBR960 Operating Instructions Printed in U.S.A. © 2004 Sony Corporation - Sony KD-34XBR960N | Operating Instructions - Page 2
Record The model and serial numbers are provided on the front of this instruction manual and at the rear of the TV. Refer to them whenever you call upon your Sony dealer regarding this product. Note This digital television is capable of receiving analog basic, digital basic and digital premium cable - Sony KD-34XBR960N | Operating Instructions - Page 3
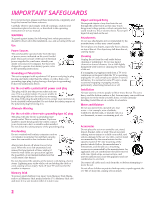
instructions placed on the set, or described in the operating instructions or service manual or cord, causing serious injury. Turn off your TV and wait for the weather to improve. Memory Stick they may touch dangerous voltage points or short out parts that could result in a fire or electric shock - Sony KD-34XBR960N | Operating Instructions - Page 4
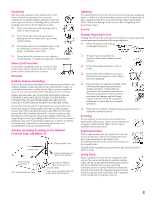
respect to proper grounding of the mast and supporting structure, grounding of the lead-in wire service grounding electrode system (NEC Art 250 Part H) Lightning For added protection for this television instructions. Adjust only those controls that are specified in the operating instructions. - Sony KD-34XBR960N | Operating Instructions - Page 5
of BBE Sound, Inc. This TV incorporates High-Definition Multimedia Interface (HDMI CableCARD™ is a trademark of Cable Television Laboratories, Inc. Wega, FD Trinitron, View, ClearEdge VM and HD Detailer are trademarks of Sony Corporation. i.LINK is a trademark of Sony Corporation and used only - Sony KD-34XBR960N | Operating Instructions - Page 6
9 Setting Up the TV Overview ...13 About the AC Power Cord 13 TV Controls and Connectors 14 and VCR 32 DVD Player with Component Video Connectors 34 DVD Player with S VIDEO and Audio Connectors 36 CableCARD 43 Activating CableCARD Service 43 Removing the CableCARD 44 Setting Up the - Sony KD-34XBR960N | Operating Instructions - Page 7
View 60 Displaying Twin Pictures 60 Factors Affecting Twin View 60 Activating the Picture 61 Changing the Picture Size 62 Using Favorite Channels 63 Using the Channel Menu 63 Using the Favorite Channels Guide 64 Using the Freeze Function 65 Using Other Equipment with Your TV Remote Control - Sony KD-34XBR960N | Operating Instructions - Page 8
102 Using the Setup Menu 105 Using the Applications Menu 108 Other Information Overview 111 Glossary ...112 Contacting Sony 113 Troubleshooting 113 Twin View 113 Remote Control 114 CableCARD 114 Channels 115 Memory Stick 116 Audio 117 Video 118 General 118 Specifications 120 Optional - Sony KD-34XBR960N | Operating Instructions - Page 9
- Sony KD-34XBR960N | Operating Instructions - Page 10
Along with your new Trinitron TV, the packing box contains a remote control and two AA (R6) batteries. These items are all you need to set up and use the TV. Features Some of the features that you will enjoy with your new TV include: ❑ Built-in Digital Television Receiver: You can watch digital - Sony KD-34XBR960N | Operating Instructions - Page 11
service details, limitations, pricing, and availability. For more information about CableCARD in this manual, see pages 17 and 43.) ❑ Wide Screen Mode: Watch conventional 4:3 aspect ratio broadcasts in wide screen (16:9) mode. ❑ Super Fine Pitch CRT: Created especially for displaying high resolution - Sony KD-34XBR960N | Operating Instructions - Page 12
digital audio/video interface between this TV and any HDMI-equipped audio/video component, such as a settop box, DVD player, and A/V receiver. HDMI supports enhanced, or high-definition video, high-definition content between these devices and your digital television. 11 SETUP SETUP SETUP - Sony KD-34XBR960N | Operating Instructions - Page 13
- Sony KD-34XBR960N | Operating Instructions - Page 14
Overview This chapter includes illustrated instructions for setting up your TV. Topic TV Controls and Connectors Basic Connections: Connecting a Cable or CableCARD Setting Up the Channel List Page(s) 14-16 17-21 24 26 28 30 32 34 36 37 38 39 40 41 42 43 45 About the AC Power Cord The AC power - Sony KD-34XBR960N | Operating Instructions - Page 15
that i.LINK Standby is on. For details, see page 106. Blinks when the TV is turned on, then shuts off when the picture is displayed. If the LED blinks continuously, this may indicate the TV needs service (see "Contacting Sony" on page 113). When lit, indicates one of the timers is set. When - Sony KD-34XBR960N | Operating Instructions - Page 16
Rear Panel 1 qs SETUP 2 qa 3 4 q; 5 9 6 Setup SETUP 78 SETUP SETUP SETUP 15 - Sony KD-34XBR960N | Operating Instructions - Page 17
to listen to your TV's audio through your stereo system. 6 HD/DVD IN 5/6 Connect TV to receive (IN) and send (OUT) remote control signals to other Sony television. The CableCARD, which is provided by your cable TV company, is inserted into this slot. After the service is activated with your cable TV - Sony KD-34XBR960N | Operating Instructions - Page 18
unidirectional device only, and cannot provide these advanced services. Check with your cable TV company for CableCARD service details, limitations, pricing, and availability, all of which are determined by your cable TV company - not Sony. For information on installing and activating CableCARD, see - Sony KD-34XBR960N | Operating Instructions - Page 19
cable (usually found in older homes) Cable Type Connect As Shown VHF Only or UHF Only or combined VHF/UHF 300-ohm twin lead cable TV VHF/UHF Antenna connector (not supplied) 75-ohm coaxial and 300-ohm twin lead cable (found in some homes) Cable Type Connect As Shown VHF - Sony KD-34XBR960N | Operating Instructions - Page 20
a cable and an antenna. (This is convenient if you are using a separate rooftop antenna to receive additional channels that are not provided by your cable TV company.) ❑ Do not have a cable box or VCR. (If you have a cable box, see pages 20 to 21. If you have a VCR, see pages 24 - Sony KD-34XBR960N | Operating Instructions - Page 21
usually channel 3 or 4) and then use the cable box to switch channels. Set up the TV remote control Program the remote control. See "Programming the Remote Control" on to operate the cable box pages 51-52. Activate the remote control to Press SAT/CABLE FUNCTION. operate the cable box Switch the - Sony KD-34XBR960N | Operating Instructions - Page 22
you have a VCR, see pages 24 and 26.) With this connection you can: ❑ Use the TV remote control to change channels coming through the cable box to the TV's VHF/UHF jack. (You must first program the remote control for your specific cable box.) About Using This Connection with Dual Picture (Twin View - Sony KD-34XBR960N | Operating Instructions - Page 23
Video Connectors DVD Player with S VIDEO and Audio Connectors Camcorder Audio Receiver DVI-Equipped Device HDMI-Equipped Device See Page 24 26 28 30 32 34 36 37 38 39 40 Setup SETUP SETUP SETUP SETUP 22 - Sony KD-34XBR960N | Operating Instructions - Page 24
Because S VIDEO carries only the video signal, you also need to connect audio cables for sound, as shown below. Example of an S VIDEO Connection TV S VIDEO cable Equipment with S VIDEO Cables are often color-coded to connectors. Connect red to red, white to white, etc. Audio cable SETUP SETUP - Sony KD-34XBR960N | Operating Instructions - Page 25
the VCR's VHF/UHF input jack. 2 Use a coaxial cable to connect the VCR's VHF/UHF output jack to the TV's CABLE jack. 3 Use an A/V cable to connect the VCR's A/V output jacks to the TV's A/V input jacks. 4 Run Auto Program, as described in "Setting Up the Channel List" on page 45. Coaxial cable - Sony KD-34XBR960N | Operating Instructions - Page 26
TV remote control If you have a non-Sony VCR, you must program the remote control. See to operate the VCR "Programming the Remote Control" on pages 51-52. Activate the TV remote on page 66. the TV remote control Label video inputs to easily See the instructions for setting up Video Labels on page - Sony KD-34XBR960N | Operating Instructions - Page 27
coming through the cable box. (You must first program the remote control for your specific cable box; see "Programming the Remote Control" on page 51.) ❑ Use the TV remote control to change channels coming directly into the TV's CABLE jack. (The TV's tuner provides a better signal than the cable box - Sony KD-34XBR960N | Operating Instructions - Page 28
TV remote control to operate the cable box or VCR If you have a non-Sony VCR, you must program the remote control. See "Programming the Remote Control" on pages 51-52. Activate the remote functions with the TV remote control Label video inputs to easily See the instructions for setting up Video - Sony KD-34XBR960N | Operating Instructions - Page 29
for tape editing 1 Use an A/V cable to connect the playback VCR's A/V output jacks to the TV's A/V input jacks. 2 Use an A/V cable to connect the recording VCR's A/V input jacks to the TV's MONITOR OUT jacks. TV Cables are often color-coded to connectors. Connect red to red, white to white, etc - Sony KD-34XBR960N | Operating Instructions - Page 30
TV remote control If you have a non-Sony VCR, you must program the remote control. See to operate the VCR(s) "Programming the Remote Control" on pages 51-52. Activate the TV remote on page 66. the TV remote control Label video inputs to easily See the instructions for setting up Video Labels on - Sony KD-34XBR960N | Operating Instructions - Page 31
satellite receiver's satellite input jack. 2 Use an A/V cable to connect the satellite receiver's A/V output jacks to the TV's A/V input jacks. 3 Connect a CATV cable from your cable or antenna to the TV's CABLE jack. 4 Run Auto Program, as described in "Setting Up the Channel List" on page 45. CATV - Sony KD-34XBR960N | Operating Instructions - Page 32
CABLE FUNCTION. Control satellite receiver functions with the See "Operating a Satellite Receiver" on page 66. TV remote control Label video inputs to easily identify equipment connected to the TV See the instructions for setting up Video Labels on page 105. Setup SETUP SETUP SETUP SETUP 31 - Sony KD-34XBR960N | Operating Instructions - Page 33
the CATV cable to the single (input) jack of the splitter. 2 Use a coaxial cable to connect one of the splitter's two output jacks to the TV's CABLE jack. 3 Use a coaxial cable to connect the splitter's other output jack to the satellite receiver's VHF/UHF input jack. 4 Connect the satellite antenna - Sony KD-34XBR960N | Operating Instructions - Page 34
functions with the TV remote control If you have a non-Sony VCR or satellite receiver, you must program the remote control. See "Programming the Remote Control" on 66. Label video inputs to easily See the instructions for setting up Video Labels on page 105. identify equipment connected to the - Sony KD-34XBR960N | Operating Instructions - Page 35
Y, PB and PR jacks to the Y, PB and PR jacks (VIDEO 5) on the TV. ✍ The Y, PB and PR jacks on your DVD player are sometimes labeled Y, CB the DVD player's audio output jacks to the TV's VIDEO 5 audio input jacks. Component video cables TV DVD player Cables are often color-coded to connectors - Sony KD-34XBR960N | Operating Instructions - Page 36
. Control DVD functions with See "Operating a DVD Player" on page 67. the TV remote control Label video inputs to easily See the instructions for setting up Video Labels on page 105. identify equipment connected to the TV ✍ You cannot record the signal from any equipment connected into the Y, PB - Sony KD-34XBR960N | Operating Instructions - Page 37
TV remote control If you have a non-Sony DVD player, you must program the remote control. to operate the DVD player See "Programming the Remote Control" on pages 51-52. Activate the TV remote page 67. the TV remote control Label video inputs to easily See the instructions for setting up Video Labels - Sony KD-34XBR960N | Operating Instructions - Page 38
. Notes on Using This Connection To Do This ... Do This ... Watch the camcorder Press TV/VIDEO repeatedly to select the camcorder input (VIDEO 2 in the illustration). Label video inputs to easily See the instructions for setting up Video Labels on page 105. identify equipment connected to the - Sony KD-34XBR960N | Operating Instructions - Page 39
cable Cables are often color-coded to connectors. Connect red to red, white to white. To line input Receiver 2 Using the TV's Audio Menu, set the Speaker option to Off. Then set the Audio Out option to Fixed or Variable, depending on how you want to control - Sony KD-34XBR960N | Operating Instructions - Page 40
cable Audio cable HDTV Receiver Note on Using This Connection To Do This ... Do This ... Watch the DVI device Press TV/VIDEO repeatedly to select the VIDEO 7 input. Label video inputs to easily See the instructions for setting up Video Labels on page 105. identify equipment connected to the - Sony KD-34XBR960N | Operating Instructions - Page 41
store. HDMI cable HDTV Receiver Note on Using This Connection To Do This ... Do This ... Watch the HDMI device Press TV/VIDEO repeatedly to select the VIDEO 7 input. Label video inputs to easily See the instructions for setting up Video Labels on page 105. identify equipment connected to the - Sony KD-34XBR960N | Operating Instructions - Page 42
is Dolby Digital and PCM compatible, such as an audio amplifier. ❑ Using an optical cable, connect the TV's DIGITAL AUDIO OPTICAL output jack to the device's audio optical input jack. TV Audio Amplifier Optical audio cable ✍ Because all equipment does not output digital audio, you should also - Sony KD-34XBR960N | Operating Instructions - Page 43
CONTROL S allows you to control your system and other Sony equipment with one remote control. In addition to allowing you to control multiple devices with one remote control, the CONTROL S feature allows you to always point your remote control at your TV, instead of having to point it at the other - Sony KD-34XBR960N | Operating Instructions - Page 44
and cannot provide these advanced services. Check with your cable TV company for CableCARD service details, limitations, pricing, and availability, all of which are determined by your cable TV company - not Sony. Activating CableCARD Service Before you can use CableCARD service, you need to insert - Sony KD-34XBR960N | Operating Instructions - Page 45
1-2 minutes, the CableCARD setup screen is displayed. This screen includes information your cable TV company will request before they can activate your service. 5 Follow the displayed instructions: Phone your cable TV company. A representative will guide you through the activation process. 6 After - Sony KD-34XBR960N | Operating Instructions - Page 46
, press . 5 The next screen instructs you to connect your cable/antenna. bar is displayed while the channel list is TV to factory settings 1 Press POWER to turn on the TV. 2 Hold down RESET on the remote control. 3 Press TV POWER on the TV. (The TV will turn itself off, then back on.) 4 Release - Sony KD-34XBR960N | Operating Instructions - Page 47
- Sony KD-34XBR960N | Operating Instructions - Page 48
how to set up, program, and use the TV's remote control. Topic Inserting Batteries Button Descriptions Outside Panel Inside Panel Programming the Remote Control Page 47 48 50 51 Inserting Batteries 1 Remove the battery cover from the remote control. 2 Insert two size AA (R6) batteries (supplied - Sony KD-34XBR960N | Operating Instructions - Page 49
Remote Control Button Descriptions Outside Panel Button Description 1 MUTING MUTING SLEEP SAT/CABLE POWER 1 qh 2 2 SLEEP Press to mute the sound. Press again or press VOL+ to restore the sound. Press repeatedly until the TV displays the time in 3 FUNCTION i.LINK SAT/CABLE TV qj TV - Sony KD-34XBR960N | Operating Instructions - Page 50
Description Press to program the remote control to operate nonSony video equipment. For details, see "Programming the Remote Control" on page 51. Display off. wg GUIDE Press to display the program guide. For details, see page 55. wh JUMP Press to jump back and forth between two channels. The TV - Sony KD-34XBR960N | Operating Instructions - Page 51
SETUP SETUP Remote Control Inside Panel MUTING SLEEP SAT/CABLE POWER SAT/CABLE FUNCTION TV TV/VIDEO ANT PIC MODE MP ENTER SCREEN MODE INDEX TWIN VIEW VOL MENU CH MODE MEMORY STICK PALETTE RESET DRC FAVORITES GUIDE DISPLAY CODE SET FREEZE EXIT JUMP TV RM-Y201 MUTING SLEEP SAT - Sony KD-34XBR960N | Operating Instructions - Page 52
other than Sony brand that you want to control with the TV's remote control, use the following procedure to 2 program the remote control. MENU VOL CH MODE MEMORY STICK PALETTE 3 DRC RESET FAVORITES GUIDE DISPLAY CODE SET JUMP FREEZE EXIT TV RM-Y201 5 ✍ You must do step 5 within 10 - Sony KD-34XBR960N | Operating Instructions - Page 53
SETUP SETUP Remote Control SETUP SETUP Manufacturer's Codes VCRs Manufacturer Sony Admiral (M. Ward 755 758 756 757 761 759 753 757 752 755 758 754 760 Cable Boxes Manufacturer Sony Hamlin/Regal Jerrold/G. I./ Motorola Oak Panasonic Pioneer Scientific Atlanta Tocom Zenith Code 230 222, - Sony KD-34XBR960N | Operating Instructions - Page 54
This chapter describes how to use the features of your TV. Topic Watching TV Using the Program Guide Using the Scrolling Index Using Screen Mode Using Twin View Using Favorite Channels Using the Freeze Function Using Other Equipment with Your TV Remote Control Page 54 55 57 58 60 63 65 66 - Sony KD-34XBR960N | Operating Instructions - Page 55
using the program guide. See pages 55 for details. Adjust the volume Press VOL +/- Mute the sound Press MUTING (press again to unmute) Alternate back and forth between two channels Press JUMP The TV alternates between the current channel and the last channel tuned. Display the current channel - Sony KD-34XBR960N | Operating Instructions - Page 56
The program guide lets you review program information and select both analog and digital channels. ✍ The Program Guide cannot be displayed when the TV is tuned (see page 100). GUIDE To display the program guide: Press GUIDE on the TV's remote control. The program guide appears, with the - Sony KD-34XBR960N | Operating Instructions - Page 57
Options Move the joystick b while in the program guide's channel list to display the following options, which allow you to customize the settings of the program on the currently tuned channel. Option Alternate Video (when available) Alternate Audio ( - Sony KD-34XBR960N | Operating Instructions - Page 58
does not function if parental controls are set (see page 102). ❑ Digital sources, as well as any sources connected to the VIDEO 5, VIDEO 6, VIDEO 7 inputs, display in the left window, but not in the right windows. 57 Features SETUP SETUP - Sony KD-34XBR960N | Operating Instructions - Page 59
the picture proportionately. The left and right edges of the picture are stretched to fill the 16:9 screen. SCREEN MODE Wide Zoom m Normal displays the 4:3 picture in its original size. Bars are shown to fill the 16:9 screen. SCREEN MODE Normal m Full stretches the 4:3 picture horizontally, to - Sony KD-34XBR960N | Operating Instructions - Page 60
SETUP SETUP SETUP Using Screen Mode with High-Definition (720p/1080i) Sources Example SCREEN MODE Description Full displays the picture at its original size. If the source is a 16:9 high-definition (720p/1080i) signal, the picture fills the screen. Full (native 16:9) If - Sony KD-34XBR960N | Operating Instructions - Page 61
but you can choose which source's sound is selected. You can also change the relative size of each of the pictures. Displaying Twin Pictures 1 Tune the TV to a working channel. 2 Press . A second picture appears. The active picture is highlighted. , TWIN VIEW , To cancel Twin View and watch the - Sony KD-34XBR960N | Operating Instructions - Page 62
ENTER. Press VOL +/Press MUTING (press again to unmute) Switch the TV's input between Press ANT sources connected to the TV's VHF/UHF and CABLE inputs Switch the TV's input between Press TV/VIDEO sources connected to the TV's A/V inputs Change the picture size Move the joystick V or v. (For - Sony KD-34XBR960N | Operating Instructions - Page 63
Enlarge the active picture v Do This ... Move the joystick V. Make the active picture v smaller Move the joystick v. When you adjust the picture sizes, the TV memorizes the change. The next time you use the Twin View function, the memorized sizes appear. SETUP Features SETUP SETUP 62 - Sony KD-34XBR960N | Operating Instructions - Page 64
in the Channel Menu, or by using the Add to Favorites feature in the Favorite Channels guide. Using the Channel Menu MENU z For details on using the Channel Menu, see page 100. 1 Press MENU to display the Menu. 2 Move the joystick V or v to highlight the Channel icon and press . 3 Press to select - Sony KD-34XBR960N | Operating Instructions - Page 65
Channels Guide FAVORITES 1 Press FAVORITES. The Favorite Channels list appears. Preview of highlighted Favorite Channel Favorite Channels 2 Move the joystick V or v to highlight the channel you want to watch. A preview of the highlighted Favorite Channel appears. ✍ Digital channels do not display - Sony KD-34XBR960N | Operating Instructions - Page 66
✍ The Freeze feature is not available while using Twin View. 1 When the program information you want to capture is displayed, press FREEZE. 2 The TV switches to Twin View mode and displays the "frozen" picture on the right, while the current program continues on the left. FREEZE Current program in - Sony KD-34XBR960N | Operating Instructions - Page 67
) TV/VCR To Do This ... Press Activate the remote control SAT/CABLE FUNCTION to operate the satellite receiver Turn on/off SAT/CABLE POWER Select a channel Change channels 0-9, ENTER CH +/- Back to previous channel JUMP Display channel number DISPLAY Display SAT Guide GUIDE Display SAT - Sony KD-34XBR960N | Operating Instructions - Page 68
CABLE POWER 0-9, ENTER CH +/JUMP To Do This ... Activate the remote control to operate the DVD Play Stop Pause Step through different tracks the disc Step through different chapters of a video disc Display the DVD player Menu (Setup) Display the DVD Menu Move highlight (cursor) Select item Press - Sony KD-34XBR960N | Operating Instructions - Page 69
Do This ... Activate the remote control to operate the DVD/VCR Turn on/off Switch between the DVD player and VCR Display the DVD menu Play Stop the A/V slide switch to the position you programmed for the DVD or VCR. VCR/DVD (power) TV/VCR/DVD MENU N x X M or m during playback V v B b SELECT N and z - Sony KD-34XBR960N | Operating Instructions - Page 70
cameras and digital video cameras. Because it is removable, Memory Stick can also be used for external data storage. The Memory Stick Viewer on your TV allows you to view files that are stored on Memory Stick media. You can view: ❑ Digital photos (JPEG files) ❑ Movies (MPEG1 files) You can also - Sony KD-34XBR960N | Operating Instructions - Page 71
television has been tested to support up to 1 GB media capacity and does not support high-speed transfer, MagicGate copyright protection technology, or access control security features. Sony data prior to use with the TV's Memory Stick Viewer. Sony cannot accept responsibility in the event that data - Sony KD-34XBR960N | Operating Instructions - Page 72
following file name extensions: File Type JPEG MPEG1 Supported File Name Extensions .jpg .jpeg .mpg .mpeg Trademark Information Memory Stick, Memory Stick Duo, Memory Stick PRO, Memory Stick PRO Duo, and MagicGate are trademarks of Sony Corporation. SETUP SETUP Features Memory Stick SETUP - Sony KD-34XBR960N | Operating Instructions - Page 73
properly, it should slide in with little resistance and click into place. I.LINK VIDEO 2 INPUT S VIDEO VIDEO L(MONO) -- AUDIO - R i.LINK MENU + VOLUME CHANNEL _ TV/VIDEO PRO STD/DUO i.LINK TIMER/ STAND BY STAND BY POWER PRO STD/DUO ✍ Be sure to insert the Memory Stick in the correct - Sony KD-34XBR960N | Operating Instructions - Page 74
Stick or its contents. 2 Push the Memory Stick gently into the slot, and then release it. The Memory Stick media is ejected. ✍ Do not pull out the Memory Stick without first pushing it in; otherwise, the TV's locking mechanism may become damaged. 3 Pull the Memory Stick completely out of the slot - Sony KD-34XBR960N | Operating Instructions - Page 75
Index Turn on the TV and insert a Memory Stick that contains the photo or movie files you want to view. For details, see page 72. ✍ If the Memory Stick Index does not appear, press the MEMORY STICK button on the remote control. The Memory Stick Index appears, which displays thumbnail images of the - Sony KD-34XBR960N | Operating Instructions - Page 76
Stick Index Menu Bar Options" on page 81. 1 Move the joystick B or b to select V. 2 Move the joystick V to return to the currently displayed thumbnails, or v to display the next page of thumbnails. Press the MEMORY STICK button on the remote control. Y SETUP Features Memory Stick SETUP 75 - Sony KD-34XBR960N | Operating Instructions - Page 77
a result of a malfunction with the TV. Photo Controls z When the Menu is hidden, move the joystick B or b to go to the previous or next photo. To Do This ... Display the next or previous file on the Options" on page 77. Press the MEMORY STICK button on the remote control. 76 Memory Stick SETUP - Sony KD-34XBR960N | Operating Instructions - Page 78
the joystick B or b to select Slide Show, View, or File. 2 Press to select the desired option. Option Description Index Displays the Memory Stick Index, with the highlight on the thumbnail of the currently displayed photo. For details, see "Using the Memory Stick Index" on page 74. Slide Show - Sony KD-34XBR960N | Operating Instructions - Page 79
; then press to set the center. The Zoom and Pan controls are displayed. SETUP SETUP Features Memory Stick To Do This ... Zoom in (increase press . Highlight Exit and press . Press the MEMORY STICK button on the remote control. Using Rotate To Rotate a photo 1 In the Photo Menu bar, highlight - Sony KD-34XBR960N | Operating Instructions - Page 80
z The quality of the movie when enlarged depends on the resolution of the MPEG1 file. See your camera's instruction manual for details. To Do This ... Do This ... Enlarge the movie window Highlight Enlarge, and then press . To display the movie controls again, press . When the movie ends, the - Sony KD-34XBR960N | Operating Instructions - Page 81
Index, Slide Show, or File. 3 Select the desired option. Option Index Slide Show File Description Displays the Memory Stick Index, with the highlight on the thumbnail of the currently displayed movie. Displays the Slide Show Menu. For details, see "Slide Show Menu Options" on page 81. Protect - Sony KD-34XBR960N | Operating Instructions - Page 82
display file information using the DISPLAY button on the remote file stored in the TV's internal memory. (List of MP3 Files and Playlists) Displays a list of all Manual Slide advances only after you move the joystick B or b. Determines whether file information is shown when the file is displayed - Sony KD-34XBR960N | Operating Instructions - Page 83
the directories defined by the DCF rules used by Sony digital cameras (see page 83). JPEG and MPEG1 displayed. Date Order Displays files in chronological order by modification date. Date Order Reverse Displays files in reverse chronological order by modification date. Alphabetical Displays - Sony KD-34XBR960N | Operating Instructions - Page 84
Names Most Sony brand digital still and video cameras automatically record still photo and movie files using DCF compliant directory and file names. If you selected the Digital Camera Folders option, as described on page 82, you might want to have your digital camera's instruction manual handy in - Sony KD-34XBR960N | Operating Instructions - Page 85
SETUP Memory Stick Precautions When using Memory Stick media, follow these precautions: ❑ To avoid permanent damage to still image data, do not turn off the TV or remove Memory Stick media from the insertion slot while data is being read (as indicated by the Memory Stick indicator light being on - Sony KD-34XBR960N | Operating Instructions - Page 86
content between these devices and your digital television. i.LINK is a trademark of Sony Corporation and used only to designate that TV has three S400 i.LINK terminals (one in the front panel, and two in the back panel). You can use the following i.LINK cables with this TV: 4-pin i.LINK cable Sony - Sony KD-34XBR960N | Operating Instructions - Page 87
, read the instruction manual of the i.LINK device to be connected. To connect a digital i.LINK device (using only a digital signal) 1 Using an i.LINK cable (see page 85), connect the device's i.LINK jack to either of the TV's i.LINK jacks. To connect an i.LINK device that supports an EIA-775A - Sony KD-34XBR960N | Operating Instructions - Page 88
i.LINK devices (devices that require only the i.LINK connection), no setup is necessary. The TV automatically recognizes the device as soon as the connection is made. Set up an i.LINK device that supports an EIA-775A analog connection 1 Connect analog A/V cables to the VIDEO 3 input (see page - Sony KD-34XBR960N | Operating Instructions - Page 89
you wish to operate. i.LINK ✍ For instructions on connecting i.LINK devices, see page 86. 2 Press i.LINK on the remote control. The TV (DTV), along with all devices connected by i.LINK to the TV, appear on the Device List. Devices that are not supported by the TV appear on the Device List as "Other - Sony KD-34XBR960N | Operating Instructions - Page 90
to control the selected i.LINK device. 1 If the i.LINK Control Panel is not already displayed, press i.LINK on the remote control. ✍ If i.LINK is pressed while the TV is displaying an analog or digital channel (not the i.LINK device), then the Device List will appear. Select the desired device - Sony KD-34XBR960N | Operating Instructions - Page 91
buttons on the TV's remote control. To program the remote control to operate i.LINK devices, see "Programming the Remote Control" on page supported for all i.LINK devices. ❑ If you are using a digital VCR, turn off any Auto LINC functionality of the VCR. For details, see the digital VCR's user manual - Sony KD-34XBR960N | Operating Instructions - Page 92
press . i.LINK SETUP i.LINK SETUP The following options are displayed: Option Alternate Video (when available) Alternate Audio (when available) to switch among these alternate audio streams (e.g., for different languages). The TV is able to accept an analog signal from a selected set-top box - Sony KD-34XBR960N | Operating Instructions - Page 93
- Sony KD-34XBR960N | Operating Instructions - Page 94
second audio programming (SAP) or customizing the Effect of the sound on your TV. Page 94 97 The Screen Menu allows you to make Screen Mode 99 and diagnostics information, and more. Navigating Through Menus To Do This ... Display the Menu Move through the Menus Select an option to change Select ( - Sony KD-34XBR960N | Operating Instructions - Page 95
You can also change the Mode setting using the PIC MODE button on the remote control. z You can alter the Video Menu settings (Picture, Brightness, Color, for standard picture settings. Movie Select to display a softer picture. Pro Select to display a picture with minimum enhancements. To - Sony KD-34XBR960N | Operating Instructions - Page 96
DRC MODE button on the remote control. You can also change the DRC Palette using the DRC PALETTE button on the remote control. z For best options. DRC Mode Creates a high-resolution picture with 4x density, for text. CineMotion Provides an optimized display by automatically detecting film content - Sony KD-34XBR960N | Operating Instructions - Page 97
Allows you to control how the Mode settings (Vivid, Standard, Movie, Pro) are applied to TV viewing, Memory Stick viewing, i.LINK and each video input. For details about Mode settings, see settings: ❑ Press RESET on the remote control when in the Video Menu. SETUP SETUP SETUP Menus Menus 96 - Sony KD-34XBR960N | Operating Instructions - Page 98
access the Audio Menu, follow these steps: 1. Display Menu 2. Highlight 3. Press to select MENU v the button on the inside panel of the remote control. The Audio Menu includes the following options the TV to second audio programs when a signal is received. (If no SAP signal is present, the TV - Sony KD-34XBR960N | Operating Instructions - Page 99
off, but the volume output from your audio system can still be controlled by the TV's remote control. Fixed The TV's speakers are turned off and the volume output of the TV is fixed. Use your audio receiver's remote control to adjust the volume through your audio system. To restore the factory - Sony KD-34XBR960N | Operating Instructions - Page 100
also change the Screen Mode using the SCREEN MODE button on the remote control. The Screen Menu includes the following options: Option Screen some cases, wide-screen programs will be shown in aspect ratios that require the display of bars at the top and bottom of your 16:9 screen. For more details - Sony KD-34XBR960N | Operating Instructions - Page 101
Channel Menu To access the Channel Menu, follow these steps: 1. Display Menu 2. Highlight 3. Press to select MENU v To change Add Select to add digital channels. Automatically sets up the channel list on the TV for all receivable channels for the current input (VHF/UHF or CABLE). ✍ Auto - Sony KD-34XBR960N | Operating Instructions - Page 102
Description Allows you to show or hide channels that appear in the Program Guide (page 55) and when you use the CH+/buttons to channel surf. Channels that are set to Hidden do not appear in the Program Guide or when you use the CH+/- buttons. 1 Move the joystick V or v - Sony KD-34XBR960N | Operating Instructions - Page 103
The Parent Menu allows you to set up the TV to block programs according to their content and rating levels. To access the Parent Menu, follow these steps: 1. Display Menu 2. Highlight 3. Press to select MENU v Use the 0-9 buttons on the remote control to enter a four-digit password. If this is - Sony KD-34XBR960N | Operating Instructions - Page 104
blocking capability, set the AgeBased Ratings. z If you block unrated TV programs, be aware that the following types of programs may be blocked: emergency broadcasts, political programs, sports, news, public service announcements, religious programs and weather. For US models, the Custom Rating - Sony KD-34XBR960N | Operating Instructions - Page 105
when tuned to a blocked program, then enter the password. This temporarily switches off the Parental Lock. To reactivate the Parental Lock settings, turn off the TV. When the TV is turned on again, your Parental Lock settings are reactivated. SETUP SETUP Menus Menus 104 - Sony KD-34XBR960N | Operating Instructions - Page 106
offers this service). Displays when the channel is changed or the DISPLAY button is pressed. Allows you to identify A/V equipment you connected to the TV, such LD, Web, Beta, HD, PVR, Skip ✍ If you select Skip, your TV skips this input when you press the TV/VIDEO button. SETUP Menus Menus 105 - Sony KD-34XBR960N | Operating Instructions - Page 107
v to choose a correction between +5 and -5 and press . Select to display all on-screen Menus in your language of choice. On Allows the i.LINK connected i.LINK devices even when the TV is turned off. The front panel i.LINK Standby LED shows orange. The TV uses more standby power than when - Sony KD-34XBR960N | Operating Instructions - Page 108
Menus Advanced Settings Allows you to make additional settings for digital (EIA708) closed caption options. As Broadcast Large Text Small Text Custom ... Allows you to customize the following settings: Character Size Small, Standard, Large Character Style Style 1-7 Character Color None, - Sony KD-34XBR960N | Operating Instructions - Page 109
i.LINK buttons on the remote control or front panel. You can also change the Sleep options using the SLEEP button on the remote control. z To go see page 69. Displays the i.LINK Device List. For details, see page 88. Select to set the clock, set the Sleep timer, and to program your TV to turn on - Sony KD-34XBR960N | Operating Instructions - Page 110
to confirm each setting and move to the next setting. Press B to go back to the previous setting. 3 Press MENU to exit the Menu. Displays the strength of the terrestrial digital broadcast signal, to help you adjust your antenna to optimize signal reception. This list of selectable CableCARD options - Sony KD-34XBR960N | Operating Instructions - Page 111
- Sony KD-34XBR960N | Operating Instructions - Page 112
Other Information Overview This chapter includes the following topics: Topic Glossary Contacting Sony Troubleshooting Specifications Optional Accessories Index Page 112 113 113 120 121 123 111 - Sony KD-34XBR960N | Operating Instructions - Page 113
from 30 to 300 megahertz. UHF (Ultra High Frequency) is the part of the frequency spectrum from 300 to 3,000 megahertz. Provides 480 lines of resolution. Displays images using interlaced scanning, which first transmits all the odd lines on the TV screen and then the even lines. Provides 480 lines of - Sony KD-34XBR960N | Operating Instructions - Page 114
only) or (416) 499-SONY (7669) (Canadian residents only). Before calling Sony customer support, please write down the model and serial numbers of your TV. You'll find this information on the front cover of this manual. Troubleshooting Twin View Problem Possible Remedies I cannot get Twin - Sony KD-34XBR960N | Operating Instructions - Page 115
to operate. ❏ There is a possibility that some non-Sony equipment cannot be operated by your Sony TV remote.You may need to use the equipment's original remote control. CableCARD Problem Problems using CableCARD or CableCARD services Possible Remedies ❏ Check that the CableCARD is inserted - Sony KD-34XBR960N | Operating Instructions - Page 116
TV companies have limitations on the broadcast of digital are not being displayed cable channels. Check with your cable TV company for more information. ❏ Check with your cable TV digital cable broadcast formats may not be supported. If your cable TV company is broadcasting digital signals in - Sony KD-34XBR960N | Operating Instructions - Page 117
Problem Possible Remedies Image does not ❏ Make sure the image file is a JPEG (.jpg, .jpeg) file or an MPEG1 (.mpg, display joystick V to display the Menu again. Cannot hear audio while ❏ Check the TV's volume or not play back ❏ The Memory Stick Viewer supports only MP3 files with a fixed data - Sony KD-34XBR960N | Operating Instructions - Page 118
The quality of the movie when enlarged depends on the resolution of the enlarged (page 79) MPEG1 file. See your camera's instruction manual for details. Error message ❏ No Memory Stick There is no Memory Stick in the slot. is displayed ❏ Memory Stick The lock mechanism on the Memory Stick is - Sony KD-34XBR960N | Operating Instructions - Page 119
your program provider). General Problem Possible Remedies How to reset TV to ❏ Turn on the TV. While holding down the RESET button on the remote factory settings control, press the POWER button on the TV. (The TV will turn itself off, then back on again.) Release the RESET button. How - Sony KD-34XBR960N | Operating Instructions - Page 120
/STAND BY LED on ❏ The LED (see page 14) blinks when the TV is turned on, then shuts off front panel is lit when the picture is displayed. If the LED blinks for more than a minute, this may indicate the TV needs service. When lit, indicates that the timer is set (page 108). When - Sony KD-34XBR960N | Operating Instructions - Page 121
Television System Supplied Accessories Visible Screen Size Actual CRT Size Speaker Output Dimensions (W (analog) 2-69 Cable TV (analog) 1-125 Terrestrial (digital) 2-69 Cable TV (digital) 1-135 120V I/II Remote Control RM-Y201 AA (R6) Batteries 2 supplied for remote control 34 in - Sony KD-34XBR960N | Operating Instructions - Page 122
Other Info Other SETUP Optional Accessories ❑ A/V Cable (VMC-810/820/830 HG) ❑ Audio Cable (RKC-515HG) ❑ Component Video Cable (VMC-10/30 HG) ❑ TV Stand: SU-34XBR3 ❑ i.LINK cables: VMC-IL4415 (4-pin to 4-pin, 1.5 meters); VMC- IL4435 (4-pin to 4-pin, 3.5 meters) 121 SETUP SETUP Other Info - Sony KD-34XBR960N | Operating Instructions - Page 123
- Sony KD-34XBR960N | Operating Instructions - Page 124
Reality Creation 10 DISC MENU button 50, 67 DISPLAY button 49, 54 DRC Mode 95 DRC MODE See Digital Reality Creation. DVD player using with TV remote control 67 with A/V connectors, connecting 36 E Effect Full (Screen Mode) 58, 59 G GUIDE button 49, 55 H HD Detailer 11 HD/DVD IN (1080i/720p/480p/480i) - Sony KD-34XBR960N | Operating Instructions - Page 125
on/off, the TV 14 presetting channels 100 Pro (Video) mode 94 problems, troubleshooting 113- 119 Program Guide 55 program guide 55 progressive 10, SAT/CABLE FUNCTION button 49 POWER button 49 satellite receiver, using with TV remote control 66 Screen Mode 58, 99 SCREEN MODE button 48, 58 Scrolling - Sony KD-34XBR960N | Operating Instructions - Page 126
Welcome SETUP Index Video modes, selecting 94 Vivid mode 94 VOL buttons 14, 48, 54 W Warm, Color Temperature 94 Wega, described 9 Wide Zoom 58 widescreen 11 Z Zoom (Screen Mode) 58, 59 zoom feature, with Twin View 62 125 SETUP SETUP Other Info - Sony KD-34XBR960N | Operating Instructions - Page 127
-
 1
1 -
 2
2 -
 3
3 -
 4
4 -
 5
5 -
 6
6 -
 7
7 -
8
-
9
-
10
-
11
-
12
-
13
-
14
-
15
-
16
-
17
-
18
-
19
-
20
-
21
-
22
-
23
-
24
-
25
-
26
-
27
-
28
-
29
-
30
-
31
-
32
-
33
-
34
-
35
-
36
-
37
-
38
-
39
-
40
-
41
-
42
-
43
-
44
-
45
-
46
-
47
-
48
-
49
-
50
-
51
-
52
-
53
-
54
-
55
-
56
-
57
-
58
-
59
-
60
-
61
-
62
-
63
-
64
-
65
-
66
-
67
-
68
-
69
-
70
-
71
-
72
-
73
-
74
-
75
-
76
-
77
-
78
-
79
-
80
-
81
-
82
-
83
-
84
-
85
-
86
-
87
-
88
-
89
-
90
-
91
-
92
-
93
-
94
-
95
-
96
-
97
-
98
-
99
-
100
-
101
-
102
-
103
-
104
-
105
-
106
-
107
-
108
-
109
-
110
-
111
-
112
-
113
-
114
-
115
-
116
-
117
-
118
-
119
-
120
-
121
-
122
-
123
-
124
-
125
-
126
-
127
 |
 |

KD-34XBR960
Operating Instructions
© 2004 Sony Corporation
Sony Corporation
Printed in U.S.A.
4-102-730-21(1)