Sony KLV-21SG2 Operating Instructions - Page 38
To reset to the factory settings, Press MENU to exit the menu screen.
 |
View all Sony KLV-21SG2 manuals
Add to My Manuals
Save this manual to your list of manuals |
Page 38 highlights
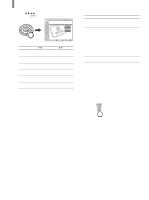
Using Advanced Features 6 Press V/v/B/b to make the desired adjustment, then press . , Video TV Return Mode: Vivid Picture: 50 Brightness: 50 Color: 25 Hue: 0 Sharpness: 3 Backlight: 5 Color Temp.: Cool CineMotion: Off Dynamic Picture: On Select: Back: Set: Exit: Adjustable options Option Press v/B Press V/b Picture To reduce picture contrast. Brightness To darken the picture. Color To decrease color intensity. Hue* To decrease the green tones. Sharpness** To soften the picture. Backlight To darken the screen. To enhance picture contrast. To brighten the picture. To increase color intensity. To increase the green tones. To sharpen the picture. To brighten the screen. * The adjustment is not available for the followings: - 480i, 480p, 1080i and 720p signals input to VIDEO 3 IN - Digital photos and movies recorded on "Memory Stick" ** The adjustment is not available for the digital photos and movies recorded on "Memory Stick." Tip You can adjust each option by referring to the value beside each option indicator. Selective options Option Description Color Temp. Select to give bright (Color colors a red tint. Temperature) CineMotion* Select to provide an optimized display by automatically detecting film content. Moving pictures will become clearer and more natural. When the superimposed text on the film content appears corrupted, set "CineMotion" to "Off." Dynamic Picture* Select to enhance the picture contrast. Setting Cool/ Neutral/ Warm On/Off On/Off * The adjustment is not available for the digital photos and movies recorded on "Memory Stick." 7 Repeat steps 5 and 6 to adjust other options. 8 Press MENU to exit the menu screen. To reset to the factory settings Press RESET while the menu is on the screen and the cursor is located on the right side of any menu item. 38
-
 1
1 -
2
-
3
-
4
-
5
-
6
-
7
-
8
-
9
-
10
-
11
-
12
-
13
-
14
-
15
-
16
-
17
-
18
-
19
-
20
-
21
-
22
-
23
-
24
-
25
-
26
-
27
-
28
-
29
-
30
-
31
-
32
-
 33
33 -
 34
34 -
 35
35 -
 36
36 -
 37
37 -
 38
38 -
 39
39 -
 40
40 -
 41
41 -
 42
42 -
 43
43 -
44
-
45
-
46
-
47
-
48
-
49
-
50
-
51
-
52
-
53
-
54
-
55
-
56
-
57
-
58
-
59
-
60
-
61
-
62
-
63
-
64
-
65
-
66
-
67
-
68
-
69
-
70
-
71
-
72
-
73
-
74
-
75
-
76
-
77
-
78
-
79
-
80
 |
 |
