Sony SDM-X82 Operating Instructions - Page 15
Gamma, Zoom (sdm-x72/x82 Only), Smoothing, Sdm-x72/x82 Only - sdm x72
 |
View all Sony SDM-X82 manuals
Add to My Manuals
Save this manual to your list of manuals |
Page 15 highlights
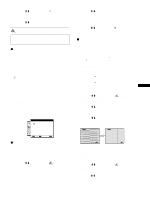
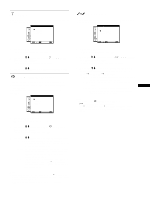
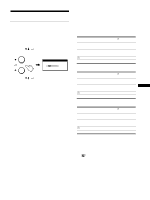
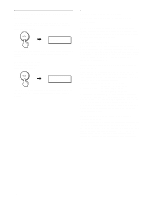
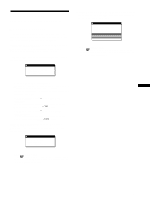
GAMMA You can associate the picture's color shade on the screen with the picture's original color shade. GAMMA GAMMA 1 GAMMA 2 GAMMA 3 1280 x1024 / 60Hz EX I T 1 Press the MENU button. The main menu appears on the screen. 2 Press the M/m buttons to select (GAMMA) and press the OK button. The GAMMA menu appears on the screen. 3 Press the M/m buttons to select the desired mode. ZOOM (SDM-X72/X82 only) The monitor is set to display the picture on the screen in full, irrespective of the picture's mode or resolution in the default setting (FULL2). You can also view the picture in its actual aspect ratio or resolution. ZOOM FULL2 FULL1 REAL 1280 x1024 / 60Hz EX I T 1 Press the MENU button. The main menu appears on the screen. 2 Press the M/m buttons to select (ZOOM) and press the OK button. The ZOOM menu appears on the screen. 3 Press the M/m buttons to select the desired mode. • FULL2 (The default setting): The input signal is displayed on the screen in full, irrespective of the picture's mode or resolution. • FULL1: The input signal is displayed on the screen at its actual aspect ratio. Therefore, black bands may appear at the top and bottom of the picture depending on the signal. • REAL: The input signal is displayed on the screen at its actual resolution. Sub-1280 × 1024 signal is displayed at the center of the screen surrounded by a black frame. Note • When using the SDM-X72/X82 model with 1280 × 1024 resolution signals, the above mentioned settings are not available. The picture is displayed on the screen in full. • SDM-X52 can only display the picture on the screen in full. SMOOTHING If the picture displayed at the FULL2 or FULL1 mode of ZOOM is not smooth, use the picture smoothing function. SMOOTH I NG TEXT S TA NDARD GRAPH I CS 1280 x1024 / 60Hz EX I T 1 Press the MENU button. The main menu appears on the screen. 2 Press the M/m buttons to select (SMOOTHING), and press the OK button. The SMOOTHING menu appears on the screen. 3 Press the M/m buttons to select the desired mode. The smoothing effect becomes stronger in the order of TEXTtSTANDARDtGRAPHICS. • TEXT: To make the characters appear clear. (This mode is suited for text-based applications.) • STANDARD (The default setting): Standard smoothing effect. • GRAPHICS: To make the pictures appear clean. (This US mode is suited for CD-ROM software such as photo images or illustrations.) Note • When you set the (ZOOM) menu to REAL, the (SMOOTHING) menu is not available. • 1024 × 768 (SDM-X52), 1280 × 1024 (SDM-X72/X82) resolution signals are shown only in REAL mode and SMOOTHING is not possible. 15
-
 1
1 -
2
-
3
-
4
-
5
-
6
-
7
-
8
-
9
-
 10
10 -
 11
11 -
 12
12 -
 13
13 -
 14
14 -
 15
15 -
 16
16 -
 17
17 -
 18
18 -
 19
19 -
 20
20 -
21
-
22
-
23
-
24
-
25
-
26
-
27
-
28
-
29
-
30
-
31
-
32
-
33
-
34
-
35
-
36
-
37
-
38
-
39
-
40
-
41
-
42
-
43
-
44
-
45
-
46
-
47
-
48
-
49
-
50
-
51
-
52
-
53
-
54
-
55
-
56
-
57
-
58
-
59
-
60
-
61
-
62
-
63
-
64
-
65
-
66
-
67
-
68
-
69
-
70
-
71
-
72
 |
 |
