TP-Link TL-WR1042ND User Guide - Page 106
TL-WR1042ND, SMTP Server, Authentication, User Name, Password, Confirm The Password, Enable Auto
 |
View all TP-Link TL-WR1042ND manuals
Add to My Manuals
Save this manual to your list of manuals |
Page 106 highlights
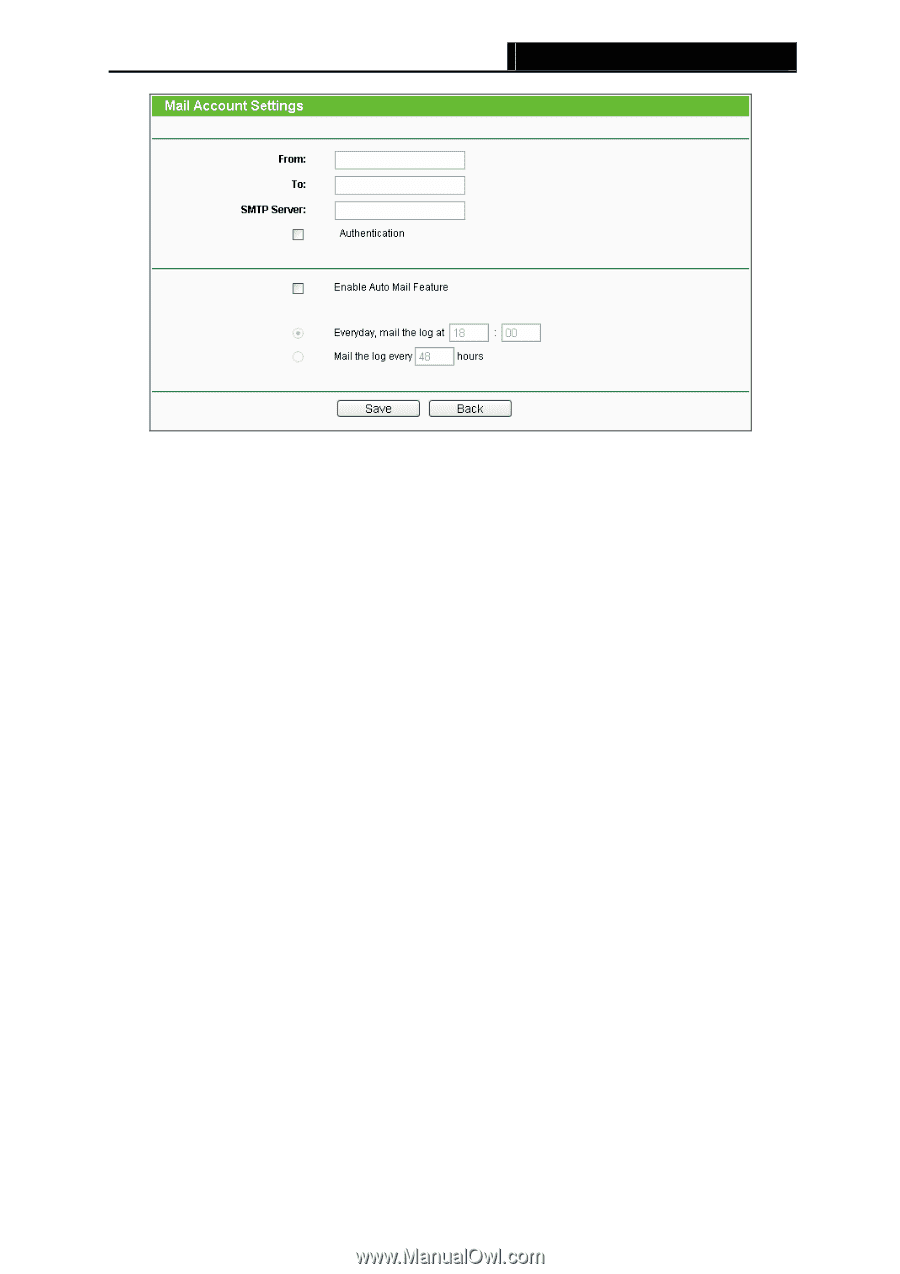
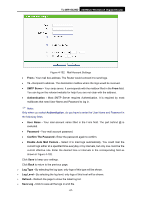
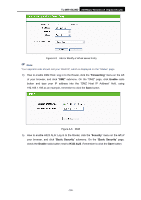
TL-WR1042ND 300Mbps Wireless N Gigabit Router Figure 4-102 Mail Account Settings • From - Your mail box address. The Router would connect it to send logs. • To - Recipient's address. The destination mailbox where the logs would be received. • SMTP Server - Your smtp server. It corresponds with the mailbox filled in the From field. You can log on the relevant website for help if you are not clear with the address. • Authentication - Most SMTP Server requires Authentication. It is required by most mailboxes that need User Name and Password to log in. ) Note: Only when you select Authentication, do you have to enter the User Name and Password in the following fields. • User Name - Your mail account name filled in the From field. The part behind @ is excluded. • Password - Your mail account password. • Confirm The Password - Enter the password again to confirm. • Enable Auto Mail Feature - Select it to mail logs automatically. You could mail the current logs either at a specified time everyday or by intervals, but only one could be the current effective rule. Enter the desired time or intervals in the corresponding field as shown in Figure 4-102. Click Save to keep your settings. Click Back to return to the previous page. ¾ Log Type - By selecting the log type, only logs of this type will be shown. ¾ Log Level - By selecting the log level, only logs of this level will be shown. ¾ Refresh - Refresh the page to show the latest log list. ¾ Save Log - Click to save all the logs in a txt file. -97-
-
 1
1 -
2
-
3
-
4
-
5
-
6
-
7
-
8
-
9
-
10
-
11
-
12
-
13
-
14
-
15
-
16
-
17
-
18
-
19
-
20
-
21
-
22
-
23
-
24
-
25
-
26
-
27
-
28
-
29
-
30
-
31
-
32
-
33
-
34
-
35
-
36
-
37
-
38
-
39
-
40
-
41
-
42
-
43
-
44
-
45
-
46
-
47
-
48
-
49
-
50
-
51
-
52
-
53
-
54
-
55
-
56
-
57
-
58
-
59
-
60
-
61
-
62
-
63
-
64
-
65
-
66
-
67
-
68
-
69
-
70
-
71
-
72
-
73
-
74
-
75
-
76
-
77
-
78
-
79
-
80
-
81
-
82
-
83
-
84
-
85
-
86
-
87
-
88
-
89
-
90
-
91
-
92
-
93
-
94
-
95
-
96
-
97
-
98
-
99
-
100
-
 101
101 -
 102
102 -
 103
103 -
 104
104 -
 105
105 -
 106
106 -
 107
107 -
 108
108 -
 109
109 -
 110
110 -
 111
111 -
112
-
113
-
114
-
115
-
116
-
117
-
118
-
119
-
120
 |
 |