Xerox 7500DX System Administrator Guide (English Only) - Page 16
Using a Startup Network Configuration File, About the Configuration File, Configuration File - download
 |
UPC - 095205706048
View all Xerox 7500DX manuals
Add to My Manuals
Save this manual to your list of manuals |
Page 16 highlights
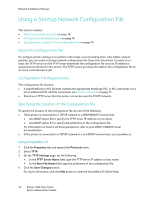
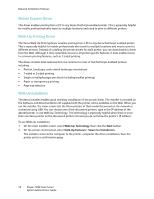
Network Installation Features Using a Startup Network Configuration File This section includes: • About the Configuration File on page 16 • Configuration File Requirements on page 16 • Specifying the Location of the Configuration File on page 16 About the Configuration File To configure printer settings or to perform other tasks, such as loading fonts, color tables, and job patches, you can create a startup network configuration file. Every time the printer is turned on or reset, the TFTP service on the TFTP server downloads the configuration file once an IP address is acquired and confirmed in the printer. The TFTP service processes the data in the configuration file as if it were a standard print job. Configuration File Requirements The configuration file must be: • A valid PostScript or PCL file that contains the appropriate PostScript, PCL, or PJL commands. For a list of additional PCL and PJL commands, see Printer Commands on page 71. • Stored on a TFTP server that the printer can access over the TCP/IP network. Specifying the Location of the Configuration File To specify the location of the configuration file, do one of the following: • If the printer is connected to a TCP/IP network in a DHCP/BOOTP environment: • Use DHCP option 66 to specify the TFTP server IP address or host name. • Use DHCP option 67 to specify the pathname of the configuration file. For information on how to set these parameters, refer to your DHCP or BOOTP server documentation. • If the printer is connected to a TCP/IP network in a non-DHCP environment, use CentreWare IS. Using CentreWare IS 1. Click the Properties tab and expand the Protocols menu. 2. Select TFTP. 3. On the TFTP Settings page, set the following: • In the TFTP Server Name field, type the TFTP server IP address or host name. • In the Boot File Name field, type the pathname of the configuration file. 4. Click the Save Changes button. For more information, click the Help button to view the CentreWare IS Online Help. 16 Phaser 7500 Color Printer System Administrator Guide
-
 1
1 -
2
-
3
-
4
-
5
-
6
-
7
-
8
-
9
-
10
-
 11
11 -
 12
12 -
 13
13 -
 14
14 -
 15
15 -
 16
16 -
 17
17 -
 18
18 -
 19
19 -
 20
20 -
 21
21 -
22
-
23
-
24
-
25
-
26
-
27
-
28
-
29
-
30
-
31
-
32
-
33
-
34
-
35
-
36
-
37
-
38
-
39
-
40
-
41
-
42
-
43
-
44
-
45
-
46
-
47
-
48
-
49
-
50
-
51
-
52
-
53
-
54
-
55
-
56
-
57
-
58
-
59
-
60
-
61
-
62
-
63
-
64
-
65
-
66
-
67
-
68
-
69
-
70
-
71
-
72
-
73
-
74
-
75
-
76
-
77
-
78
-
79
-
80
-
81
-
82
-
83
-
84
-
85
-
86
-
87
-
88
-
89
-
90
-
91
-
92
-
93
-
94
-
95
-
96
-
97
-
98
-
99
-
100
-
101
-
102
-
103
-
104
-
105
-
106
-
107
-
108
-
109
-
110
-
111
-
112
-
113
-
114
-
115
-
116
 |
 |