Xerox 7500DX System Administrator Guide (English Only) - Page 46
Securing the Hard Drive, Selecting the Hard Drive Overwrite Security Option
 |
UPC - 095205706048
View all Xerox 7500DX manuals
Add to My Manuals
Save this manual to your list of manuals |
Page 46 highlights
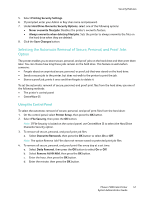
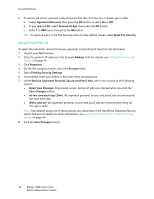
Security Features Securing the Hard Drive This section includes: • Selecting the Hard Drive Overwrite Security Option on page 46 • Selecting the Automatic Removal of Secure, Personal, and Proof Jobs Option on page 47 Selecting the Hard Drive Overwrite Security Option When a file is deleted from the printer's hard drive, only the file name is deleted; the data in the file remains on the hard drive, regardless of the operating system. An unauthorized person could, possibly, retrieve the data in the file that was deleted. Printers with a hard drive have a Hard Drive Overwrite Security option. This option overwrites the data stored on the hard drive of a file marked for deletion using DOD5200.28-M, a U.S. Department of Defense three-pass overwriting process: first with a pattern of 0s (zeros), next with a pattern of 1s, and finally with a random pattern of bits. This is done before the file's directory entry is removed and the storage space on the hard drive is marked as available for reuse. The random pattern of bits stays on the hard drive until it is overwritten by another file. By default, the Hard Drive Overwrite Security option is disabled. To select the Hard Drive Overwrite Security option, use one of the following methods: • The printer control panel • CentreWare IS Using the Control Panel To select the automatic removal of secure, personal, and proof print files from the hard drive: 1. On the control panel, select Printer Setup, then press the OK button. 2. Select File Security, then press the OK button. Note: If File Security is locked on the control panel, use CentreWare IS to select the Hard Drive Overwrite Security option. 3. To remove all secure, personal, and proof print job files: a. Select Overwrite Removals, then press the OK button to select On or Off. Note: The option Remove Job Files does not remove saved or protected print job files. Using CentreWare IS To select the Hard Drive Overwrite Security option: 1. Launch your Web browser. 2. Enter the printer's IP address in the browser Address field. For details, see Finding the Printer's IP Address on page 14. 3. Click Properties. 4. On the left navigation pane, select the Security folder. 46 Phaser 7500 Color Printer System Administrator Guide
-
 1
1 -
2
-
3
-
4
-
5
-
6
-
7
-
8
-
9
-
10
-
11
-
12
-
13
-
14
-
15
-
16
-
17
-
18
-
19
-
20
-
21
-
22
-
23
-
24
-
25
-
26
-
27
-
28
-
29
-
30
-
31
-
32
-
33
-
34
-
35
-
36
-
37
-
38
-
39
-
40
-
 41
41 -
 42
42 -
 43
43 -
 44
44 -
 45
45 -
 46
46 -
 47
47 -
 48
48 -
 49
49 -
 50
50 -
 51
51 -
52
-
53
-
54
-
55
-
56
-
57
-
58
-
59
-
60
-
61
-
62
-
63
-
64
-
65
-
66
-
67
-
68
-
69
-
70
-
71
-
72
-
73
-
74
-
75
-
76
-
77
-
78
-
79
-
80
-
81
-
82
-
83
-
84
-
85
-
86
-
87
-
88
-
89
-
90
-
91
-
92
-
93
-
94
-
95
-
96
-
97
-
98
-
99
-
100
-
101
-
102
-
103
-
104
-
105
-
106
-
107
-
108
-
109
-
110
-
111
-
112
-
113
-
114
-
115
-
116
 |
 |
