Xerox 7500DX System Administrator Guide (English Only) - Page 35
Cloning
 |
UPC - 095205706048
View all Xerox 7500DX manuals
Add to My Manuals
Save this manual to your list of manuals |
Page 35 highlights
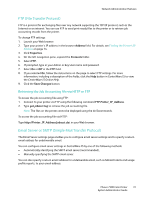
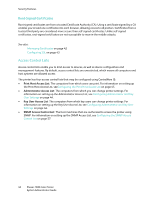
Cloning Network Administration Features Cloning enables you to configure one printer and then copy that configuration to another printer on the same network. Use CentreWare IS to select the settings you want to clone from one printer to another. To clone settings from one printer to another printer using CentreWare IS: 1. Launch your Web browser. 2. Type your printer's IP address in the browser Address field. For details, see Finding the Printer's IP Address on page 14. 3. Click Properties. 4. On the left navigation pane, select Clone Printer. 5. If prompted, type in your Admin or Key User name and password. 6. On the Clone Printer page, select the settings you want to clone from the source printer or click Check All to select all the settings. The settings are: 802.1X Control Panel Lockout Date and Time Email Server EtherTalk HTTPS Input Trays IPP LPR PCL PostScript Printing Security Settings Security SNMP TCP/IP (v6) Settings UPnP Warmup Access Control Custom Paper Types DNS/WINS E-Supplies FTP Information Forwarding Interfaces IPsec Mail Alerts Port 9100 Printer Defaults Remote Printing SLP TCP/IP Settings TFTP Usage Profile Properties Web Links 7. Type the IP address or DNS Name of the destination printer in the IP Address or DNS Name field. 8. (Optional) To assign a printer name to the destination printer, type this name in the Printer Name (SNMP System Name) field. Phaser 7500 Color Printer 35 System Administrator Guide
-
 1
1 -
2
-
3
-
4
-
5
-
6
-
7
-
8
-
9
-
10
-
11
-
12
-
13
-
14
-
15
-
16
-
17
-
18
-
19
-
20
-
21
-
22
-
23
-
24
-
25
-
26
-
27
-
28
-
29
-
 30
30 -
 31
31 -
 32
32 -
 33
33 -
 34
34 -
 35
35 -
 36
36 -
 37
37 -
 38
38 -
 39
39 -
 40
40 -
41
-
42
-
43
-
44
-
45
-
46
-
47
-
48
-
49
-
50
-
51
-
52
-
53
-
54
-
55
-
56
-
57
-
58
-
59
-
60
-
61
-
62
-
63
-
64
-
65
-
66
-
67
-
68
-
69
-
70
-
71
-
72
-
73
-
74
-
75
-
76
-
77
-
78
-
79
-
80
-
81
-
82
-
83
-
84
-
85
-
86
-
87
-
88
-
89
-
90
-
91
-
92
-
93
-
94
-
95
-
96
-
97
-
98
-
99
-
100
-
101
-
102
-
103
-
104
-
105
-
106
-
107
-
108
-
109
-
110
-
111
-
112
-
113
-
114
-
115
-
116
 |
 |
