Yamaha DJX-II Owner's Manual - Page 53
Sampling
 |
View all Yamaha DJX-II manuals
Add to My Manuals
Save this manual to your list of manuals |
Page 53 highlights
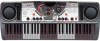
Chapter 16 Sampling Sampling has become such an important music-making tool - in virtually all styles of modern music. Thanks to the DJX-II's Sampler functions, you can use it for your music, too! 72 Sample it! Roll your own samples! With the DJX-II, you can record any audio source - such as a CD or MD player, or your own voice with a microphone - and create and play your own original samples. It's simple! Just follow the easy steps here, and you're off! 1 Set up the source. Connect the external audio source (CD player, MD player, cassette deck, microphone, etc.) to the appropriate rear panel jack on the DJX-II. • Never connect a line level signal (CD player, cassette deck, electronic instrument, etc.) into the MIC input jack! Doing this could damage the DJX-II and its Sampling functions. Start playing back the audio. If your audio source has a level (volume) control, make sure that is set appropriately. Also, adjust the INPUT LEVEL knob on the DJX-II so that the level is high enough to record properly, but not so high that there is distortion. CD MD N Helpful hint: While you're playing back the audio during setup, start one of the Patterns of the DJX-II - preferably one you plan on using with the sample. With the Master Volume up to an appropriate level, this lets you set the level of the external audio so that it will be heard properly as a sample. 2 Set Sampling to standby. Stop the audio, then simultaneously hold down the SAMPLING/STOP button and press one of the SAMPLE PADS (1 - 6). You're ready to record! G Sampling indications Notice that while you hold down the SAMPLING/STOP button, the display indi- cates the level of the signal. Also, when you set Sampling to standby, the letters "SAmp" flash; when sample recording starts, the letters light continuously. 3 Start/stop recording. Start the audio source, or sing into the microphone - sampling starts automatically! Maximum sample time for one pad is three seconds and maximum sample time for all pads is six seconds. To stop recording (if your sample is shorter than three seconds), press SAMPLING/STOP again. 4 Play the sample. Simply press the appropriate Sample Pad to play the sample. The DJX-II gives you six pads for recording your samples. N Be careful! Avoid pressing three or more panel buttons simultaneously (for example, in trying to play three samples at the same time, etc.). Doing so can cause the DJX-II to behave erratically. 53
-
 1
1 -
2
-
3
-
4
-
5
-
6
-
7
-
8
-
9
-
10
-
11
-
12
-
13
-
14
-
15
-
16
-
17
-
18
-
19
-
20
-
21
-
22
-
23
-
24
-
25
-
26
-
27
-
28
-
29
-
30
-
31
-
32
-
33
-
34
-
35
-
36
-
37
-
38
-
39
-
40
-
41
-
42
-
43
-
44
-
45
-
46
-
47
-
 48
48 -
 49
49 -
 50
50 -
 51
51 -
 52
52 -
 53
53 -
 54
54 -
 55
55 -
 56
56 -
 57
57 -
 58
58 -
59
-
60
-
61
-
62
-
63
-
64
-
65
-
66
-
67
-
68
-
69
-
70
-
71
-
72
-
73
-
74
-
75
-
76
-
77
-
78
-
79
-
80
-
81
-
82
-
83
-
84
-
85
-
86
-
87
-
88
-
89
-
90
-
91
-
92
-
93
-
94
-
95
-
96
-
97
-
98
-
99
-
100
 |
 |
