3Com NJ220 User Manual - Page 9
Installing the IntelliJack, Connect the IntelliJack to the network - 20 power supply
 |
UPC - 662705476865
View all 3Com NJ220 manuals
Add to My Manuals
Save this manual to your list of manuals |
Page 9 highlights
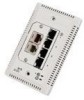
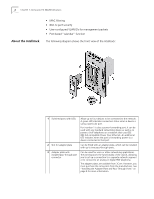
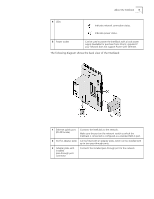
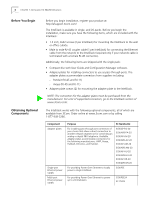
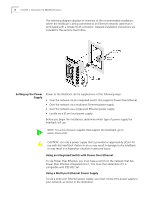
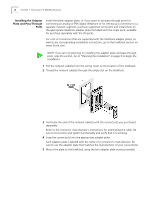
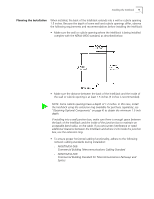
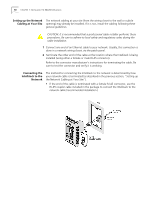
Installing the IntelliJack Installing the IntelliJack 5 Component Local power supply VoIP telephone power cable Extension ring Purpose For locally powering a single IntelliJack; required if your network does not support Power Over Ethernet. For powering a VoIP telephone on a network that uses Capacitive Power Discovery Process-compatible Power Over Ethernet. For ensuring that the IntelliJack is properly mounted to a cubicle; required if the cubicle opening: n Has a depth of fewer than 1.5 inches. n Does not support the NEMA-WD6 standard. n Does not have pre-drilled screw holes for standard mounting. 3C Number(s) 3CNJPSL 3CNJVOIPMOD-NBX 3CNJVOIPMOD-20 3CNJVOIP-CPOD 3CNJVOIP-CPOD-20 3CNJEXTRING Installing the IntelliJack consists of the following steps: 1 Set up the power supply (page 6). 2 Install the adapter plate and pass-through ports (page 8). 3 Plan the installation (page 9). 4 Set up the network cabling at your site (page 10). 5 Connect the IntelliJack to the network (page 10). 6 Mount the IntelliJack to the wall or office cubicle (page 11). 7 Connect the local power supply (page 12; optional) not required if your network supports Power Over Ethernet or if you are using a single-port or multi-port power supply). 8 Connect network devices to the IntelliJack (page 13).
-
 1
1 -
2
-
3
-
 4
4 -
 5
5 -
 6
6 -
 7
7 -
 8
8 -
 9
9 -
 10
10 -
 11
11 -
 12
12 -
 13
13 -
 14
14 -
15
-
16
-
17
-
18
-
19
-
20
-
21
-
22
-
23
-
24
-
25
-
26
-
27
-
28
-
29
-
30
-
31
-
32
-
33
-
34
-
35
-
36
-
37
-
38
-
39
-
40
-
41
-
42
-
43
-
44
-
45
-
46
-
47
-
48
-
49
-
50
-
51
-
52
-
53
-
54
-
55
-
56
-
57
-
58
-
59
-
60
-
61
-
62
-
63
-
64
-
65
-
66
-
67
-
68
-
69
-
70
-
71
-
72
-
73
-
74
-
75
-
76
-
77
-
78
-
79
-
80
-
81
-
82
 |
 |