Acer easyStore H340 Aspire easyStore H340 User's Guide - Page 122
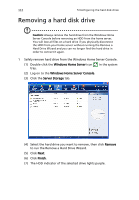
Insert the new drive into the right side of the carrier aligning
 |
View all Acer easyStore H340 manuals
Add to My Manuals
Save this manual to your list of manuals |
Page 122 highlights
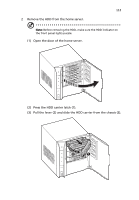
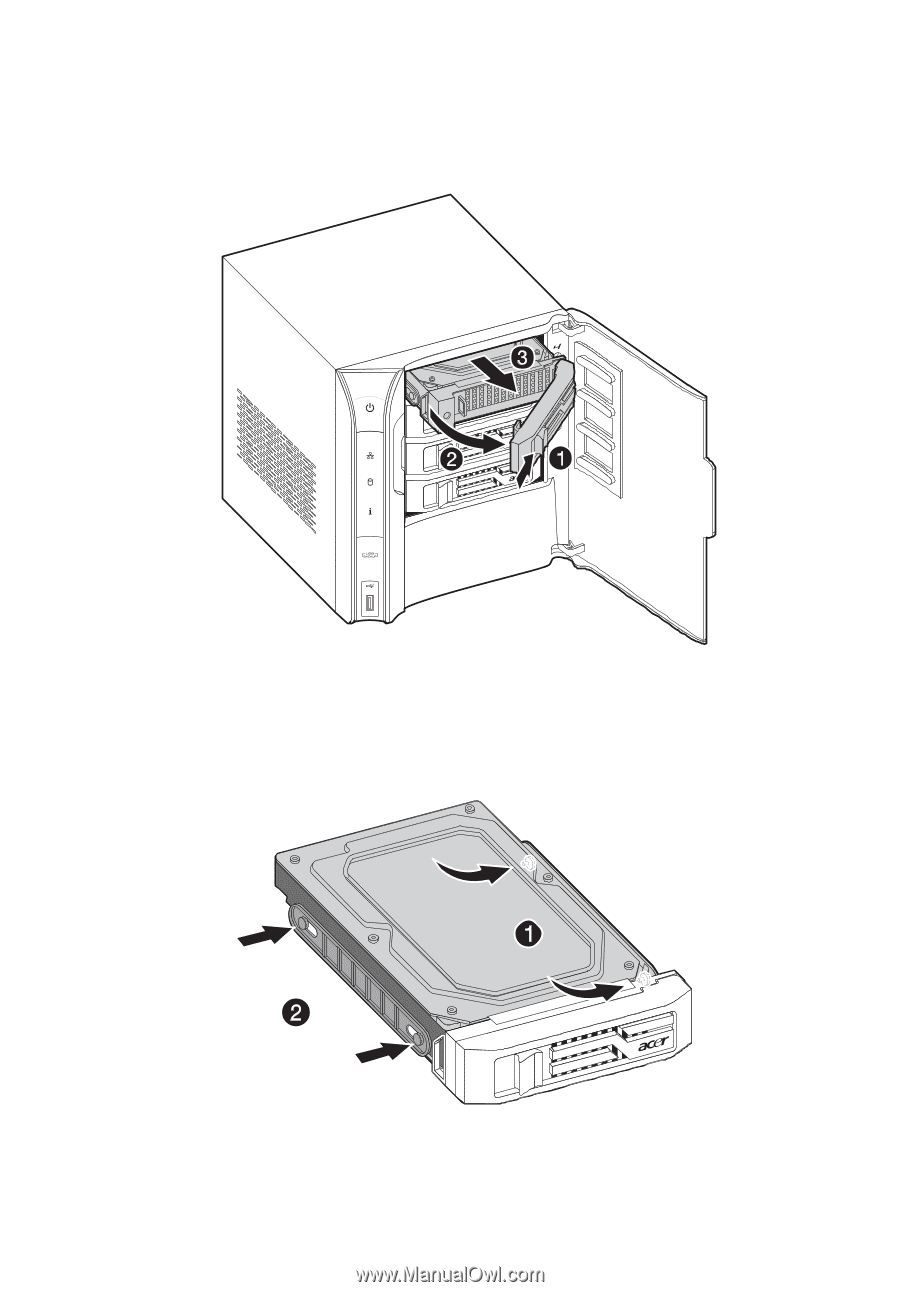
108 5 Configuring the hard disk drive (2) Remove the HDD carrier by pressing the HDD carrier latch (1). (3) Pull the lever (2) and slide the HDD carrier from the chassis (3). (4) Insert the new drive into the right side of the carrier aligning the pins into the HDD's mounting holes (1). (5) Slightly bend the left side rail and insert the pins into the HDD's mounting holes (2).
-
 1
1 -
2
-
3
-
4
-
5
-
6
-
7
-
8
-
9
-
10
-
11
-
12
-
13
-
14
-
15
-
16
-
17
-
18
-
19
-
20
-
21
-
22
-
23
-
24
-
25
-
26
-
27
-
28
-
29
-
30
-
31
-
32
-
33
-
34
-
35
-
36
-
37
-
38
-
39
-
40
-
41
-
42
-
43
-
44
-
45
-
46
-
47
-
48
-
49
-
50
-
51
-
52
-
53
-
54
-
55
-
56
-
57
-
58
-
59
-
60
-
61
-
62
-
63
-
64
-
65
-
66
-
67
-
68
-
69
-
70
-
71
-
72
-
73
-
74
-
75
-
76
-
77
-
78
-
79
-
80
-
81
-
82
-
83
-
84
-
85
-
86
-
87
-
88
-
89
-
90
-
91
-
92
-
93
-
94
-
95
-
96
-
97
-
98
-
99
-
100
-
101
-
102
-
103
-
104
-
105
-
106
-
107
-
108
-
109
-
110
-
111
-
112
-
113
-
114
-
115
-
116
-
 117
117 -
 118
118 -
 119
119 -
 120
120 -
 121
121 -
 122
122 -
 123
123 -
 124
124 -
 125
125 -
 126
126 -
 127
127 -
128
-
129
-
130
-
131
-
132
-
133
-
134
-
135
-
136
-
137
-
138
-
139
-
140
-
141
-
142
-
143
-
144
-
145
-
146
-
147
-
148
 |
 |
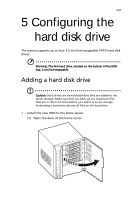
5 Configuring the hard disk drive
108
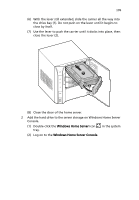
(2)
Remove the HDD carrier by pressing the HDD carrier latch (1).
(3)
Pull the lever (2) and slide the HDD carrier from the chassis (3).
(4)
Insert the new drive into the right side of the carrier aligning
the pins into the HDD’s mounting holes (1).
(5)
Slightly bend the left side rail and insert the pins into the
HDD’s mounting holes (2).