Acer easyStore H340 Aspire easyStore H340 User's Guide - Page 78
Create user accounts
 |
View all Acer easyStore H340 manuals
Add to My Manuals
Save this manual to your list of manuals |
Page 78 highlights
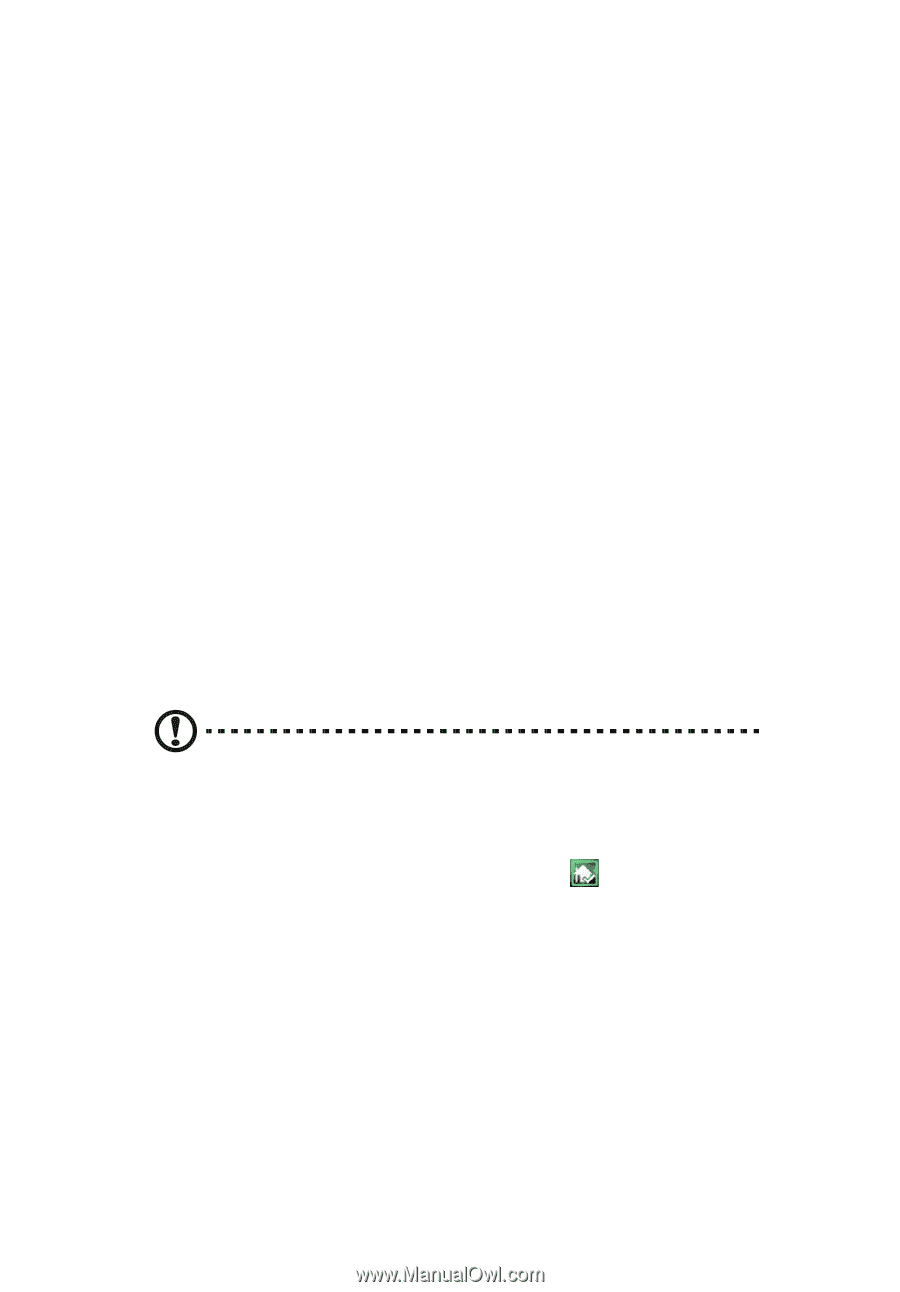
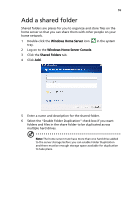
64 4 Managing the server Create user accounts After you complete Windows Home Server Setup and install the Windows Home Server Connector software on all of your home computers, you are ready to set up your user accounts for the people in your household. There are two types of user accounts that you can set up for the home server: • Guest account - If you want everybody to use the same user account to access the home server, you must enable the guest account feature in the console. • Personal user account - If you want an individual to access the home server with their own personal user account, you must add matching user accounts on Windows Home Server and give access privileges to individual shared folders. To enable the guest account: The guest account can be used to give access to shared folders for users that do not have their own user account for Windows Home Server. Enabling the guest account will provide default Read permission to the shared folders: Music, Photos, Videos, Public, and Software. Caution: If you enable the guest account, your home server is open to anyone who connects to your home network. They can access all of the shared folders and other resources on your home server. 1 Double-click the Windows Home Server icon tray. in the system 2 Log on to the Windows Home Server Console.
-
 1
1 -
2
-
3
-
4
-
5
-
6
-
7
-
8
-
9
-
10
-
11
-
12
-
13
-
14
-
15
-
16
-
17
-
18
-
19
-
20
-
21
-
22
-
23
-
24
-
25
-
26
-
27
-
28
-
29
-
30
-
31
-
32
-
33
-
34
-
35
-
36
-
37
-
38
-
39
-
40
-
41
-
42
-
43
-
44
-
45
-
46
-
47
-
48
-
49
-
50
-
51
-
52
-
53
-
54
-
55
-
56
-
57
-
58
-
59
-
60
-
61
-
62
-
63
-
64
-
65
-
66
-
67
-
68
-
69
-
70
-
71
-
72
-
 73
73 -
 74
74 -
 75
75 -
 76
76 -
 77
77 -
 78
78 -
 79
79 -
 80
80 -
 81
81 -
 82
82 -
 83
83 -
84
-
85
-
86
-
87
-
88
-
89
-
90
-
91
-
92
-
93
-
94
-
95
-
96
-
97
-
98
-
99
-
100
-
101
-
102
-
103
-
104
-
105
-
106
-
107
-
108
-
109
-
110
-
111
-
112
-
113
-
114
-
115
-
116
-
117
-
118
-
119
-
120
-
121
-
122
-
123
-
124
-
125
-
126
-
127
-
128
-
129
-
130
-
131
-
132
-
133
-
134
-
135
-
136
-
137
-
138
-
139
-
140
-
141
-
142
-
143
-
144
-
145
-
146
-
147
-
148
 |
 |