Adaptec LSM-FC2002 Installation Guide - Page 77
Installing and Removing a Disk Drive Carrier, Installing a Disk, Drive Carrier, Removing a Disk
 |
UPC - 760884145067
View all Adaptec LSM-FC2002 manuals
Add to My Manuals
Save this manual to your list of manuals |
Page 77 highlights
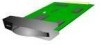
77 Installing and Removing a Disk Drive Carrier The disk drive carriers are located in the front of the enclosure. Follow these procedures to install and remove the disk drive carrier. Installing a Disk Drive Carrier 1 Select the disk drive slot into which the disk drive carrier is to be installed and remove the carrier blank if there is one installed. 2 Orient the disk drive carrier such that the LEDs are on the top (on the right for desk side systems). 3 With the cam lever fully open slide the carrier into the slot until the lever starts to close. 4 Fully close the cam lever. The lever is fully closed, and the drive locked in place, when the lever "clicks" into position. Removing a Disk Drive Carrier 1 Using your finger, release the locking tab by pressing it in the direction shown in Figure 5-1, and pull the cam lever towards you. 2 Fully open the cam lever. (approx. 90o to enclosure). 3 With the cam lever open wait for at least one minute to allow the disk drive to spin down fully before removing it. 4 Gently, pull the disk drive carrier out of the enclosure. CAUTION: Immediately replace the disk drive carrier or install a disk drive carrier blank to maintain correct airflow. Installing and Removing a Disk Drive Carrier
-
 1
1 -
2
-
3
-
4
-
5
-
6
-
7
-
8
-
9
-
10
-
11
-
12
-
13
-
14
-
15
-
16
-
17
-
18
-
19
-
20
-
21
-
22
-
23
-
24
-
25
-
26
-
27
-
28
-
29
-
30
-
31
-
32
-
33
-
34
-
35
-
36
-
37
-
38
-
39
-
40
-
41
-
42
-
43
-
44
-
45
-
46
-
47
-
48
-
49
-
50
-
51
-
52
-
53
-
54
-
55
-
56
-
57
-
58
-
59
-
60
-
61
-
62
-
63
-
64
-
65
-
66
-
67
-
68
-
69
-
70
-
71
-
 72
72 -
 73
73 -
 74
74 -
 75
75 -
 76
76 -
 77
77 -
 78
78 -
 79
79 -
 80
80 -
 81
81 -
 82
82 -
83
-
84
-
85
-
86
-
87
-
88
-
89
-
90
-
91
-
92
-
93
-
94
-
95
-
96
-
97
-
98
-
99
-
100
-
101
-
102
-
103
-
104
-
105
-
106
-
107
-
108
-
109
-
110
 |
 |
