Brother International ™ QL-720NW Quick Setup Guide - English and Spa - Page 23
For wired network interface users (Windows®) (QL-720NW only), Standard Installation
 |
View all Brother International ™ QL-720NW manuals
Add to My Manuals
Save this manual to your list of manuals |
Page 23 highlights
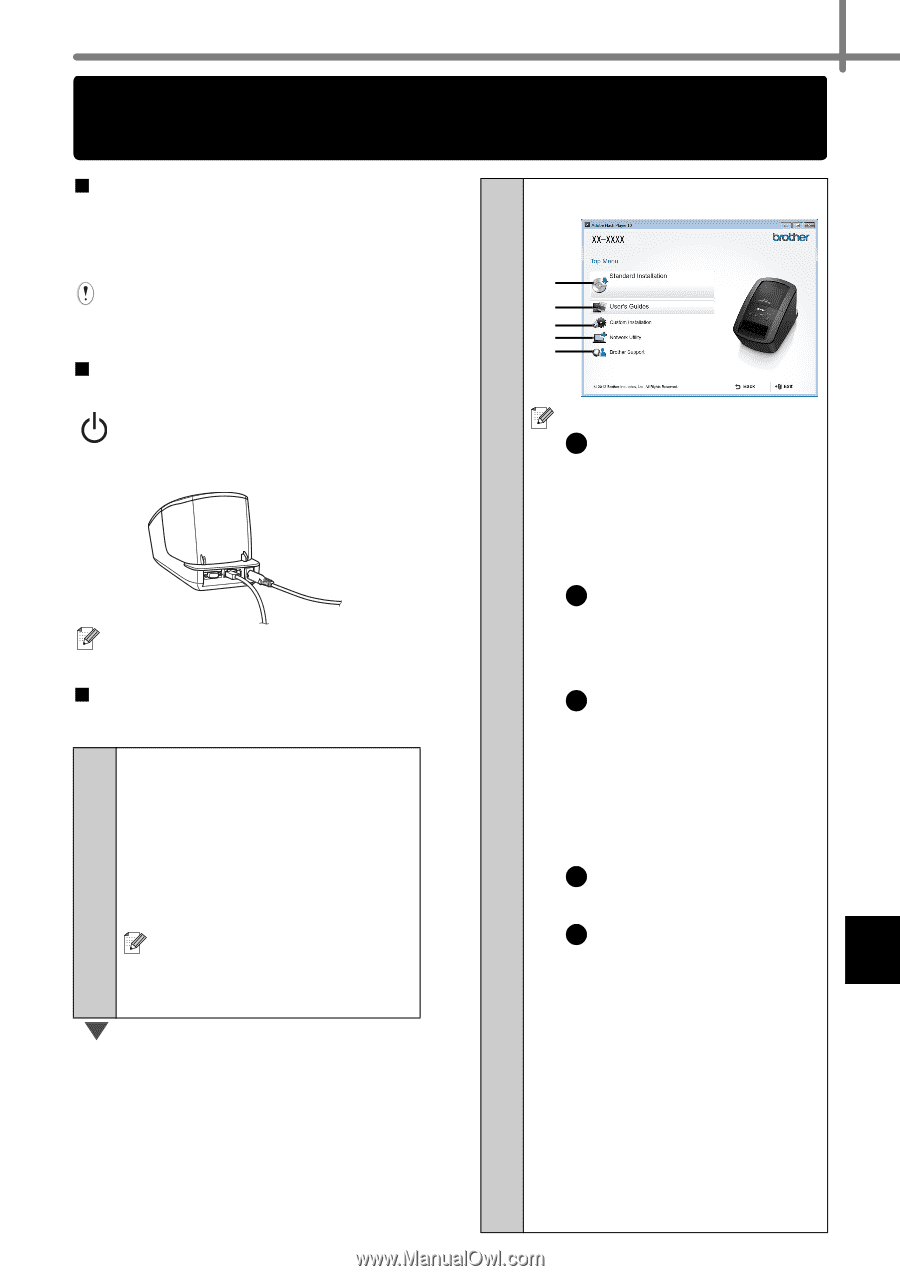
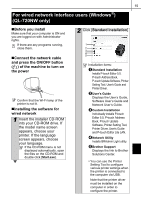
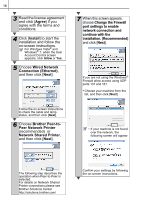
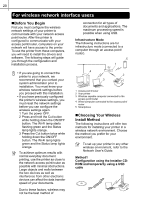
15 For wired network interface users (Windows®) (QL-720NW only) „Before you install Make sure that your computer is ON and you are logged on with Administrator rights. If there are any programs running, close them. „Connect the network cable and press the ON/OFF button ( ) of the machine to turn on the power Confirm that the Wi-Fi lamp of the printer is not lit. „Installing the software for wired network 1 Insert the installer CD-ROM into your CD-ROM drive. If the model name screen appears, choose your printer. If the language screen appears, choose your language. If the CD-ROM menu is not displayed automatically, open the files on the CD-ROM and double click [Start.exe]. 2 Click [Standard Installation]. 1 2 3 4 5 Installation items: 1 Standard Installation Installs P-touch Editor 5.0, P-touch Address Book, P-touch Update Software, Printer Setting Tool, User's Guide and Printer Driver. 2 User's Guide Displays the User's Guide, Software User's Guide and Network User's Guide. 3 Custom Installation Individually installs P-touch Editor 5.0, P-touch Address Book, P-touch Update Software, Printer Setting Tool, Printer Driver, User's Guide and P-touch Editor Lite LAN. 4 Network Utility Installs BRAdmin Light utility. 5 Brother Support Displays the link to Brother Solutions Center. • You can use the Printer Setting Tool to configure various printer settings when the printer is connected to the computer via USB. Note that the printer driver must be installed on the computer in order to configure the printer.
-
 1
1 -
2
-
3
-
4
-
5
-
6
-
7
-
8
-
9
-
10
-
11
-
12
-
13
-
14
-
15
-
16
-
17
-
 18
18 -
 19
19 -
 20
20 -
 21
21 -
 22
22 -
 23
23 -
 24
24 -
 25
25 -
 26
26 -
 27
27 -
 28
28 -
29
-
30
-
31
-
32
-
33
-
34
-
35
-
36
-
37
-
38
-
39
-
40
-
41
-
42
-
43
-
44
-
45
-
46
-
47
-
48
-
49
-
50
-
51
-
52
-
53
-
54
-
55
-
56
-
57
-
58
-
59
-
60
-
61
-
62
-
63
-
64
-
65
-
66
-
67
-
68
-
69
-
70
-
71
-
72
-
73
-
74
-
75
-
76
-
77
-
78
-
79
-
80
-
81
-
82
-
83
-
84
-
85
-
86
-
87
-
88
-
89
-
90
-
91
-
92
-
93
 |
 |