Brother International ™ QL-720NW Quick Setup Guide - English and Spa - Page 35
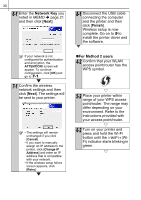
For Method 2 users, Cancel, on your printer lights
 |
View all Brother International ™ QL-720NW manuals
Add to My Manuals
Save this manual to your list of manuals |
Page 35 highlights
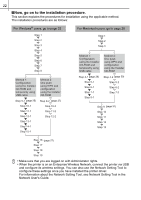
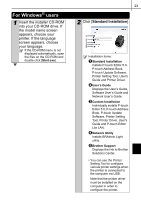
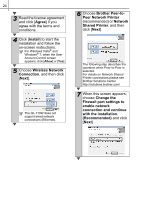
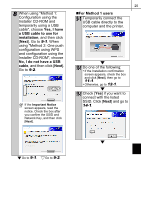
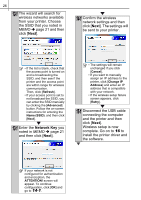
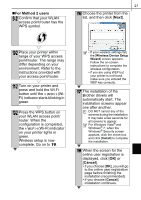
„For Method 2 users 9-2 Confirm that your WLAN access point/router has the WPS symbol. 27 16 Choose the printer from the list, and then click [Next]. 10-2 Place your printer within range of your WPS access point/router. The range may differ depending on your environment. Refer to the instructions provided with your access point/router. 11-2 Turn on your printer and press and hold the Wi-Fi button until the (Wi- Fi) indicator starts blinking in green. 12-2 Press the WPS button on your WLAN access point/ router. When the configuration is completed, the (Wi-Fi) indicator on your printer lights in green. Wireless setup is now complete. Go on to 16. • If your wireless settings fail, the [Wireless Device Setup Wizard] screen appears. Follow the on-screen instructions to complete the wireless configuration. • If you are using WEP but your printer is not found, make sure you entered the WEP key correctly. 17 The installation of the Brother drivers will automatically start. The installation screens appear one after another. DO NOT cancel any of the screens during the installation. It may take a few seconds for all screens to appear. For Windows Vista® and Windows® 7, when the Windows® Security screen appears, click the check box and click [Install] to complete the installation. 18 When the screen for the online user registration is displayed, click [OK] or [Cancel]. • If you choose [OK], you will go to the online user registration page before finishing the installation (recommended). • If you choose [Cancel], installation continues.
-
 1
1 -
2
-
3
-
4
-
5
-
6
-
7
-
8
-
9
-
10
-
11
-
12
-
13
-
14
-
15
-
16
-
17
-
18
-
19
-
20
-
21
-
22
-
23
-
24
-
25
-
26
-
27
-
28
-
29
-
 30
30 -
 31
31 -
 32
32 -
 33
33 -
 34
34 -
 35
35 -
 36
36 -
 37
37 -
 38
38 -
 39
39 -
 40
40 -
41
-
42
-
43
-
44
-
45
-
46
-
47
-
48
-
49
-
50
-
51
-
52
-
53
-
54
-
55
-
56
-
57
-
58
-
59
-
60
-
61
-
62
-
63
-
64
-
65
-
66
-
67
-
68
-
69
-
70
-
71
-
72
-
73
-
74
-
75
-
76
-
77
-
78
-
79
-
80
-
81
-
82
-
83
-
84
-
85
-
86
-
87
-
88
-
89
-
90
-
91
-
92
-
93
 |
 |
