Brother International ™ QL-720NW Quick Setup Guide - English and Spa - Page 39
For Simple Network
 |
View all Brother International ™ QL-720NW manuals
Add to My Manuals
Save this manual to your list of manuals |
Page 39 highlights
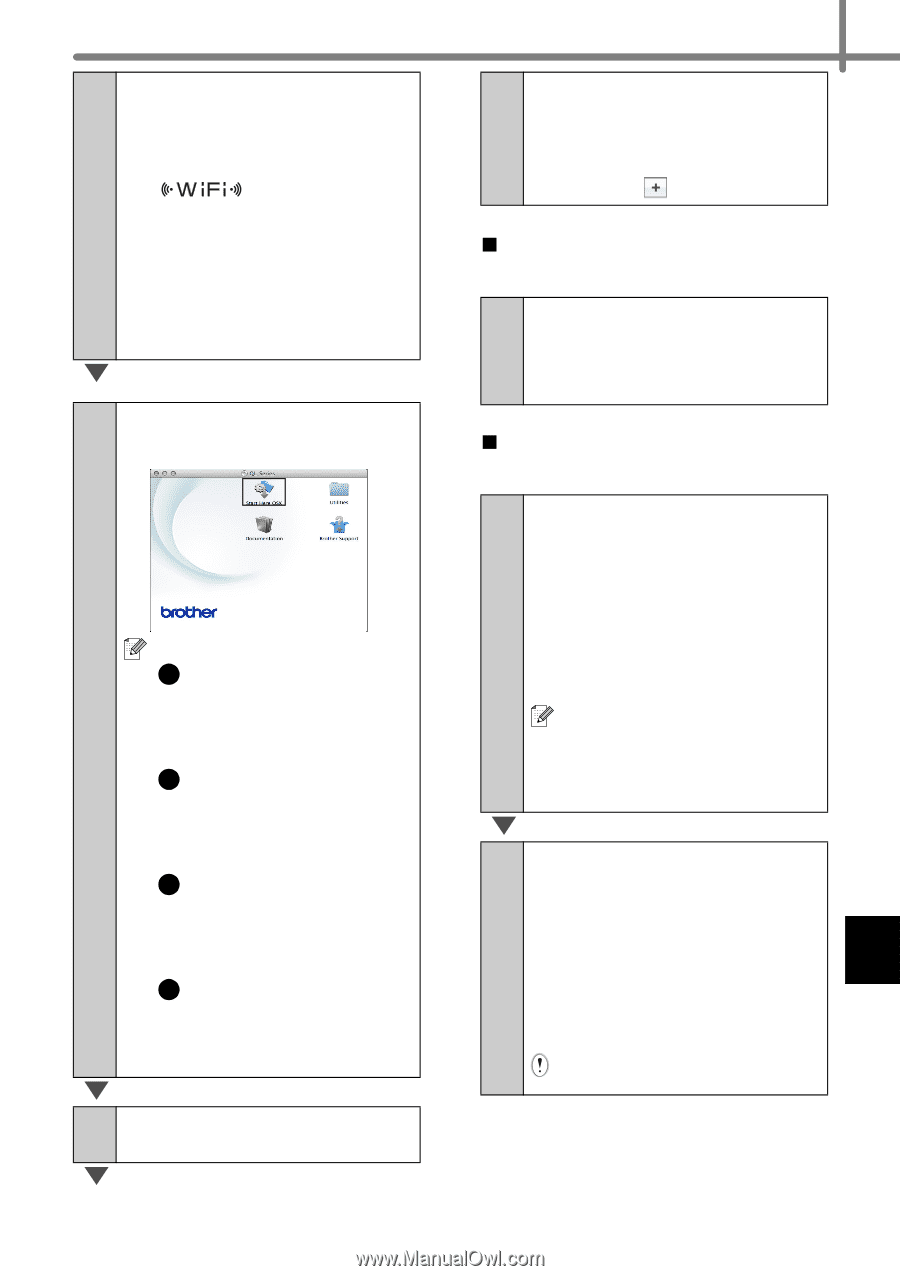
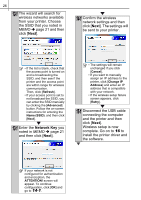
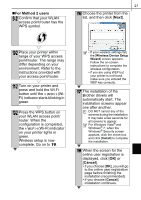
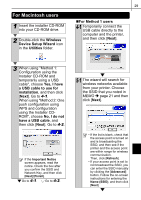
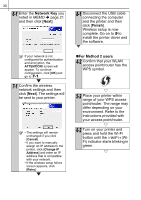
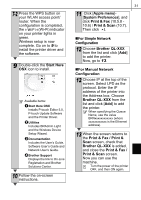
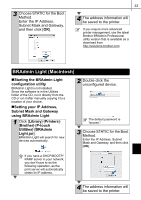
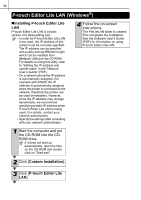
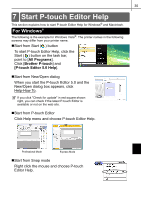
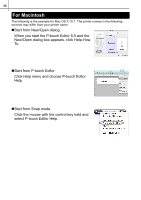
7-2 Press the WPS button on your WLAN access point/ router. When the configuration is completed, the (Wi-Fi) indicator on your printer lights in green. Wireless setup is now complete. Go on to 9 to install the printer driver and the software. 9 Double-click the Start Here OSX icon to install. Available items: 1 Start Here OSX Installs P-touch Editor 5.0, P-touch Update Software and the Printer Driver. 2 Utilities Includes BRAdmin Light and the Wireless Device Setup Wizard. 3 Documentation Includes the User's Guide, Software User's Guide and Network User's Guide. 4 Brother Support Displays the link to On-Line Registration and Brother Solutions Center. 10 Follow the on-screen instructions. 31 11 Click [Apple menu][System Preferences], and click Print & Fax (10.5.8 10.6) / Print & Scan (10.7). Then click . „For Simple Network Configuration 12 Choose Brother QL-XXX from the list and click [Add] to add the printer. Now, go to 13. „For Manual Network Configuration 12 Choose IP at the top of the screen. Select LPD as the protocol. Enter the IP address of the printer into the Address box. Choose Brother QL-XXX from the list and click [Add] to add the printer. When specifying the Queue Name, use the value BRNxxxxxxxxxxxx (where xxxxxxxxxxxx is the Ethernet address). 13 When the screen returns to the Print & Fax / Print & Scan screen, check that Brother QL-XXX is added, and close the Print & Fax / Print & Scan screen. Now you can use the machine. Turn the power of the printer OFF, and then ON again.
-
 1
1 -
2
-
3
-
4
-
5
-
6
-
7
-
8
-
9
-
10
-
11
-
12
-
13
-
14
-
15
-
16
-
17
-
18
-
19
-
20
-
21
-
22
-
23
-
24
-
25
-
26
-
27
-
28
-
29
-
30
-
31
-
32
-
33
-
 34
34 -
 35
35 -
 36
36 -
 37
37 -
 38
38 -
 39
39 -
 40
40 -
 41
41 -
 42
42 -
 43
43 -
 44
44 -
45
-
46
-
47
-
48
-
49
-
50
-
51
-
52
-
53
-
54
-
55
-
56
-
57
-
58
-
59
-
60
-
61
-
62
-
63
-
64
-
65
-
66
-
67
-
68
-
69
-
70
-
71
-
72
-
73
-
74
-
75
-
76
-
77
-
78
-
79
-
80
-
81
-
82
-
83
-
84
-
85
-
86
-
87
-
88
-
89
-
90
-
91
-
92
-
93
 |
 |