Brother International BES-963 Instruction Manual - English - Page 132
Turn off the MENDING lamp No. 2 at the, to move
 |
View all Brother International BES-963 manuals
Add to My Manuals
Save this manual to your list of manuals |
Page 132 highlights
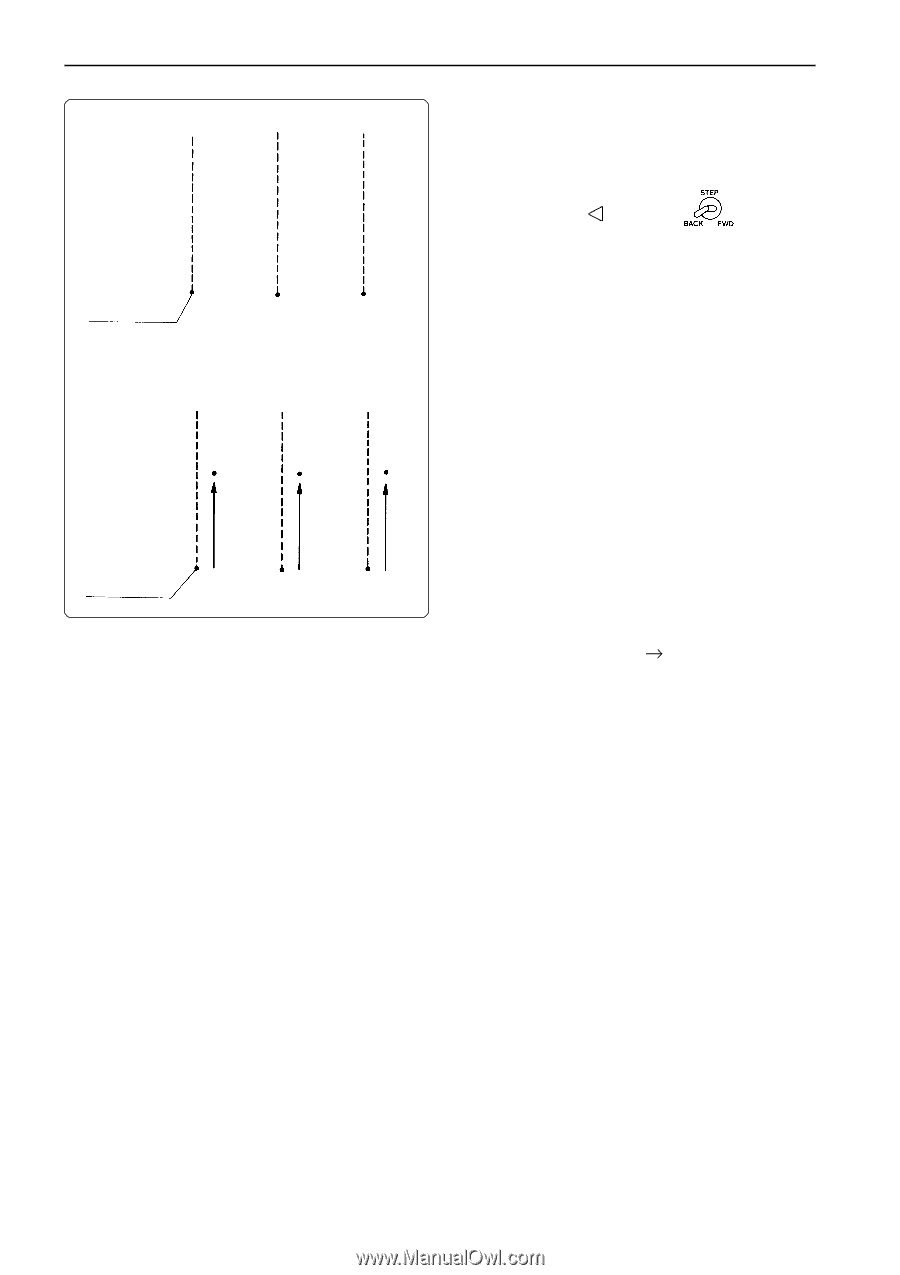
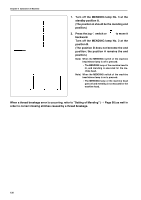
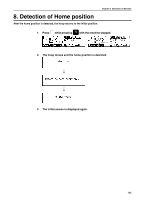
Chapter 6 Operation of Machine No.1 Stitch No.2 Stitch No.3 Stitch Stand by position A No.3 Mending LED is off. No.1 Stitch No.2 Stitch No.3 Stitch B Mending LED Stand by position A 1. Turn off the MENDING lamp No. 3 at the standby position A. (The position A should be the mending end position.) 2. Press the jog switch or to move it backward. Turn off the MENDING lamp No. 2 at the position B. (The position B does not become the end position; the position A remains the end position.) Note) When the MENDING switch of the machine head whose lamp is off is pressed: • The MENDING lamp of the machine head is lit, and mending is executed for the machine head. Note) When the MENDING switch of the machine head whose lamp is on is pressed: • The MENDING lamp of the machine head goes off and mending is not excuted for the machine head. When a thread breakage error is occurring, refer to "Setting of Mending" ( Page 98) as well in order to correct missing stitches caused by a thread breakage. 130 BES-963BC • BES-1263BC
-
 1
1 -
2
-
3
-
4
-
5
-
6
-
7
-
8
-
9
-
10
-
11
-
12
-
13
-
14
-
15
-
16
-
17
-
18
-
19
-
20
-
21
-
22
-
23
-
24
-
25
-
26
-
27
-
28
-
29
-
30
-
31
-
32
-
33
-
34
-
35
-
36
-
37
-
38
-
39
-
40
-
41
-
42
-
43
-
44
-
45
-
46
-
47
-
48
-
49
-
50
-
51
-
52
-
53
-
54
-
55
-
56
-
57
-
58
-
59
-
60
-
61
-
62
-
63
-
64
-
65
-
66
-
67
-
68
-
69
-
70
-
71
-
72
-
73
-
74
-
75
-
76
-
77
-
78
-
79
-
80
-
81
-
82
-
83
-
84
-
85
-
86
-
87
-
88
-
89
-
90
-
91
-
92
-
93
-
94
-
95
-
96
-
97
-
98
-
99
-
100
-
101
-
102
-
103
-
104
-
105
-
106
-
107
-
108
-
109
-
110
-
111
-
112
-
113
-
114
-
115
-
116
-
117
-
118
-
119
-
120
-
121
-
122
-
123
-
124
-
125
-
126
-
 127
127 -
 128
128 -
 129
129 -
 130
130 -
 131
131 -
 132
132 -
 133
133 -
 134
134 -
 135
135 -
 136
136 -
 137
137 -
138
-
139
-
140
-
141
-
142
-
143
-
144
-
145
-
146
-
147
-
148
-
149
-
150
-
151
-
152
-
153
-
154
-
155
-
156
-
157
-
158
-
159
-
160
-
161
-
162
-
163
-
164
-
165
-
166
-
167
-
168
-
169
-
170
-
171
-
172
-
173
-
174
-
175
-
176
-
177
-
178
-
179
-
180
-
181
-
182
-
183
-
184
 |
 |