Brother International CE-5500/CE-5500PRW Operation Manual - Page 17
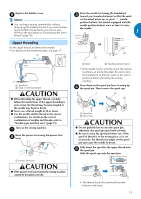
Upper threading
 |
View all Brother International CE-5500/CE-5500PRW manuals
Add to My Manuals
Save this manual to your list of manuals |
Page 17 highlights
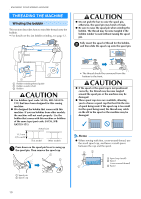
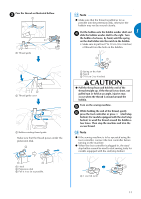
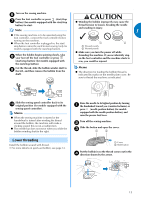
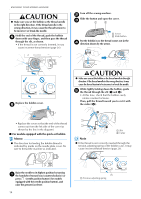
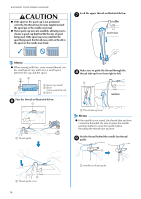
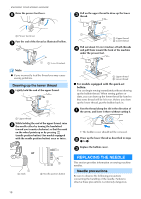
Replace the bobbin cover. f Memo ● You can begin sewing immediately without drawing up the bobbin thread. If you want to draw up the bobbin thread before you start to sew, follow to the procedure in "Drawing up the lower thread" (page 18). Upper threading Set the upper thread and thread the needle. • For details on the needle threader, see page 17. Raise the needle by turning the handwheel c toward you (counterclockwise) so that the mark on the wheel points up, or press (needle position button) (for models equipped with the needle position button) once or twice to raise the needle. 1 or a Spool pin b Mark on the handwheel CAUTION ● When threading the upper thread, carefully follow the instructions. If the upper threading is not correct, the thread may become tangled or the needle may bend or break. ● Never use a thread weight of 20 or lower. ● Use the needle and the thread in the correct combination. For details on the correct combination of needles and threads, refer to "Needle types and their uses" (page 19). Turn on the sewing machine. a Raise the presser foot using the presser foot b lever. a Presser foot lever CAUTION ● If the presser foot is not raised, the sewing machine cannot be threaded correctly. a Mark b Needle position button • If the needle is not correctly raised, the sewing machine can not be threaded. Be sure to turn the handwheel so that the mark on the wheel points up before threading the sewing machine. Press down on the spool pin lever to swing up d the spool pin. Then remove the spool cap. a Spool pin b Spool cap CAUTION ● Do not grab the bar to raise the spool pin, otherwise, the spool pin may bend or break. ● Be sure to raise the spool pin before use. If the spool of thread is in the wrong place, or is set incorrectly, the thread may tangle on the spool pin and cause the needle to break. Fully insert the spool for the upper thread onto e the spool pin. Slide the spool cap onto the spool pin. • The thread should be unwound from the bottom to the front. 15
-
 1
1 -
2
-
3
-
4
-
5
-
6
-
7
-
8
-
9
-
10
-
11
-
 12
12 -
 13
13 -
 14
14 -
 15
15 -
 16
16 -
 17
17 -
 18
18 -
 19
19 -
 20
20 -
 21
21 -
 22
22 -
23
-
24
-
25
-
26
-
27
-
28
-
29
-
30
-
31
-
32
-
33
-
34
-
35
-
36
-
37
-
38
-
39
-
40
-
41
-
42
-
43
-
44
-
45
-
46
-
47
-
48
-
49
-
50
-
51
-
52
-
53
-
54
-
55
-
56
-
57
-
58
-
59
-
60
-
61
-
62
-
63
-
64
-
65
-
66
-
67
-
68
-
69
-
70
-
71
-
72
 |
 |