Brother International CE-5500/CE-5500PRW Operation Manual - Page 20
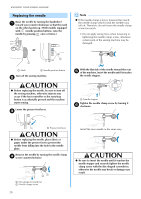
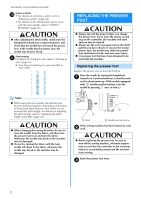
Replacing The Needle
 |
View all Brother International CE-5500/CE-5500PRW manuals
Add to My Manuals
Save this manual to your list of manuals |
Page 20 highlights
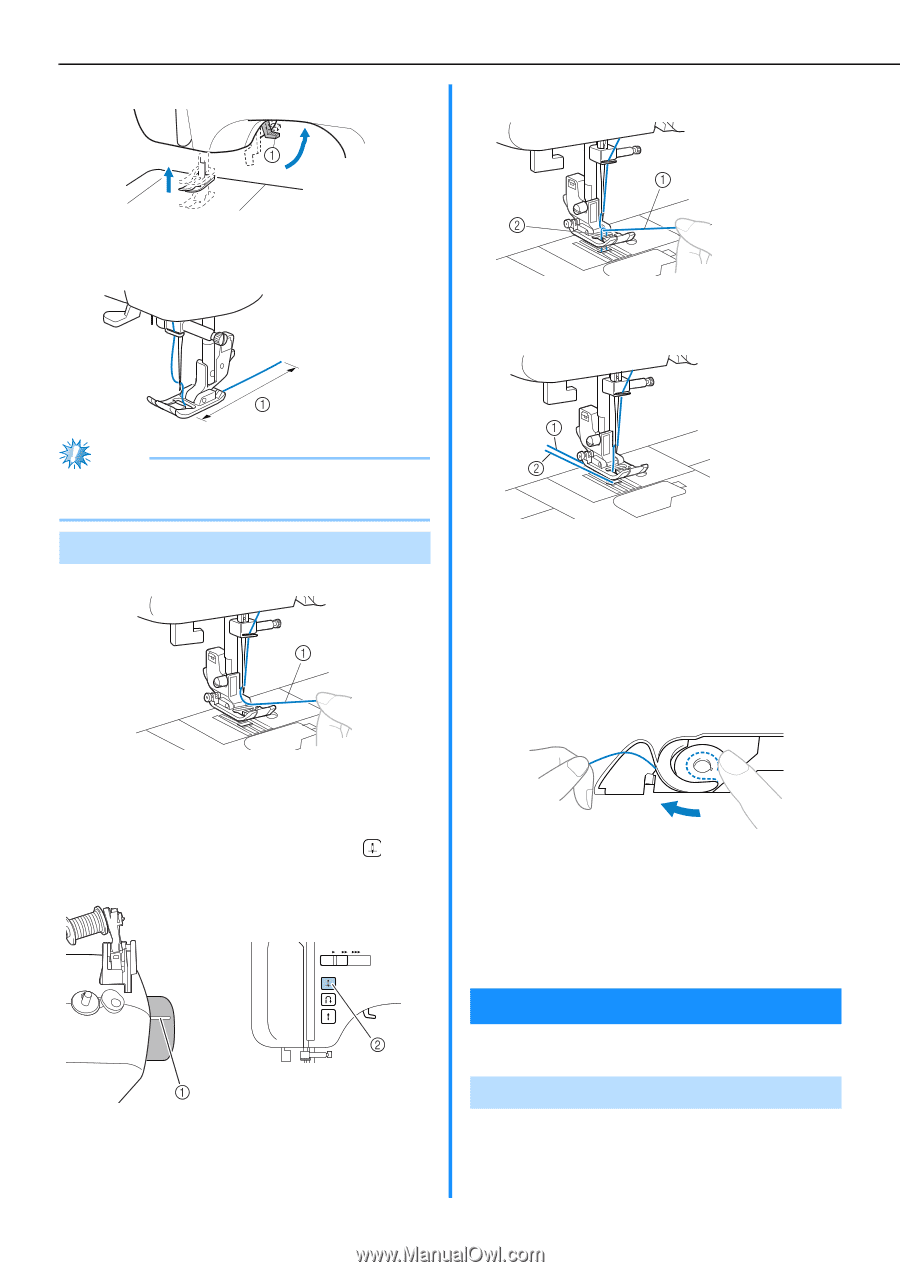
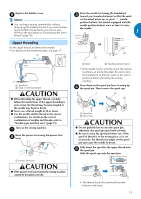
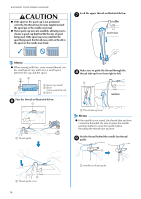
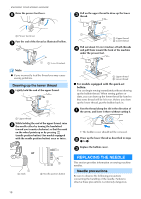
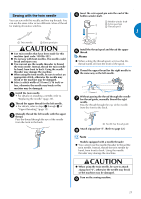
KNOWING YOUR SEWING MACHINE Raise the presser foot lever. f Pull on the upper thread to draw up the lower c thread. a Presser foot lever Pass the end of the thread as illustrated bellow. g a Upper thread b Lower thread Pull out about 10 cm (4 inches) of both threads d and pull them toward the back of the machine under the presser foot. a 5 cm (2 inches) Note ● If you incorrectly feed the thread you may cause sewing problems. Drawing up the lower thread Lightly hold the end of the upper thread. a a Upper thread While holding the end of the upper thread, raise b the needle either by turning the handwheel toward you (counterclockwise) so that the mark on the wheel points up or by pressing (needle position button) (for models equipped with the needle position button) once or twice. or a Mark b Needle position button a Upper thread b Lower thread ■ For models equipped with the quick-set bobbin You can begin sewing immediately without drawing up the bobbin thread. When sewing gathers or darts, you can draw up the lower thread by hand so that some thread will be left over. Before you draw up the lower thread, put the bobbin back in. Pass the thread along the slit in the direction of a the arrow, and leave it there without cutting it. • The bobbin cover should still be removed. Draw up the lower thread as described in steps b 1 to 4. Replace the bobbin cover. c REPLACING THE NEEDLE This section provides information on sewing machine needles. Needle precautions Be sure to observe the following precautions concerning the handling of the needle. Failure to observe these precautions is extremely dangerous. 18
-
 1
1 -
2
-
3
-
4
-
5
-
6
-
7
-
8
-
9
-
10
-
11
-
12
-
13
-
14
-
 15
15 -
 16
16 -
 17
17 -
 18
18 -
 19
19 -
 20
20 -
 21
21 -
 22
22 -
 23
23 -
 24
24 -
 25
25 -
26
-
27
-
28
-
29
-
30
-
31
-
32
-
33
-
34
-
35
-
36
-
37
-
38
-
39
-
40
-
41
-
42
-
43
-
44
-
45
-
46
-
47
-
48
-
49
-
50
-
51
-
52
-
53
-
54
-
55
-
56
-
57
-
58
-
59
-
60
-
61
-
62
-
63
-
64
-
65
-
66
-
67
-
68
-
69
-
70
-
71
-
72
 |
 |