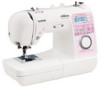
Brother International Innov-is 40e Operation Manual - Page 22
Threading the upper thread
 |
View all Brother International Innov-is 40e manuals
Add to My Manuals
Save this manual to your list of manuals |
Page 22 highlights
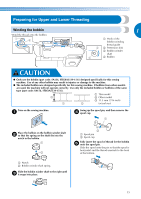
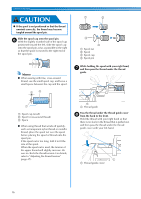
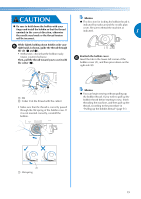
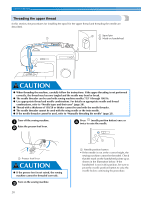
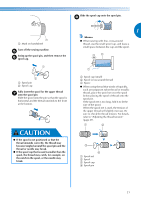
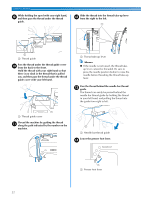
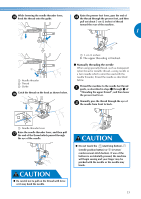
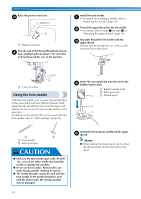
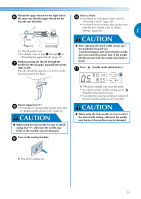
GETTING READY Threading the upper thread In this section, the procedures for installing the spool for the upper thread and threading the needle are described. b a Spool pin a b Mark on handwheel CAUTION ● When threading the machine, carefully follow the instructions. If the upper threading is not performed correctly, the thread may become tangled and the needle may bend or break. ● The needle threader can be used with sewing machine needles 75/11 through 100/16. ● Use appropriate thread and needle combinations. For details on appropriate needle and thread combinations, refer to "Needle types and their uses" (page 28). ● Thread with a thickness of 130/20 or thicker cannot be used with the needle threader. ● The needle threader cannot be used with the wing needle or the twin needle. ● If the needle threader cannot be used, refer to "Manually threading the needle" (page 23). Turn off the sewing machine. a Raise the presser foot lever. b Press (needle position button) once or d twice to raise the needle. a Presser foot lever CAUTION ● If the presser foot is not raised, the sewing machine cannot be threaded correctly. Turn on the sewing machine. c 20 a Needle position button • If the needle is not at the correct height, the sewing machine cannot be threaded. Check that the mark on the handwheel points up as shown in the illustration below. If the handwheel is not in this position, be sure to press the needle position button to raise the needle before continuing the procedure.
-
 1
1 -
2
-
3
-
4
-
5
-
6
-
7
-
8
-
9
-
10
-
11
-
12
-
13
-
14
-
15
-
16
-
 17
17 -
 18
18 -
 19
19 -
 20
20 -
 21
21 -
 22
22 -
 23
23 -
 24
24 -
 25
25 -
 26
26 -
 27
27 -
28
-
29
-
30
-
31
-
32
-
33
-
34
-
35
-
36
-
37
-
38
-
39
-
40
-
41
-
42
-
43
-
44
-
45
-
46
-
47
-
48
-
49
-
50
-
51
-
52
-
53
-
54
-
55
-
56
-
57
-
58
-
59
-
60
-
61
-
62
-
63
-
64
-
65
-
66
-
67
-
68
-
69
-
70
-
71
-
72
-
73
-
74
-
75
-
76
-
77
-
78
-
79
-
80
-
81
-
82
-
83
-
84
-
85
-
86
-
87
-
88
-
89
-
90
-
91
-
92
-
93
-
94
-
95
-
96
-
97
-
98
-
99
-
100
-
101
-
102
-
103
-
104
-
105
-
106
-
107
-
108
-
109
-
110
-
111
-
112
 |
 |
