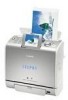
Canon 0324B001 SELPHY ES1 User Guide - Page 25
Loading the Cartridge
 |
UPC - 013803065541
View all Canon 0324B001 manuals
Add to My Manuals
Save this manual to your list of manuals |
Page 25 highlights
„ Loading the Cartridge Proper Handling of Cartridges Cartridge (p. 14) 1 Check that the ink sheet is tight and that the paper is correctly loaded in the cartridge. Ink sheet z When inserting the cartridge into the printer, if the ink sheet is so slack it catches, insert the cleaner unit and turn it slowly to take up the slack. z If the paper is outside of the clips, push it down with your finger so it is inside the clips. •It will not be possible to use all the paper for printing if you overwind the ink sheet. •Do not touch or pull out the ink sheet. Clip Cleaner unit 2 Lift up the cover lever to open the cartridge cover, and insert the cartridge all the way into the compartment. z Push the cartridge all the way in, so that it clicks into place. z When you are ready to remove the cartridge, slide the lever down and pull the cartridge out. Cartridge lever •When replacing the cartridge, remove all paper from the print receptacle before printing. Protective paper side facing front •The colored paper on the top side of the cartridge is the protective paper. Load the cartridge with this paper still attached. 3 Close the cartridge cover. •You can check the type and the remaining paper (ink) of the cartridge loaded in the printer by the icons in the print confirmation screen/printing screen or standby screen (p. 19). •After the power is turned on, or immediately after the cartridge cover is opened/closed, the status icon is not displayed. This icon is displayed when at least one sheet is printed. When the cartridge cover is open, the cover lever can become stuck in the lowered position. When this happens, raise the lever to close the cover. Cover lever Remaining paper (ink) 23
-
 1
1 -
2
-
3
-
4
-
5
-
6
-
7
-
8
-
9
-
10
-
11
-
12
-
13
-
14
-
15
-
16
-
17
-
18
-
19
-
 20
20 -
 21
21 -
 22
22 -
 23
23 -
 24
24 -
 25
25 -
 26
26 -
 27
27 -
 28
28 -
 29
29 -
 30
30 -
31
-
32
-
33
-
34
-
35
-
36
-
37
-
38
-
39
-
40
-
41
-
42
-
43
-
44
-
45
-
46
-
47
-
48
-
49
-
50
-
51
-
52
-
53
-
54
-
55
-
56
-
57
-
58
-
59
-
60
-
61
-
62
-
63
-
64
-
65
-
66
-
67
-
68
-
69
-
70
-
71
-
72
-
73
-
74
-
75
-
76
-
77
 |
 |
