Canon 0324B001 SELPHY ES1 User Guide - Page 6
Quick Start
 |
UPC - 013803065541
View all Canon 0324B001 manuals
Add to My Manuals
Save this manual to your list of manuals |
Page 6 highlights
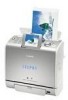
Quick Start This section explains the procedures required to print with the trial cartridge (Postcard size (100 x 148 mm (4 x 6 in.)) paper) included with your printer from a memory card. Things to Prepare Printer (SELPHY ES1) Ink and Paper Integrated Cartridge (Postcard size, 10 sheets) Compact Power Adapter CA-ES100 Power Cord Memory Card (containing the images you wish to print) : Included with the printer 1 Loading the Cartridge in the Printer (p. 23) 1 Lift up the cover lever and open the cartridge cover. 2 Grasp the cleaner unit that is inside and remove it. 3 Load the cartridge and close the cartridge cover. Make sure the cover lever is in the up position, then press here when closing the cartridge cover. When closed, make sure the cover lever is pushed all the way down. The colored paper on the top side of the cartridge is the protective paper. Load the cartridge with this paper still attached. 4
-
 1
1 -
 2
2 -
 3
3 -
 4
4 -
 5
5 -
 6
6 -
 7
7 -
 8
8 -
 9
9 -
 10
10 -
 11
11 -
 12
12 -
13
-
14
-
15
-
16
-
17
-
18
-
19
-
20
-
21
-
22
-
23
-
24
-
25
-
26
-
27
-
28
-
29
-
30
-
31
-
32
-
33
-
34
-
35
-
36
-
37
-
38
-
39
-
40
-
41
-
42
-
43
-
44
-
45
-
46
-
47
-
48
-
49
-
50
-
51
-
52
-
53
-
54
-
55
-
56
-
57
-
58
-
59
-
60
-
61
-
62
-
63
-
64
-
65
-
66
-
67
-
68
-
69
-
70
-
71
-
72
-
73
-
74
-
75
-
76
-
77
 |
 |
