Canon CanoScan FB 630U User Guide - Page 31
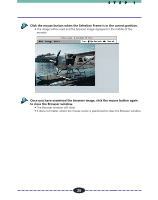
Scanning, Specify the Scan Area., Click the [Scan] button.
 |
View all Canon CanoScan FB 630U manuals
Add to My Manuals
Save this manual to your list of manuals |
Page 31 highlights
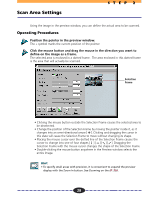
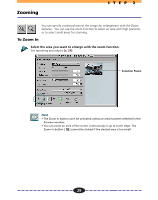
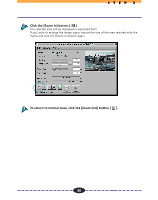
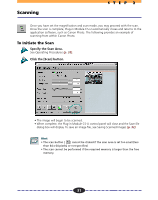
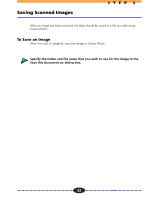
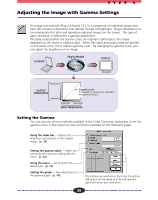
Scanning STEP 2 Once you have set the magnification and scan mode, you may proceed with the scan. Once the scan is complete, Plug-in Module CS-U automatically closes and returns to the application software, such as Canon Photo. The following provides an example of scanning from within Canon Photo. To Initiate the Scan Specify the Scan Area. See Operating Procedures (p. 28). Click the [Scan] button. ª • The image will begin to be scanned. • When complete, the Plug-in Module CS-U control panel will close and the Save file dialog box will display. To save an image file, see Saving Scanned Images (p. 32). Hint • The scan button [ ] cannot be clicked if the scan area is set too small (less than 64 x 64 pixels) or not specified. • The scan cannot be performed if the required memory is larger than the free memory. 31
-
 1
1 -
2
-
3
-
4
-
5
-
6
-
7
-
8
-
9
-
10
-
11
-
12
-
13
-
14
-
15
-
16
-
17
-
18
-
19
-
20
-
21
-
22
-
23
-
24
-
25
-
 26
26 -
 27
27 -
 28
28 -
 29
29 -
 30
30 -
 31
31 -
 32
32 -
 33
33 -
 34
34 -
 35
35 -
 36
36 -
37
-
38
-
39
-
40
-
41
-
42
-
43
-
44
-
45
-
46
-
47
-
48
-
49
-
50
-
51
-
52
-
53
-
54
-
55
-
56
-
57
-
58
-
59
-
60
-
61
-
62
 |
 |