Canon EOS 6D Instruction Manual - Page 166
Checking Network Settings, Windows, Macintosh
 |
View all Canon EOS 6D manuals
Add to My Manuals
Save this manual to your list of manuals |
Page 166 highlights
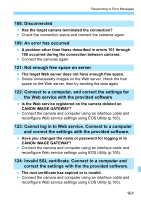
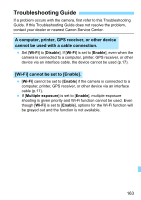
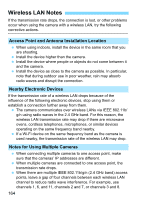
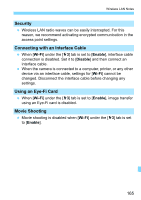
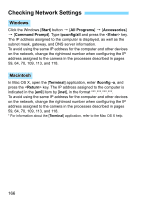
Checking Network Settings Windows Click the Windows [Start] button 9 [All Programs] 9 [Accessories] 9 [Command Prompt]. Type ipconfig/all and press the key. The IP address assigned to the computer is displayed, as well as the subnet mask, gateway, and DNS server information. To avoid using the same IP address for the computer and other devices on the network, change the rightmost number when configuring the IP address assigned to the camera in the processes described in pages 59, 64, 70, 109, 113, and 118. Macintosh In Mac OS X, open the [Terminal] application, enter ifconfig -a, and press the key. The IP address assigned to the computer is indicated in the [en0] item by [inet], in the format To avoid using the same IP address for the computer and other devices on the network, change the rightmost number when configuring the IP address assigned to the camera in the processes described in pages 59, 64, 70, 109, 113, and 118. * For information about the [Terminal] application, refer to the Mac OS X help. 166
-
 1
1 -
2
-
3
-
4
-
5
-
6
-
7
-
8
-
9
-
10
-
11
-
12
-
13
-
14
-
15
-
16
-
17
-
18
-
19
-
20
-
21
-
22
-
23
-
24
-
25
-
26
-
27
-
28
-
29
-
30
-
31
-
32
-
33
-
34
-
35
-
36
-
37
-
38
-
39
-
40
-
41
-
42
-
43
-
44
-
45
-
46
-
47
-
48
-
49
-
50
-
51
-
52
-
53
-
54
-
55
-
56
-
57
-
58
-
59
-
60
-
61
-
62
-
63
-
64
-
65
-
66
-
67
-
68
-
69
-
70
-
71
-
72
-
73
-
74
-
75
-
76
-
77
-
78
-
79
-
80
-
81
-
82
-
83
-
84
-
85
-
86
-
87
-
88
-
89
-
90
-
91
-
92
-
93
-
94
-
95
-
96
-
97
-
98
-
99
-
100
-
101
-
102
-
103
-
104
-
105
-
106
-
107
-
108
-
109
-
110
-
111
-
112
-
113
-
114
-
115
-
116
-
117
-
118
-
119
-
120
-
121
-
122
-
123
-
124
-
125
-
126
-
127
-
128
-
129
-
130
-
131
-
132
-
133
-
134
-
135
-
136
-
137
-
138
-
139
-
140
-
141
-
142
-
143
-
144
-
145
-
146
-
147
-
148
-
149
-
150
-
151
-
152
-
153
-
154
-
155
-
156
-
157
-
158
-
159
-
160
-
 161
161 -
 162
162 -
 163
163 -
 164
164 -
 165
165 -
 166
166 -
 167
167 -
 168
168 -
 169
169 -
 170
170 -
 171
171 -
172
-
173
 |
 |
