Canon MultiPASS F30 Software User's Guide for the MultiPASS F30 and MultiPASS - Page 16
If installation does not start automatically, or you are installing from, If AutoRun is enabled - driver windows 7
 |
View all Canon MultiPASS F30 manuals
Add to My Manuals
Save this manual to your list of manuals |
Page 16 highlights
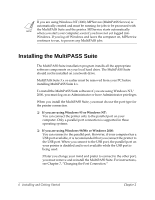
2. Connect your printer cable to the ports on your printer and PC. 3. Plug in your printer. Then, turn on the printer and PC. With your PC on, close any open applications (including any virus checkers). If a New Hardware Found, Update Device Driver Wizard, or Add New Hardware Wizard dialog box appears, click Cancel. 4. Insert the installation disk into your disk drive. If you are installing with a copy of the MultiPASS Suite located on another drive, skip to the next step. 5. If AutoRun is enabled, the installation starts automatically. If installation does not start automatically, or you are installing from the software copied on another drive, do the following: On the Windows taskbar, click Start, and then click Run. In the Run dialog box, type the following command and click OK (where D: is the drive containing the installation disk or copied software): D:\csplash.exe 6. When the main menu appears, click Install MultiPASS Suite. 10 Installing and Getting Started Chapter 2
-
 1
1 -
2
-
3
-
4
-
5
-
6
-
7
-
8
-
9
-
10
-
 11
11 -
 12
12 -
 13
13 -
 14
14 -
 15
15 -
 16
16 -
 17
17 -
 18
18 -
 19
19 -
 20
20 -
 21
21 -
22
-
23
-
24
-
25
-
26
-
27
-
28
-
29
-
30
-
31
-
32
-
33
-
34
-
35
-
36
-
37
-
38
-
39
-
40
-
41
-
42
-
43
-
44
-
45
-
46
-
47
-
48
-
49
-
50
-
51
-
52
-
53
-
54
-
55
-
56
-
57
-
58
-
59
-
60
-
61
-
62
-
63
-
64
-
65
-
66
-
67
-
68
-
69
-
70
-
71
-
72
-
73
-
74
-
75
-
76
-
77
-
78
-
79
-
80
-
81
-
82
-
83
-
84
-
85
-
86
-
87
-
88
-
89
-
90
-
91
-
92
-
93
-
94
-
95
-
96
-
97
-
98
-
99
-
100
-
101
-
102
-
103
-
104
-
105
-
106
-
107
-
108
-
109
-
110
-
111
-
112
-
113
-
114
-
115
-
116
-
117
-
118
-
119
-
120
-
121
-
122
-
123
-
124
-
125
-
126
-
127
-
128
-
129
-
130
-
131
-
132
-
133
-
134
-
135
-
136
-
137
-
138
-
139
-
140
-
141
-
142
-
143
-
144
-
145
-
146
-
147
-
148
-
149
-
150
-
151
-
152
-
153
-
154
-
155
-
156
-
157
-
158
-
159
-
160
-
161
-
162
-
163
-
164
-
165
-
166
-
167
-
168
-
169
-
170
 |
 |
