Canon MultiPASS F30 Software User's Guide for the MultiPASS F30 and MultiPASS - Page 80
Working with Scan Settings in ScanGear, My MultiPASS Scan to Save folder.
 |
View all Canon MultiPASS F30 manuals
Add to My Manuals
Save this manual to your list of manuals |
Page 80 highlights
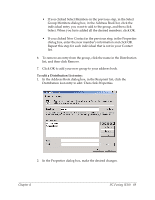
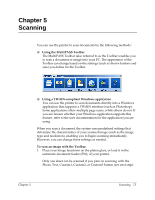
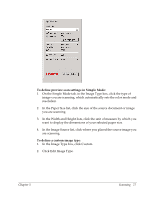
2. On the Windows desktop, on the MultiPASS Toolbar, click the appropriate scan button. • Click Fax to scan your document and automatically send it as a fax from your PC (F50). • Click Mail to scan your document and automatically attach it to a message in your e-mail application. • Click Save to scan your document and automatically save it in the My MultiPASS Scan to Save folder. • Click Photo to scan your document and automatically have it display in a graphic application (such as MultiPASS Viewer). • If the buttons appear on the Toolbar, click Text, Custom1, Custom2, or Custom3 to scan your document and automatically have it display in an application you assigned in the Toolbar settings (such as OmniPage or Microsoft Paint). 3. If the ScanGear window appears, define your scan settings as desired and scan your document. For details on setting the ScanGear window to appear, see the "Defining Toolbar Settings" section. For details on defining scan settings, see the "Working with Scan Settings in ScanGear" section. If the ScanGear window does not appear, skip to the next step. 4. When the scan is complete, do one of the following: • If you clicked Fax in Step 2: In the Send Fax dialog box, enter the appropriate information and send the fax. • If you clicked Mail in Step 2: In the e-mail message window, enter the appropriate information and send the e-mail message. 74 Scanning Chapter 5
-
 1
1 -
2
-
3
-
4
-
5
-
6
-
7
-
8
-
9
-
10
-
11
-
12
-
13
-
14
-
15
-
16
-
17
-
18
-
19
-
20
-
21
-
22
-
23
-
24
-
25
-
26
-
27
-
28
-
29
-
30
-
31
-
32
-
33
-
34
-
35
-
36
-
37
-
38
-
39
-
40
-
41
-
42
-
43
-
44
-
45
-
46
-
47
-
48
-
49
-
50
-
51
-
52
-
53
-
54
-
55
-
56
-
57
-
58
-
59
-
60
-
61
-
62
-
63
-
64
-
65
-
66
-
67
-
68
-
69
-
70
-
71
-
72
-
73
-
74
-
 75
75 -
 76
76 -
 77
77 -
 78
78 -
 79
79 -
 80
80 -
 81
81 -
 82
82 -
 83
83 -
 84
84 -
 85
85 -
86
-
87
-
88
-
89
-
90
-
91
-
92
-
93
-
94
-
95
-
96
-
97
-
98
-
99
-
100
-
101
-
102
-
103
-
104
-
105
-
106
-
107
-
108
-
109
-
110
-
111
-
112
-
113
-
114
-
115
-
116
-
117
-
118
-
119
-
120
-
121
-
122
-
123
-
124
-
125
-
126
-
127
-
128
-
129
-
130
-
131
-
132
-
133
-
134
-
135
-
136
-
137
-
138
-
139
-
140
-
141
-
142
-
143
-
144
-
145
-
146
-
147
-
148
-
149
-
150
-
151
-
152
-
153
-
154
-
155
-
156
-
157
-
158
-
159
-
160
-
161
-
162
-
163
-
164
-
165
-
166
-
167
-
168
-
169
-
170
 |
 |