Canon PowerShot SX400 IS User Guide - Page 45
Shots Resembling Miniature Models Miniature Effect
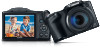 |
View all Canon PowerShot SX400 IS manuals
Add to My Manuals
Save this manual to your list of manuals |
Page 45 highlights
Shots Resembling Miniature Models (Miniature Effect) Still Images Movies Creates the effect of a miniature model, by blurring image areas above and below your selected area. You can also make movies that look like scenes in miniature models by choosing the playback speed before the movie is recorded. People and objects in the scene will move quickly during playback. Note that sound is not recorded. 1 Choose [ ]. ●●Follow step 1 in "Specific Scenes" (=43) and choose [ ]. ●●A white frame is displayed, indicating the image area that will not be blurred. 2 Choose the area to keep in focus. ●●Press the [ ] button. ●●Move the zoom lever to resize the frame, and press the [ ][ ] buttons to move it. 3 For movies, choose the movie playback speed. ●●Press the [ ] button, and then press the [ ][ ] buttons to choose the speed. 4 Return to the shooting screen and shoot. ●●Press the [ ] button to return to the shooting screen, and then shoot. Playback Speed and Estimated Playback Time (for One-Minute Clips) Speed Playback Time Approx. 12 sec. Approx. 6 sec. Approx. 3 sec. ●● The zoom is not available when shooting movies. Be sure to set the zoom before shooting. ●● Try taking some test shots first, to make sure you obtain the desired results. ●● To switch the orientation of the frame (from horizontal to vertical or vice-versa), press the [ ] button in step 2. You can move the frame in vertical orientation by pressing the [ ][ ] buttons. ●● Holding the camera vertically will change the orientation of the frame. ●● Movie image quality is [ ] at an aspect ratio of [ ] and [ ] at an aspect ratio of [ ] (=36). These quality settings cannot be changed. Before Use Basic Guide Advanced Guide 1 Camera Basics 2 Auto Mode 3 Other Shooting Modes 4 P Mode 5 Playback Mode 6 Setting Menu 7 Accessories 8 Appendix Index 45
-
 1
1 -
2
-
3
-
4
-
5
-
6
-
7
-
8
-
9
-
10
-
11
-
12
-
13
-
14
-
15
-
16
-
17
-
18
-
19
-
20
-
21
-
22
-
23
-
24
-
25
-
26
-
27
-
28
-
29
-
30
-
31
-
32
-
33
-
34
-
35
-
36
-
37
-
38
-
39
-
 40
40 -
 41
41 -
 42
42 -
 43
43 -
 44
44 -
 45
45 -
 46
46 -
 47
47 -
 48
48 -
 49
49 -
 50
50 -
51
-
52
-
53
-
54
-
55
-
56
-
57
-
58
-
59
-
60
-
61
-
62
-
63
-
64
-
65
-
66
-
67
-
68
-
69
-
70
-
71
-
72
-
73
-
74
-
75
-
76
-
77
-
78
-
79
-
80
-
81
-
82
-
83
-
84
-
85
-
86
-
87
-
88
-
89
-
90
-
91
-
92
-
93
-
94
-
95
-
96
-
97
-
98
-
99
-
100
-
101
-
102
-
103
-
104
-
105
-
106
-
107
-
108
-
109
-
110
-
111
-
112
-
113
-
114
-
115
-
116
-
117
-
118
-
119
-
120
 |
 |
