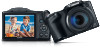
Canon PowerShot SX400 IS User Guide - Page 78
World Clock, Hiding Hints and Tips, Date and Time
 |
View all Canon PowerShot SX400 IS manuals
Add to My Manuals
Save this manual to your list of manuals |
Page 78 highlights
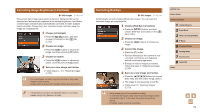
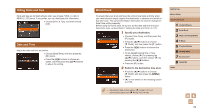
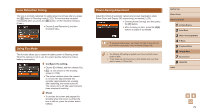
Hiding Hints and Tips Hints and tips are normally shown when you choose FUNC. (=24) or MENU (=25) items. If you prefer, you can deactivate this information. ●●Choose [Hints & Tips], and then choose [Off]. Date and Time Adjust the date and time as follows. ●●Choose [Date/Time], and then press the [ ] button. ●●Press the [ ][ ] buttons to choose an option, and then press the [ ][ ] buttons to adjust the setting. World Clock To ensure that your shots will have the correct local date and time when you travel abroad, simply register the destination in advance and switch to that time zone. This convenient feature eliminates the need to change the Date/Time setting manually. Before using the world clock, be sure to set the date and time and your home time zone, as described in "Setting the Date and Time" (= 17). 1 Specify your destination. ●●Choose [Time Zone], and then press the [ ] button. ●●Press the [ ][ ] buttons to choose [ World], and then press the [ ] button. ●●Press the [ ][ ] buttons to choose the destination. ●●To set daylight saving time (1 hour ahead), choose [ ] by pressing the [ ][ ] buttons, and then choose [ ] by pressing the [ ][ ] buttons. ●●Press the [ ] button. 2 Switch to the destination time zone. ●●Press the [ ][ ] buttons to choose [ World], and then press the [ ] button. ●●[ ] is now shown on the shooting screen (= 105). ●● Adjusting the date or time while in [ ] mode (=17) will automatically update your [ Home] time and date. Before Use Basic Guide Advanced Guide 1 Camera Basics 2 Auto Mode 3 Other Shooting Modes 4 P Mode 5 Playback Mode 6 Setting Menu 7 Accessories 8 Appendix Index 78
-
 1
1 -
2
-
3
-
4
-
5
-
6
-
7
-
8
-
9
-
10
-
11
-
12
-
13
-
14
-
15
-
16
-
17
-
18
-
19
-
20
-
21
-
22
-
23
-
24
-
25
-
26
-
27
-
28
-
29
-
30
-
31
-
32
-
33
-
34
-
35
-
36
-
37
-
38
-
39
-
40
-
41
-
42
-
43
-
44
-
45
-
46
-
47
-
48
-
49
-
50
-
51
-
52
-
53
-
54
-
55
-
56
-
57
-
58
-
59
-
60
-
61
-
62
-
63
-
64
-
65
-
66
-
67
-
68
-
69
-
70
-
71
-
72
-
 73
73 -
 74
74 -
 75
75 -
 76
76 -
 77
77 -
 78
78 -
 79
79 -
 80
80 -
 81
81 -
 82
82 -
 83
83 -
84
-
85
-
86
-
87
-
88
-
89
-
90
-
91
-
92
-
93
-
94
-
95
-
96
-
97
-
98
-
99
-
100
-
101
-
102
-
103
-
104
-
105
-
106
-
107
-
108
-
109
-
110
-
111
-
112
-
113
-
114
-
115
-
116
-
117
-
118
-
119
-
120
 |
 |
