Canon VB-M42 Network Camera VB-H43/VB-H630VE/VB-H630D/VB-H730F/VB-M42/VB-M620V - Page 154
Setting White Balance, Exposure Compensation], Metering Mode], hutter, peed], Aperture], Gain], Auto]
 |
View all Canon VB-M42 manuals
Add to My Manuals
Save this manual to your list of manuals |
Page 154 highlights
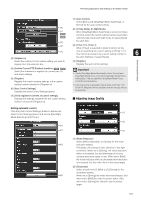
(2) [Exposure Compensation] When [Auto], [Auto (Flickerless)] or [Auto (Shutterpriority AE)] is selected for [Exposure], the exposure compensation value desired can be selected from nine levels (-4 to +4) using the slider. To darken the image, select a negative value. To brighten the image, select a positive value. (3) [Metering Mode] When [Auto], [Auto (Flickerless)] or [Auto (Shutterpriority AE)] is selected for [Exposure], the metering mode can be selected from [Center-Weighted], [Average] or [Spot]. For an explanation on each item set in [Metering Mode], see [Metering Mode] in the Setting page (p. 56). (4) [Shutter Speed] When [Manual] or [Auto (Shutter-priority AE)] is selected for [Exposure], select the shutter speed desired. If [Manual] is selected, set the shutter speed in the range of [1/1 sec] to [1/16000 sec] from a pulldown menu. If [Auto (Shutter-priority AE)] is selected, set the shutter speed in the range of [1/2 sec] to [1/16000 sec] from a pull-down menu. When capturing a moving subject, selecting a higher shutter speed can reduce blurry video capture. (5) [Slow Shutter] You can set slow shutter if [Exposure] is set to [Auto] or [Auto (Flickerless)]. Select a value in the range of [1/2 sec] to [1/30 sec] from the pull-down menu. As slower shutter speeds generate afterimages when capturing a moving subject, select an appropriate time according to the capture conditions. (6) [Aperture] If [Manual] is selected for [Exposure], set a desired aperture value. Moving the slider to the left closes the aperture and darkens the image. Moving the slider to the right opens the aperture and brightens the image. (7) [Gain] If [Manual] is selected for [Exposure], set a desired gain value. Moving the slider to the left decreases the gain (sensitivity to brightness) and darkens the image. Moving the slider to the right increases the gain and brightens the image. Important • If the subject is a traffic signal or electronic scoreboard, etc., the captured image may flicker. In this case, try changing [Exposure] to [Auto (Shutter-priority AE)] and then select a shutter speed lower than 1/100, to see if the situation improves. • [Exposure Compensation] and [Manual] for [Exposure] cannot be selected if [Smart Shade Control] is set to [Auto]. • When [Camera] > [Camera Control] > [AGC Limit] is set to [OFF] in the setting page and [Exposure] is set to [Auto (Shutter-priority AE)], exposure compensation and backlight compensation will not be performed. „ Setting White Balance (1) (3) (2) (1) [Auto] The white balance is adjusted automatically. (2) [Light Source] Select the light source from the pull-down menu below according to the condition in which the camera is used. For an explanation on each item set in [Light Source], see [White Balance] in the Setting page (p. 57). (3) [Manual] The white balance is adjusted manually. (3) [One-shot WB] This is used for forcibly locking the white balance to match the light source. 154
-
 1
1 -
2
-
3
-
4
-
5
-
6
-
7
-
8
-
9
-
10
-
11
-
12
-
13
-
14
-
15
-
16
-
17
-
18
-
19
-
20
-
21
-
22
-
23
-
24
-
25
-
26
-
27
-
28
-
29
-
30
-
31
-
32
-
33
-
34
-
35
-
36
-
37
-
38
-
39
-
40
-
41
-
42
-
43
-
44
-
45
-
46
-
47
-
48
-
49
-
50
-
51
-
52
-
53
-
54
-
55
-
56
-
57
-
58
-
59
-
60
-
61
-
62
-
63
-
64
-
65
-
66
-
67
-
68
-
69
-
70
-
71
-
72
-
73
-
74
-
75
-
76
-
77
-
78
-
79
-
80
-
81
-
82
-
83
-
84
-
85
-
86
-
87
-
88
-
89
-
90
-
91
-
92
-
93
-
94
-
95
-
96
-
97
-
98
-
99
-
100
-
101
-
102
-
103
-
104
-
105
-
106
-
107
-
108
-
109
-
110
-
111
-
112
-
113
-
114
-
115
-
116
-
117
-
118
-
119
-
120
-
121
-
122
-
123
-
124
-
125
-
126
-
127
-
128
-
129
-
130
-
131
-
132
-
133
-
134
-
135
-
136
-
137
-
138
-
139
-
140
-
141
-
142
-
143
-
144
-
145
-
146
-
147
-
148
-
 149
149 -
 150
150 -
 151
151 -
 152
152 -
 153
153 -
 154
154 -
 155
155 -
 156
156 -
 157
157 -
 158
158 -
 159
159 -
160
-
161
-
162
-
163
-
164
-
165
-
166
-
167
-
168
-
169
-
170
-
171
-
172
-
173
-
174
-
175
-
176
-
177
-
178
-
179
-
180
-
181
-
182
-
183
-
184
-
185
-
186
-
187
-
188
-
189
-
190
-
191
-
192
-
193
-
194
-
195
 |
 |
