Canon XL-H1 XL H1 Instruction Manual
Canon XL-H1 - 3CCD High Definition Camcorder Manual
 |
UPC - 086753092998
View all Canon XL-H1 manuals
Add to My Manuals
Save this manual to your list of manuals |
Canon XL-H1 manual content summary:
- Canon XL-H1 | XL H1 Instruction Manual - Page 1
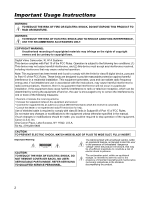
PUB. DIM-720 HD VIDEO CAMERA RECORDER Instruction Manual English CAMÉSCOPE ET LECTEUR VIDÉO HD Manuel d'instruction Français VIDEOCÁMARA Y GRABADORA HD Manual de Instrucciones Español Mini Digital Video Cassette A NTSC - Canon XL-H1 | XL H1 Instruction Manual - Page 2
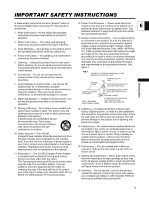
contrary to copyright laws. Digital Video Camcorder, XL H1A Systems. This device manual. If such changes or modifications should be made, you could be required to stop operation of the equipment. Canon U.S.A. Inc. One Canon servicing) instructions in the literature accompanying the product. 2 - Canon XL-H1 | XL H1 Instruction Manual - Page 3
the word "product" refers to the Canon Digital Video Camcorder XL H1A and all its accessories. 1. Read Instructions - All the safety and operating instructions should be read before the product is operated. 2. Retain Instructions - The safety and operating instructions should be retained for future - Canon XL-H1 | XL H1 Instruction Manual - Page 4
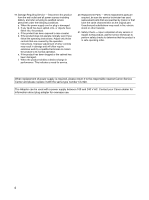
if you follow the operating instructions. Adjust only those controls that are covered by the operation instructions. Improper adjustment of other of power supply is required, please return it to the responsible nearest Canon Service Center and please replace it with the same type number CA-920. - Canon XL-H1 | XL H1 Instruction Manual - Page 5
Thank you for purchasing the Canon XL H1. Please read this manual carefully before you use the E camcorder and retain it for future reference. Should your camcorder fail to operate correctly, refer to the Troubleshooting table ( 144). Conventions Used in this Manual : Precautions related to the - Canon XL-H1 | XL H1 Instruction Manual - Page 6
Throughout the manual we will distinguish between the video signal standards used by the camera section of the XL H1, and the recording standards used by the recorder section of the XL H1. The video signal can be set to HD (high definition) or SD (standard definition) specifications. The - Canon XL-H1 | XL H1 Instruction Manual - Page 7
Introduction Contents Introduction E Important Usage Instructions...2 Important Safety Instructions...3 Using this Manual ...5 Checking the Supplied Accessories ...9 Components Guide...10 Preparations Preparing the Power Supply...16 Preparing the Camcorder ...19 Preparing the Lens ...24 Using the - Canon XL-H1 | XL H1 Instruction Manual - Page 8
Line-In, HDV/DV In 110 Converting Analog Signals into Digital Signals (Analog-Digital Converter 112 Connecting to a Computer (IEEE1394) ...113 Using ...132 List of Messages...136 Maintenance/Others ...137 Troubleshooting...144 System Diagram ...147 Optional Accessories...149 Specifications - Canon XL-H1 | XL H1 Instruction Manual - Page 9
Introduction Additional Accessories Supplied with the Lens Kit Canon HD Video 5.4-108 mm L IS II camcorder. Write down the number and other information here and retain this book as a permanent record of your purchase to aid identification in case of theft. Date of Purchase: Model Name: XL H1 - Canon XL-H1 | XL H1 Instruction Manual - Page 10
Components Guide XL H1 Left side view POWER dial External control mode VCR/PLAY mode Power off Auto Shutter-Priority Aperture-Priority Manual Recording Spotlight programs Night Easy Recording LIGHT button END SEARCH button ( 49) MODE SELECT switch ( 48) FRAME RATE switch ( 56) AUDIO - Canon XL-H1 | XL H1 Instruction Manual - Page 11
Left side view E Introduction Dioptric adjustment lever ( 21) STEREO/MONO microphone selector ( 64) Lock lever ( 20) Eye cup ( 20) Color viewfinder ( 19-22) Lock release button ( 21) Viewfinder cable ( 19) Zoom ring ( 50) Lens hood ( 25) Focus ring ( 52) RESET button Memory card slot ( 30) ND - Canon XL-H1 | XL H1 Instruction Manual - Page 12
Right side view S-video terminal ( 102) Video terminal (BNC) ( 102) RCA/BNC selector ( 102) Video terminal (RCA) ( 102) AUDIO 2 terminals (RCA) ( 66) AUDIO 1 terminals (RCA) ( 64) Terminal cover Battery attachment unit ( 16) BATT. RELEASE button ( 16) HD/SD SDI terminal ( 100) GEN.LOCK terminal ( - Canon XL-H1 | XL H1 Instruction Manual - Page 13
button ( 42) COMPONENT OUT terminal ( 101) * Do not use tripods with fastening screws longer than 5.5 mm (0.2 in.) as it may damage the camcorder. About the Terminal (LANC) stands for Local Application Control Bus System. The terminal allows you to connect and control connected devices. Connect - Canon XL-H1 | XL H1 Instruction Manual - Page 14
Top view (pause) button ( 98) / DRIVE MODE button ( 119) (stop) button ( 98,110) / (metering mode) button ( 121) (rewind) button ( 98) / - button ( 124) (play) button ( 98) / SLIDESHOW button ( 124) (fast forward) button ( 98) / + button ( 87, 124) REC (record) button ( 110) Screw holes for adapter - Canon XL-H1 | XL H1 Instruction Manual - Page 15
WL-D5000 Wireless Controller E Introduction PHOTO button ( 116) START/STOP button ( 42) MENU button ( 31) TV SCREEN button ( 132) SLIDESHOW button ( 124) DATA CODE button ( 108) INDEX WRITE button ( 91) AUDIO MONITOR button ( 67, 104) END SEARCH button ( 49) SEARCH SELECT button ( 106, 107) REC - Canon XL-H1 | XL H1 Instruction Manual - Page 16
and disconnect it from the adapter. Charge indicator Attaching the Battery Pack 1. Turn the POWER dial to OFF. 2. Attach the battery pack to the camcorder. Press lightly and slide the battery pack up, in the direction of the arrow until it clicks. 3. Remove the battery pack after use. Holding - Canon XL-H1 | XL H1 Instruction Manual - Page 17
depleted. In that case, recharge the built-in battery by powering the camcorder from a power outlet and leaving it with the POWER dial set to the power adapter when charging a battery pack. Turn off the camcorder before connecting or disconnecting the power adapter. If the adapter is used - Canon XL-H1 | XL H1 Instruction Manual - Page 18
16x Supplied color viewfinder Manual Zoom Lens Optional FU-1000 monochrome viewfinder 3x Zoom Supplied color viewfinder Lens XL Optional FU-1000 monochrome viewfinder you think you might need. To conserve battery power, turn off the camcorder instead of leaving it in record pause mode. 18 - Canon XL-H1 | XL H1 Instruction Manual - Page 19
Viewfinder Unit 1. Slide the viewfinder unit onto the bracket and tighten the locking screw. Preparations 2. Connect the viewfinder cable to the upper socket of the camcorder body. 3. Hook the viewfinder cable onto the cable clamp. Insert the cable plug straight into the - Canon XL-H1 | XL H1 Instruction Manual - Page 20
shown in the illustration. Adjusting the Position of the Viewfinder The viewfinder position can be changed (right/left, forward/backward). When storing the camcorder in the optional HC-3200 System Case, adjust the viewfinder to the right and lock it. Right/Left Adjustment Loosen the locking screw - Canon XL-H1 | XL H1 Instruction Manual - Page 21
in the viewfinder. The viewfinder LCD may become damaged due to concentration of the light by the lens. Pay special attention when mounting the camcorder on a tripod, or during transportation. Using the Viewfinder as LCD Panel You can use the viewfinder as an LCD panel by opening the eyepiece - Canon XL-H1 | XL H1 Instruction Manual - Page 22
the microphone clamp. 2. Align the mark on the microphone with the mark on the clamp and tighten the screw. 3. Plug the microphone cable to the camcorder's FRONT MIC terminals. 22 - Canon XL-H1 | XL H1 Instruction Manual - Page 23
length of the strap. Preparations Be careful not to drop the camcorder when adjusting the strap or the grip belt. Attaching the Adapter 2. Adjust the position of the support bars. Support bars Stop lever When using the optional CH-910, hook it onto the support bars and secure it with the stop - Canon XL-H1 | XL H1 Instruction Manual - Page 24
instruction manual of the lens. Mounting the Lens 1. Set the POWER dial to OFF. 2. Remove the dust caps from the camcorder and the lens. 3. Align the red mark on the lens with the red mark on the camcorder HDV standard with lenses that are not HDV compatible. If you attach to the camcorder a lens - Canon XL-H1 | XL H1 Instruction Manual - Page 25
be guaranteed when recording in HDV standard with the optional Extender XL 1.6x. The message "HD INCOMPATIBLE LENS" will appear when 1. Place the lens hood on the front of the lens and screw it clockwise until the Canon logo appears on top. • Be careful not to deform the lens hood. • Make sure - Canon XL-H1 | XL H1 Instruction Manual - Page 26
camcorder (AF) or manually (MF). Different flange back adjustment values can be memorized and can also be saved as backup. You can store flange back settings for up to 10 lenses Press the MENU button. 2. Turn the SELECT dial to select [CAMERA SETUP] and press the SET button. 3. Select [FB] and then - Canon XL-H1 | XL H1 Instruction Manual - Page 27
mounted lens. 1. Press the MENU button. 2. Turn the SELECT dial to select [CAMERA SETUP] and press the SET button. E 3. Select [FB] and then select [ correctly and the camcorder will return to the flange back adjustment selection screen. - In the AF adjustment the camcorder cannot focus. - - Canon XL-H1 | XL H1 Instruction Manual - Page 28
Using the Wireless Controller When you press the buttons on the wireless controller, point it at one of the camcorder's remote sensors. The camcorder has three remote sensors: two at the front and one at the back. Inserting the Batteries The wireless controller operates with two AA (R6) batteries. - Canon XL-H1 | XL H1 Instruction Manual - Page 29
with the cassette compartment while it is opening or closing automatically. Be careful not to get your fingers caught in the cassette compartment. If the camcorder is connected to a power source, cassettes can be loaded/unloaded even if the POWER dial is set to OFF. 29 - Canon XL-H1 | XL H1 Instruction Manual - Page 30
Make sure that the CARD indicator is not flashing before you turn off the camcorder. 2. Open the memory card slot cover. 3. Push the memory card to then remove the memory card. 4. Close the card slot cover. This camcorder is compatible with SD Memory Cards or MultiMediaCards (MMC) only. Do not - Canon XL-H1 | XL H1 Instruction Manual - Page 31
Changing Settings with the MENU Button Many of the camcorder's functions can be changed from the onscreen menu. E SELECT dial SET button MENU button Selecting Menus and Settings 1. Press the MENU button to open the - Canon XL-H1 | XL H1 Instruction Manual - Page 32
480i, 1080i/480i 101 SDI OUTPUT ON, OFF 101 SDI SPEC. AUTO, SD LOCKED 101 CAMERA SETUP 24F MODE SEL* 2:3, 2:3:3:2 57 ZEBRA ON, OFF HIGH F SPEED PSET2 LOW, MIDDLE, HIGH 54 CLEAR SCAN 89 FB AF ADJUST 26 MF ADJUST 26 SET DEFAULT 27 1 Cannot be selected in Standard Definition - Canon XL-H1 | XL H1 Instruction Manual - Page 33
CAMERA MENU Submenu Menu Item CUSTOM PRESET EDIT Setting Options SELECT CP 1 PRESET_A, 2 PRESET_B, 3 PRESET_C, 4 PRESET_D, 5 PRESET_E, 6 PRESET_E TUNE RENAME PROTECT RESET RETURN GAMMA NORMAL, CINE1, CINE2 KNEE AUTO, LOW, MIDDLE, HIGH BLACK STRETCH, MIDDLE, PRESS MASTER PED. -9 ~ - Canon XL-H1 | XL H1 Instruction Manual - Page 34
ZONE TV SCREEN AUDIO LEVEL LANGUAGE OBJ DST UNIT ZOOM IND. GUIDE INFO UB DISPLAY CUSTOM KEY 1 CUSTOM KEY 2 WL. REMOTE TALLY LAMP POWER SAVE D/TIME SET LED ON/OFF CHAR. REC DV CONTROL IRIS DIAL *Only in Standard Definition (SD). Setting Options SP, LP 96 INT. USR-BIT, EXT. USR-BIT - Canon XL-H1 | XL H1 Instruction Manual - Page 35
Only in Standard Definition (SD). Submenu SIGNAL SETUP RECORDING SETUP AUDIO SETUP Menu Item TIME CODE PLAYBACK STD T.CODE OUT COMP. OUT SDI OUTPUT SDI SPEC. AV DV 115 104 104 63 64 64, 66 1 Cannot be selected in Standard Definition (SD) if the frame rate is set to 24F. Preparations HD DOWN - Canon XL-H1 | XL H1 Instruction Manual - Page 36
SCREEN ON, OFF 132 AUDIO LEVEL ON, OFF 67 DISPLAYS ON, OFF 132 CUSTOM KEYS ON, OFF 90 DATA CODE DATE, TIME, DATE & TIME, CAMERA DATA, 108 CAM. & D/T LANGUAGE ENGLISH, , 97 6 SEC.DATE ON, OFF 108 UB DISPLAY ON, OFF 62 SYSTEM/ CUSTOM KEY 1 TIME CODE, TV SCREEN, DATA - Canon XL-H1 | XL H1 Instruction Manual - Page 37
Submenu SIGNAL SETUP CAMERA SETUP Menu Item GENLOCK GENLCK ADJUST COMP. OUT SDI OUTPUT SDI SPEC. ZEBRA ZEBRA LEVEL SKIN D.SET F SPEED PSET1 FB FOCUS PRI. REVIEW Setting Options ON, OFF -1023 - +1023 480i, 1080i/480i ON, OFF AUTO, SD LOCKED - Canon XL-H1 | XL H1 Instruction Manual - Page 38
CARD CAMERA MENU Submenu Menu Item CUSTOM PRESET EDIT RECORDING PRESET_E, 6 PRESET_E TUNE RENAME PROTECT RESET RETURN KNEE AUTO, LOW, MIDDLE, HIGH BLACK STRETCH, MIDDLE, PRESS SHARPNESS -9 ~ +9 H DTL FREQ LOW, MIDDLE, HIGH DTL HV -9 ~ +9 BALANCE CORING -9 ~ +9 COLOR GAIN -9 ~ - Canon XL-H1 | XL H1 Instruction Manual - Page 39
CARD CAMERA MENU Submenu DISPLAY SETUP/ Menu Item EVF SETUP SYSTEM/ LEV/CENT MRK OBJ DST UNIT ZOOM IND. TV SCREEN GUIDE INFO LANGUAGE CUSTOM KEY 1 CUSTOM KEY 2 WL. REMOTE POWER SAVE D/TIME SET LED ON/OFF IRIS DIAL Setting Options EVF BW MODE ON, OFF BRIGHTNESS - Canon XL-H1 | XL H1 Instruction Manual - Page 40
. OUT 480i, 1080i/480i 101 SDI OUTPUT ON, OFF 101 SDI SPEC. AUTO, SD LOCKED 101 CARD OPERATIONS PRINT ORDERS NO, YES 129 132 CUSTOM KEYS ON, OFF 90 DATA CODE DATE, TIME, DATE & TIME, CAMERA DATA, 108 CAM. & D/T LANGUAGE ENGLISH, , 97 SYSTEM/ CUSTOM KEY 1 TV SCREEN, - Canon XL-H1 | XL H1 Instruction Manual - Page 41
INFO•••OFF Open the menu and select [DISPLAY SETUP/ DISPLAY] and close the menu. ]. Select [GUIDE INFO], set it to [D/T If you do not use the camcorder for a period of approximately 3 months, the built-in rechargeable battery will become totally depleted and the date and time settings will be - Canon XL-H1 | XL H1 Instruction Manual - Page 42
1. Remove the lens cap. 2. Press the lock button and set the POWER dial to a recording program. 3. Press the start/stop button to begin recording. • The camcorder is equipped with 3 start/stop buttons: one on the carrying handle, one on the side grip and one at the front. • The tally lamp and - Canon XL-H1 | XL H1 Instruction Manual - Page 43
mode activates the power save mode (The message "ENTERING POWER STANDBY" will be displayed). This shuts the power down to the camera and VCR sections while maintaining the camera settings. The camcorder retains the exposure lock and color bars settings. Press the STANDBY button again to turn the - Canon XL-H1 | XL H1 Instruction Manual - Page 44
turn off without displaying " ". • The actual battery charge may not be indicated accurately depending on the condition under which the battery pack and camcorder are used. SHUTTER lamp Lights up when the shutter speed is changed from the following: 60i 1/60 of a second 30F 1/30 of a second - Canon XL-H1 | XL H1 Instruction Manual - Page 45
options in the following sequence. E Normal screen display Audio level indicator, zoom indicator, center and level markers, aspect ratio guides, safety zone guides, EVF peaking/magnifying, recording program, EXP lock, ND filter, custom preset, shutter speed, aperture, AE shift, gain, white balance - Canon XL-H1 | XL H1 Instruction Manual - Page 46
to review the last few seconds of your recording to check if it has been recorded properly. Press and release the (record review) button. The camcorder rewinds the tape, plays back the last few seconds, and returns to record pause mode. If the current video signal standard is different from the - Canon XL-H1 | XL H1 Instruction Manual - Page 47
position. • HD: To record on the tape in HDV standard or to use the camcorder as a high-definition (HD) camera. • SD 16:9, SD 4:3: To record on the tape in DV standard or to use the camcorder as a standard-definition (SD) camera. Select the aspect ratio as desired. If you set the [LED ON/OFF] option - Canon XL-H1 | XL H1 Instruction Manual - Page 48
SD Changing the Aspect Ratio When recording in standard definition (SD), you can change the aspect ratio of your recording to 16:9 or 4:3. MODE SELECT switch Set the MODE SELECT switch to SD 16:9 or SD 4:3. The camcorder's viewfinder has a 16:9 aspect ratio. If you select the 4:3 aspect ratio, the - Canon XL-H1 | XL H1 Instruction Manual - Page 49
You can use this function to locate the end of the last recorded scene. E END SEARCH button Press the END SEARCH button. • " " appears. • The camcorder rewinds/fast forwards the tape, plays back the last few seconds of the recording and stops the tape. • Pressing the button again cancels the search - Canon XL-H1 | XL H1 Instruction Manual - Page 50
Zooming You can operate the zoom from either the side grip or the carrying handle. You can also use the zoom ring on the zoom lens or the zoom buttons on the wireless controller. Zoom lever Zoom buttons Zoom ring ZOOM SPEED dial ZOOM SPEED switch Move the zoom lever toward W to zoom out (wide- - Canon XL-H1 | XL H1 Instruction Manual - Page 51
Zoom Preset (Lenses equipped with the zoom preset function) This function enables any given The preset setting is canceled when you attach the optional Extender XL 1.6x or mount a lens with a different magnification. The camcorder uses the zoom speed of the CONSTANT setting when returning to the - Canon XL-H1 | XL H1 Instruction Manual - Page 52
refer also to the instruction manual of the lens you are using. AF switch Focus ring Focus selector Autofocus (Lenses equipped with the autofocus function manually. The camcorder will return to autofocus as soon as you release the focus ring. When recording under bright conditions, the camcorder - Canon XL-H1 | XL H1 Instruction Manual - Page 53
Recording 1. Lenses equipped with autofocus function: Slide the focus selector on the lens to M. "MF" is displayed on screen. 2. Zoom in to telephoto. 3. Turn the focus ring to adjust the focus. 4. Operate the zoom to reframe the subject. If you focus manually and then leave the camcorder with the - Canon XL-H1 | XL H1 Instruction Manual - Page 54
. Focus Preset (Lenses equipped with the focus HIGH Open the menu and select [CAMERA SETUP]. Select [F SPEED PSET], select a setting option and close the menu. The selected speed appears next to "MF". Returning to the Preset Focus Setting Move the POSITION PRESET ON/SET switch to ON. The camcorder - Canon XL-H1 | XL H1 Instruction Manual - Page 55
Lenses with Built-in ND Filter) E When recording in bright surroundings, the camcorder ND filter operating ring. In recording programs other than M Manual and if the gain is not set to automatic, the filter available, use the Tv mode and set a high shutter speed, or use the Av mode and set - Canon XL-H1 | XL H1 Instruction Manual - Page 56
as TV signals. 30F Mode Records in 30 fps progressive mode and outputs signals converted into 60 fps interlaced. 30F (camera) A B C D E F G H I J 60i (tape) a a b b c c d d e e f f g g h h i i j j 24F Mode HD Records in 24 fps progressive mode. During playback the signals are down-converted to 60 - Canon XL-H1 | XL H1 Instruction Manual - Page 57
MODE SEL•2:3 Open the menu and select [CAMERA SETUP]. Select [24F MODE SEL], select a setting option and close the menu. • [2:3]: "24F" appears in white. • [2:3:3:2]: "24F" appears in orange. If you are using an editing system that does not support the 2:3:3:2 pulldown method, make sure to record - Canon XL-H1 | XL H1 Instruction Manual - Page 58
. With record run, the time code runs only when you are recording. With free run, the time code runs regardless of the operation of the camcorder. You can select the start point for the free-run and the record run preset time codes. MENU ( 31) SIGNAL SETUP TIME CODE COUNT-UP - Canon XL-H1 | XL H1 Instruction Manual - Page 59
In 24F (in SD) mode, the "frames" value of the time code is set in multiples of 5. When you change the frame rate from 60i/30F to 24F, the "frames" value of the time code will automatically become a multiple of 5. When you mix drop frame and non-drop frame time codes (including 24F frame rate - Canon XL-H1 | XL H1 Instruction Manual - Page 60
signal can also be recorded on tape. Time Code OUT The camcorder's internal time code is sent out from the TC OUT terminal as a standard LTC timing signal. Select whether to send out the camcorder's time code signal with the [T.CODE OUT] option in the [SIGNAL SETUP] - Canon XL-H1 | XL H1 Instruction Manual - Page 61
the external time code lock will be lost if you turn the camcorder off, set the camcorder to mode or change the position of the FRAME RATE switch. will not be available if the MODE SELECT switch is set to HD and the [SDI SPEC.] option is set to [SD LOCKED]. When you select [GENLOCK] or [GENLOCK+TC - Canon XL-H1 | XL H1 Instruction Manual - Page 62
00 00], select [CLEAR] in step 2. The user bit can be recorded when recording with the camcorder or from analog devices. The user bit set in the camcorder cannot be recorded when recording from digital devices (DV or HDV). Displaying the User Bit MENU ( 31) DISPLAY SETUP/ UB DISPLAY•OFF Open - Canon XL-H1 | XL H1 Instruction Manual - Page 63
Audio Recording When recording on the tape in either HDV or DV standard, you can select to record audio in only two channels or all four channels simultaneously. E HDV The audio transfer rate is 384 Kbps when recording on 2 channels, and 384 Kbps (192 Kbps / 2 channels) when recording on all 4 - Canon XL-H1 | XL H1 Instruction Manual - Page 64
Using the Wind Screen With the supplied microphone (only), you can reduce the sound of wind recorded from the front microphone. MENU ( 31) AUDIO SETUP WIND SCREEN•••ON Open the menu and select [AUDIO SETUP]. Select [WIND SCREEN], select a setting option and close the menu. Recording on Channels - Canon XL-H1 | XL H1 Instruction Manual - Page 65
-up: Open the menu and select [AUDIO SETUP]. Select [R-XLR GAINUP], set it to [12dB] and close the menu. When connecting a microphone that does not support phantom power, make sure to set the +48V switch to OFF. Otherwise the microphone may be damaged. Recording 65 - Canon XL-H1 | XL H1 Instruction Manual - Page 66
shoe. • With the MA-300, you can use balanced microphones on all 4 channels. • Refer also to the MA-300 instruction manual. 2. Set the INPUT SELECT switch to SHOE. The MA-300 does not support phantom power. When using the MA-300 only the MIC LEVEL signal can be input. The MA-100 and - Canon XL-H1 | XL H1 Instruction Manual - Page 67
does not support phantom power, 90). Automatic Audio Adjustments Set the REC LEVEL switch to A. Manual Audio Adjustments 1. Set the REC LEVEL switch to M. 2. When when adjusting the audio level. If the input level is too high, audio may become distorted even if the audio level indicator is - Canon XL-H1 | XL H1 Instruction Manual - Page 68
Image Stabilizer (Lenses Equipped with Image Stabilizer) You can select to activate recommend turning off the image stabilizer when mounting the camcorder on a tripod. The image stabilizer is designed to compensate for a normal degree of camcorder shake. The image stabilizer may not be - Canon XL-H1 | XL H1 Instruction Manual - Page 69
automatically controls camera adjustments allowing you to simply point and shoot. However, in the Auto mode, you have the option of adjusting the settings manually. Shutter-Priority ( 72) Use this mode to select the shutter speed. The camcorder automatically sets a matching aperture setting - Canon XL-H1 | XL H1 Instruction Manual - Page 70
f/1.6 to f/9.5 (or to full iris close)-and the camcorder automatically sets a matching shutter speed. This mode allows for the best control of depth of field. Manual ( 74) This mode offers the creative freedom of a complete range of manual controls. In the Manual mode, you have the option to set the - Canon XL-H1 | XL H1 Instruction Manual - Page 71
Available when the exposure is locked. 2: Available during clear scan. HD 20x L IS, 20x L IS, 16x IS II and 3x zoom lens Recording program Manual focus ring Zoom ring Image Stabilizer* ND filter Focus mode AF switch/PUSH AF button (on) (autofocus) * Not available with the 3x zoom lens. Modes - Canon XL-H1 | XL H1 Instruction Manual - Page 72
Recording in the Shutter-Priority (Tv) Mode SHUTTER button SHUTTER button POWER dial Available shutter speeds when recording movies depend on the selected frame rate: 60i/30F 24F 1/4*, 1/8, 1/15, 1/30, 1/60, 1/100, 1/250, 1/500, 1/1000, 1/2000, 1/4000, 1/8000, 1/15000, CS (clear scan) 1/3*, - Canon XL-H1 | XL H1 Instruction Manual - Page 73
condition. In such case, readjust the aperture. When the built-in ND filter of a lens is activated, the picture may become dark when you set a high F number. In such case, turn the ND Filter off first and readjust the aperture. Recording 73 - Canon XL-H1 | XL H1 Instruction Manual - Page 74
Recording in the Manual Mode You can set the exposure at any combination of shutter speed and aperture levels. POWER dial IRIS dial SHUTTER button SHUTTER button Available settings - Canon XL-H1 | XL H1 Instruction Manual - Page 75
Adjusting the Exposure EXP. LOCK button POWER dial E GAIN dial Recording Exposure Lock IRIS dial SHUTTER button SHUTTER button 1. Set the POWER dial to , Tv or Av. 2. Press the EXP. LOCK button. • The exposure indicator appears. Use the exposure indicator as an estimate. • The mark above the - Canon XL-H1 | XL H1 Instruction Manual - Page 76
Using AE Shift You can use the AE Shift control to manually override the automatic exposure system to darken or lighten the image. Select from 13 AE levels (+2.0, +1.5, +1.0, +0.75, +0.5, +0.25, ±0, -0.25, -0.5, -0.75, -1.0, -1.5, -2.0). POWER dial AE SHIFT dial 1. - Canon XL-H1 | XL H1 Instruction Manual - Page 77
Adjusting the Gain The gain control adjusts the level of the video signal generated depending on the lighting and shooting conditions. You can select from automatic gain control or preset levels that range from -3 to +18 dB. E -3 dB Auto 0 dB +3 dB/+6 dB/ +12 dB/+18 dB For the lowest noise - Canon XL-H1 | XL H1 Instruction Manual - Page 78
Setting the White Balance The camcorder uses an electronic white balance process to calibrate the picture for accurate color display under different lighting conditions. In addition to the fully automated mode, - Canon XL-H1 | XL H1 Instruction Manual - Page 79
number flash on the screen and stop flashing when the setting is complete. As long as the built-in rechargeable lithium battery is charged, the camcorder retains the custom white balance setting even if you turn it off. When you set the custom white balance: very rarely and depending on the - Canon XL-H1 | XL H1 Instruction Manual - Page 80
camcorder the EVF Peaking and EVF Magnifying functions. Use this feature to guide the adjustment of the aperture and shutter speed. Available zebra pattern the Zebra Pattern Level MENU ( 31) CAMERA SETUP ZEBRA LEVEL••75 Open the menu and select [CAMERA SETUP]. Select [ZEBRA LEVEL], select a - Canon XL-H1 | XL H1 Instruction Manual - Page 81
be detected as skin areas. Activating the Skin Detail Function MENU ( 31) CAMERA SETUP SKIN D.SET SKIN DETAIL••OFF Open the menu and select [CAMERA SETUP] and [SKIN D.SET]. Select [SKIN DETAIL], set it to [HIGH ], [MIDDLE ] or [LOW ] and close the menu. " " appears. Determining the Skin Area - Canon XL-H1 | XL H1 Instruction Manual - Page 82
preset from the memory card to the camcorder. The recording specifications that can be recording on the tape. Gamma Curve [GAM] (only in CAMERA mode) You can select from [NORMAL], [CINE1] or [HIGH], [MIDDLE] or [LOW]. [NORMAL] [CINE1] [CINE2] Representation of the setting Input Output [HIGH - Canon XL-H1 | XL H1 Instruction Manual - Page 83
). Coring [COR] Adjust the detail noise level in the range -9 to +9. Noise Reduction 1 [NR1] (only in CAMERA mode) You can select from [OFF], [HIGH], [MIDDLE] or [LOW]. • With the [HIGH] setting moving subjects may leave a trailing afterimage. • When picture noise is already low due to the gain - Canon XL-H1 | XL H1 Instruction Manual - Page 84
Color Phase [CPH] Adjust the color phase in the range -9 to +9. R Gain [RGN] Adjust the red level in the range -9 to +9. G Gain [GGN] Adjust the green level in the range -9 to +9. B Gain [BGN] Adjust the blue level in the range -9 to +9. R-G Matrix [RGM] Adjust the level in the range -9 to +9. R-B - Canon XL-H1 | XL H1 Instruction Manual - Page 85
CUSTOM PRESET ON/OFF button CUSTOM PRESET SELECT button E Recording SELECT dial MENU button Setting the Custom Preset Settings MENU ( 31) CUSTOM PRESET EDIT SELECT CP 1. Open the menu and select [CUSTOM PRESET]. 2. Select [ EDIT]. The custom preset submenu appears. 3. Select [SELECT CP] - Canon XL-H1 | XL H1 Instruction Manual - Page 86
KEY] to cycle through the options in reverse order (from last to first) ( 90). • When you are not using the custom preset setting, set the camcorder to "CP ". 2. Press the CUSTOM PRESET ON/OFF button. The setting is activated. 86 - Canon XL-H1 | XL H1 Instruction Manual - Page 87
] and in the confirmation screen select [YES] to load the file. 5. Close the menu. Loading a Custom Preset File from a Still Image to the Camcorder Recording 1. Select the still image that contains the custom preset file you want to load. Use the + / - buttons to move between the still images - Canon XL-H1 | XL H1 Instruction Manual - Page 88
Saving the Custom Preset Settings in Use with a Still Image on the Memory Card In mode, you can save the custom preset settings currently being used on the memory card along with a still image of the recording. This is very useful when you want to load the custom preset file later by selecting - Canon XL-H1 | XL H1 Instruction Manual - Page 89
displaying black band or flicker on the screen. You can adjust the frequency from 60.1 Hz to 203.9 Hz. E SHUTTER buttons POWER dial MENU ( 31) CAMERA SETUP CLEAR SCAN•••60.1Hz 1. Set the POWER dial to Tv or M. 2. Press the SHUTTER button to display "CS". 3. Open the menu and select - Canon XL-H1 | XL H1 Instruction Manual - Page 90
key. TV screen Data code EVF B&W mode To check the current custom key settings: In recording mode: Open the menu and select [DISPLAY SETUP/ ]. Select [GUIDE INFO], set it to [CUSTOM KEYS] and close the menu. In VCR/PLAY mode: Open the menu and select [DISPLAY SETUP/ ]. Select [CUSTOM KEYS], set - Canon XL-H1 | XL H1 Instruction Manual - Page 91
. Press the button again to deactivate it. VCR STOP ( 43) When the camcorder is in record pause mode, you can turn off the recorder section. If the OFF, even in VCR STOP mode, the camera section is still powered, allowing you to adjust the camera settings without worrying about the tape or the - Canon XL-H1 | XL H1 Instruction Manual - Page 92
The time code hold will be canceled when you turn the camcorder on/off, change the operation mode CAMERA/VCR/PLAY or change the position of the TAPE/CARD switch output from all terminals will not change. With HDV compatible XL lenses, the FLIP EVF function will be deactivated while displaying the - Canon XL-H1 | XL H1 Instruction Manual - Page 93
Recording Color Bars/Audio Reference Signal Color Bars You can generate and record SMPTE (Society of Motion Picture and Television Engineers) color bars. E BARS/FADE SELECT button Recording BARS/FADE ON/OFF button 1. Press the BARS/FADE SELECT button to display "COLOR BARS". • Repeatedly - Canon XL-H1 | XL H1 Instruction Manual - Page 94
Using the Faders You can choose to fade to/from white or to/from black. 1. While recording or in record pause mode, press the BARS/FADE SELECT button to display "WHITE FADE" or "BLACK FADE". • Repeatedly pressing the button will cycle through the options in the following order: COLOR BARS, WHITE - Canon XL-H1 | XL H1 Instruction Manual - Page 95
Using the Digital Video Control This feature enables the XL H1 to control the record and XL H1 for DV control. With some non-Canon devices: The DV control may not work properly depending on the connected device. As long as the built-in rechargeable lithium battery is charged, the camcorder - Canon XL-H1 | XL H1 Instruction Manual - Page 96
Other Camcorder Functions/Settings Changing the Recording Mode (SP/LP) When recording in Standard Definition (SD mode) only, you can back a tape that has been recorded in LP mode with another digital device on this camcorder, or vice versa, the picture and sound may become distorted. Superimposing - Canon XL-H1 | XL H1 Instruction Manual - Page 97
be displayed for approx. 3 seconds when you switch from autofocus to manual focus or when you operate the focus ring in the manual focus mode. You can select to display the distance in metric The focal distance will not be displayed when the optional Extender XL 1.6x is attached to the camcorder. 97 - Canon XL-H1 | XL H1 Instruction Manual - Page 98
distorted, clean the video heads using a Canon Head Cleaning Cassette or a commercially available digital video head-cleaning cassette ( 138). Select ) To pause playback, press the during normal playback. button on the camcorder or the PAUSE button on the wireless controller (Rewind Playback) / - Canon XL-H1 | XL H1 Instruction Manual - Page 99
Playback) / (Fast Forward Playback) Plays back the tape at 9.5 times normal speed (forward or reverse). Press down and hold the or button on the camcorder or the REW or FF button on the wireless controller during normal playback, rewind or fast forward to enter the fast playback at 8x the - Canon XL-H1 | XL H1 Instruction Manual - Page 100
HD 1920x1080 D3 (1440x1080) MPEG TS SD in 4:3 640x480 D1 (SD) Normal DV (SD) SD in 16:9 640x480 D1 (SD) DV (SD) Connection to a High Definition TV or Monitor (HDTV/HiVision) 1 Using the SD/HD SDI Terminal The audio signal is separate from the component video signal Open the terminal cover - Canon XL-H1 | XL H1 Instruction Manual - Page 101
to . 2. Open the menu and select [SIGNAL SETUP]. Select [SDI OUTPUT] and set it to [ON]. 3. From the same [SIGNAL SETUP] submenu select [SDI SPEC.]. Select [AUTO] or E [SD LOCKED] to match the video output you wish to use. 4. Close the menu. 2 Using the COMPONENT OUT (D-) Terminal Playback - Canon XL-H1 | XL H1 Instruction Manual - Page 102
HDV/DV Terminal DV Cable (commercially available) 4-pin 6-pin • When connecting the camcorder to a monitor TV that supports DV, you may need to carry out a procedure on the TV to recognize the camera. Refer to the instruction manual of the TV or monitor. • If necessary, turn on the DV conversion and - Canon XL-H1 | XL H1 Instruction Manual - Page 103
a TV set the input selector to VIDEO. If connecting to a VCR, set the input selector to LINE. Refer also to the instruction manual of the TV or VCR. We recommend powering the camcorder from a household power outlet. When connecting to the RCA terminal, set the RCA/BNC selector down to RCA. When - Canon XL-H1 | XL H1 Instruction Manual - Page 104
Audio Output AUDIO2 RCA terminals SET button SELECT dial MENU button AUDIO MONITOR button AUDIO1 RCA terminals Selecting the Audio Output of the RCA Terminals Press the AUDIO MONITOR button. Repeatedly pressing the button will cycle through the options in the following sequence: CH 1/2 , CH 3/4 - Canon XL-H1 | XL H1 Instruction Manual - Page 105
Returning to a Pre-marked Position If you wish to return to a particular scene later, mark the point with the zero set memory, and the tape will stop at that point when you rewind/fast forward the tape. E This function is operated with the wireless controller. REW button ZERO SET MEMORY - Canon XL-H1 | XL H1 Instruction Manual - Page 106
Index Search With the index search you can locate any point you have marked beforehand with an index signal ( 91). This function is operated with the wireless controller. SEARCH SELECT button / buttons 1. Press the SEARCH SELECT button to display "INDEX SEARCH". " " appears. 2. Press the or - Canon XL-H1 | XL H1 Instruction Manual - Page 107
Date Search You can locate the change of the date/time zone with the date search function. This function is operated with the wireless controller. E SEARCH SELECT button / buttons 1. Press the SEARCH SELECT button to display "DATE SEARCH". " " appears. 2. Press the or button to begin searching - Canon XL-H1 | XL H1 Instruction Manual - Page 108
the Data Code The camcorder maintains a data code containing the recording date and time and other camera data such as shutter speed controller. The data code will not display the next time you turn on the camcorder. Six-Second Auto Date The date and time appear for 6 seconds when you begin - Canon XL-H1 | XL H1 Instruction Manual - Page 109
and an off setting are available to prevent interference from other Canon wireless controllers being used nearby. E Turning the Remote Sensor Off 2. Keep the button pressed for over 2 seconds. If you have set the camcorder to mode 1, press the ZOOM W button for mode 1. The wireless controller - Canon XL-H1 | XL H1 Instruction Manual - Page 110
. Recording starts. 9. Press the button to stop recording. 10. Connected device: Stop playback. HDV/DV In 1. Connect the camcorder to the external video device. For the connection diagram to a digital device refer to Section 3 of Connecting to a Monitor/TV ( 102). 2. Set the POWER dial to and load - Canon XL-H1 | XL H1 Instruction Manual - Page 111
the DV terminal, "COPYRIGHT PROTECTED DUBBING RESTRICTED" appears and you will not be able to record the contents of the tape. We recommend powering the camcorder from a household power outlet. Editing 111 - Canon XL-H1 | XL H1 Instruction Manual - Page 112
or anomalous signals such as ghost signals). For normal use, set [AV DV] to [OFF]. If it is set to [ON], digital signals cannot be input via the camcorder's HDV/DV terminal. Depending on the software and the specifications of your computer, you may not be able to transfer converted signals via - Canon XL-H1 | XL H1 Instruction Manual - Page 113
connected the camcorder, disconnect and reconnect the DV cable. Should the problem persist, disconnect the cable, turn both the camcorder and the of the camcorder's video output, the camcorder may not be correctly detected or may not operate properly. Refer also to the instruction manual of the - Canon XL-H1 | XL H1 Instruction Manual - Page 114
Selecting UsingaMemoryCard the Image Quality/Size Changing the Still Image Quality You can choose from Superfine, Fine and Normal. MENU ( 31) RECORDING SETUP IMG QUALITY••FINE Open the menu and select [RECORDING SETUP]. Select [IMG QUALITY], select a setting option and close the menu. Changing - Canon XL-H1 | XL H1 Instruction Manual - Page 115
reset each time a new memory card is inserted. If the memory card already contains image files, the consecutive file number will be assigned. The camcorder memorizes the file number of the last image and assigns the consecutive file number to the next image, even when a new memory card is inserted - Canon XL-H1 | XL H1 Instruction Manual - Page 116
2. Press the PHOTO button halfway. • The symbol turns green once the focus is adjusted. The picture may appear out of focus for a moment while the camcorder is focusing. • While the PHOTO button is half-pressed you can also use the focusing ring to adjust the focus. • Exposure is locked. • When you - Canon XL-H1 | XL H1 Instruction Manual - Page 117
subject is not suitable for autofocus, the camcorder locks the focus. In that case, adjust the E focus manually with the focusing ring. When the as you press the PHOTO button. MENU ( 31) CAMERA SETUP FOCUS PRI.•••ON Open the menu and select [CAMERA SETUP]. Select [FOCUS PRI.], set it to [ - Canon XL-H1 | XL H1 Instruction Manual - Page 118
may decrease by 2 images at once. • All indicators are displayed in green when a memory card is played back. " " Card Access Display Indicates that the camcorder is writing on the memory card. Image Quality and Size Indicates the quality and size currently selected for recording still images. 118 - Canon XL-H1 | XL H1 Instruction Manual - Page 119
Selecting the Drive Mode Continuous Shooting High-Speed Continuous Captures a quick series of still images while you hold the PHOTO button pressed down. For the number of frames per second, refer to the table E below. AEB The camcorder records a still image in three different exposures (dark, - Canon XL-H1 | XL H1 Instruction Manual - Page 120
Auto Exposure Bracketing Press the PHOTO button. Three still images in different exposures are recorded to the memory card. Make sure that there is sufficient space on the memory card. 120 - Canon XL-H1 | XL H1 Instruction Manual - Page 121
Selecting the Metering Method EVALUATIVE CENT.WEIGHT.AVERAGE SPOT Appropriate for standard shooting conditions, including backlit scenes. E The camcorder divides images into several zones for light metering. It evaluates the position and brightness of the subject, background, direct light or - Canon XL-H1 | XL H1 Instruction Manual - Page 122
instruction manual of the Speedlite flash. Connecting a Speedlite Flash When connecting a Canon Speedlite flash you cannot use the Off-Camera Shoe Cord designed for Canon EOS SLR cameras. Always turn off the camcorder /580EX flashes. The camcorder does not support the ST-E2 Wireless Speedlite - Canon XL-H1 | XL H1 Instruction Manual - Page 123
seconds after it has been recorded. E MENU ( 31) CAMERA SETUP REVIEW 2SEC Open the menu and select [CAMERA SETUP]. Select [REVIEW], select a setting option and close the be selected when (continuous shooting), (high-speed continuous shooting) or (auto exposure bracketing) is selected. Using a Memory - Canon XL-H1 | XL H1 Instruction Manual - Page 124
, uploaded from a computer, edited on a computer and images whose file names have been changed may not be played back correctly. Do not turn off the camcorder, change the position of the TAPE/CARD switch or the POWER dial, open the memory card cover or remove the memory card while the card - Canon XL-H1 | XL H1 Instruction Manual - Page 125
Index Screen 1. Move the zoom lever toward W. Up to 6 images appear. 2. Turn the SELECT dial to select an image. E • Move the " " to the image you wish to view. • You can switch between the index pages by pressing the + / - button. 3. Move the zoom lever toward T. The index screen is - Canon XL-H1 | XL H1 Instruction Manual - Page 126
Erasing Images You can erase images one at a time or all at once. Be careful when erasing images. Erased images cannot be recovered. Erasing a still image that had a custom preset file embedded (recorded with the [ON+CP DATA] setting) will erase the image and the embedded custom preset file. - Canon XL-H1 | XL H1 Instruction Manual - Page 127
Protecting Images You can protect important images from accidental erasure when displaying a single image or the index screen. E If a memory card is initialized, all still images, even protected ones, will be erased permanently. 1. Select the image you wish to protect. 2. Press the SET button - Canon XL-H1 | XL H1 Instruction Manual - Page 128
the card initialization cannot be recovered. If you use a memory card other than the supplied one, initialize it with the camcorder. MENU ( 31) CARD OPERATIONS INITIALIZE 1. Open the menu and select [CARD OPERATIONS]. 2. Select [INITIALIZE]. 3. Select [EXECUTE]. 4. In the confirmation - Canon XL-H1 | XL H1 Instruction Manual - Page 129
images for printing and set the number of copies. These print order settings are E compatible with the Digital Print Order Format (DPOF) standards and can be used for printing on DPOF compatible printers. A maximum of 998 still images can be selected. Selecting Still Images for Printing (Print Order - Canon XL-H1 | XL H1 Instruction Manual - Page 130
, all settings will be erased. Recording Mode Aperture setting in Av mode Shutter speed setting in Tv mode Aperture, shutter speed setting in Manual mode Custom white balance Exposure lock on/off Aperture, shutter speed setting during exposure lock Color bars setting* Color bars on/off* Faders - Canon XL-H1 | XL H1 Instruction Manual - Page 131
programmed AE mode or frame rate. Recording Mode Aperture setting in Av mode Shutter speed setting in Tv mode Aperture, shutter speed setting in Manual mode Custom white balance Exposure lock on/off Aperture, shutter speed setting during exposure lock Color bars setting* Color bars on/off* Faders - Canon XL-H1 | XL H1 Instruction Manual - Page 132
Hiding/Showing the Displays on the TV Screen When you connect a TV for recording, you can select to hide the camcorder displays on the TV screen. For playback, you can show the camcorder displays on the TV screen. MENU ( 31) DISPLAY SETUP / TV SCREEN••••ON Open the menu and select [DISPLAY SETUP - Canon XL-H1 | XL H1 Instruction Manual - Page 133
focus ( 53) Custom preset ( 82) Custom keys ( 90)/ Date and time ( 41) Gain ( 77) Recording standard ( 47) Frame rate ( 56) * In Manual mode. Tape operation REC PAUSE STOP EJECT Remote sensor mode ( 109) Wind screen ( 64) Recording mode ( 96) Audio level indicator ( 67) Magnifying ( 53) Metering - Canon XL-H1 | XL H1 Instruction Manual - Page 134
Screen Displays during Playback Date search ( 107)/ Index search ( 106) Audio output ( 104) Mix balance ( 104) Custom keys ( 90) Data code ( 108) End search ( 49) Recording standard ( 47) Frame rate ( 56) Tape operation ( 98) REC PAUSE STOP EJECT PLAY : Fast forward : Rewind : Fast forward playback - Canon XL-H1 | XL H1 Instruction Manual - Page 135
Side panel Video signal standard Time code setting Video output signal from the HD/SD SDI Terminal [AUDIO LEVEL] is set to [MANUAL] Time code E Tape has reached the end Remaining battery charge Time code synchronization setting Audio level indicator Additional Information 135 - Canon XL-H1 | XL H1 Instruction Manual - Page 136
connected, or the connected digital device is turned off. 110 CONDENSATION HAS BEEN Condensation has been detected in the camcorder. DETECTED 139 TAPE END not support still images recording. 24 INCOMPATIBLE INPUT SIGNAL You attempted to input a video signal incompatible with the camcorder - Canon XL-H1 | XL H1 Instruction Manual - Page 137
leave the camcorder in places subject to high temperatures, such as a sun-heated car, and high humidity. Do not use the camcorder in places camcorder. If the camcorder does not function properly, consult qualified service personnel. Handle the camcorder with care. Do not subject the camcorder - Canon XL-H1 | XL H1 Instruction Manual - Page 138
, we recommend cleaning the video heads frequently with the Canon DVM-CL Digital Video Head Cleaning Cassette or a commercially available dry cleaning camcorder. If the playback picture does not improve after cleaning the video heads it may indicate a malfunction. Consult a Canon Service Center. - Canon XL-H1 | XL H1 Instruction Manual - Page 139
"REMOVE THE CASSETTE" appears and " " starts flashing. Remove the cassette immediately and leave the cassette compartment open. Leaving the cassette in the camcorder may damage the tape. A cassette cannot be loaded when condensation is detected. Resuming use: It takes about 1 hour until the water - Canon XL-H1 | XL H1 Instruction Manual - Page 140
metallic objects may cause a short circuit and damage the battery pack. Dirty terminals may cause a poor contact between the battery pack and the camcorder. Wipe the terminals with a soft cloth. Since storing a charged battery pack for a long time (about 1 year) can shorten its lifecycle or affect - Canon XL-H1 | XL H1 Instruction Manual - Page 141
The memory function is not supported by the camcorder. Protecting Tapes from Accidental defects or exposure to static electricity. Canon Inc. makes no warranties for corrupted or not leave memory cards in places subject to high humidity and high temperature. Do not disassemble memory cards. - Canon XL-H1 | XL H1 Instruction Manual - Page 142
adapter to operate the camcorder and to charge battery packs in any country with power supply between 100 and 240 V AC, 50/60 Hz. Consult the Canon Service Center for information on plug , Saint Vincent and the Grenadines, Surinam, Taiwan, Trinidad and Tobago, USA, Venezuela, Virgin Islands. 142 - Canon XL-H1 | XL H1 Instruction Manual - Page 143
is installed and pull to detach it. Do not remove the cover for any other purpose than removing the battery for recycling when disposing the camcorder. When you have removed the battery, keep it out of reach of children. If it is swallowed, seek medical assistance immediately. The battery case - Canon XL-H1 | XL H1 Instruction Manual - Page 144
Troubleshooting If you have a problem with your camcorder, refer to this checklist. Consult your dealer or a Canon Service Center if the problem persists. Power Source Problem Camcorder will not turn on. The camcorder . Camcorder will not focus. Autofocus does not work on that Focus manually. - Canon XL-H1 | XL H1 Instruction Manual - Page 145
64 66 Playback Problem Cause Solution Pressing the playback button does Camcorder is turned off, or is not set Set the camcorder to VCR/PLAY 98 Lenses with built-in image stabilizer: Detected air bubbles inside the lens. Sometimes air bubbles may form inside the lens in airplanes or on high - Canon XL-H1 | XL H1 Instruction Manual - Page 146
About the LCD screen The LCD screen is produced with extremely high-precision manufacturing techniques, with more than 99.99% of the pixels operating to specification. Less than 0.01% of the pixels may occasionally misfire or appear - Canon XL-H1 | XL H1 Instruction Manual - Page 147
1 RC-72 Ratio Converter 5 FS-72U Filter Set 16x IS II Zoom Lens XL 5.5-88 mm 3x Zoom Lens XL 3.4-10.2 mm 16x Manual Zoom Lens XL 5.4-86.4 mm MiniDV Video Cassette 20x L IS Zoom Lens XL 5.4-108 mm EF lens 2 EF Adapter XL 4 HC-3200 System Case TA-100 Tripod Adapter FU-1000 Monochrome CRT - Canon XL-H1 | XL H1 Instruction Manual - Page 148
1 Can be attached to the HD 20x L IS, 20x L IS, 16x IS II and 16x manual zoom lenses (only for recording in SD mode). 2 EF-S lenses cannot be used. 3 When you use the FU-1000 Monochrome CRT Viewfinder with the XL H1 you can use the compact power adapter or the optional CB-920 Car Battery - Canon XL-H1 | XL H1 Instruction Manual - Page 149
by the malfunction of non-genuine Canon accessories (e.g., a leakage and/or camcorder during transportation and storage. Additional Information 3x Zoom Lens XL 3.4-10.2 mm A super wide-angle lens that gives a range of 24.5- 73.5 mm (35 mm film equivalent). 16x Manual Zoom Lens XL 5.4-86.4 mm A high - Canon XL-H1 | XL H1 Instruction Manual - Page 150
Canon EF lenses to the XL H1. The difference in size between the XL H1's 1/3-inch CCD's and 35 mm film means that the effective focal length of still camera lenses is multiplied by 8.8x (4:3)/ 7.2x (16:9). • Consult your local service outlet to make sure there are no compatibility problems with - Canon XL-H1 | XL H1 Instruction Manual - Page 151
Controller When the ZR-2000 is connected to the LANC terminal of a Canon camcorder, it is possible to control functions such as the start and stop of Zoom Remote Controller TA-100 Tripod Adapter Extender XL 1.6x EF Adapter XL 3x Zoom Lens XL 3.4-10.2mm 16x Zoom Lens XL 5.4-86.4mm 20x L IS Lens FS-72U - Canon XL-H1 | XL H1 Instruction Manual - Page 152
supports Exif 2.2 (also called "Exif Print"). Exif Print is a standard for enhancing the communication between camcorders and printers. By connecting to an Exif Print-compliant printer, the camcorder's image data at the time of shooting is used and optimized, yielding extremely high quality - Canon XL-H1 | XL H1 Instruction Manual - Page 153
dBv (Auto mode)/600 ohms Max: -67 dBv (Manual mode, max. volume) AUDIO 1, 2: RCA jack ( Dimensions (W x H x D) Weight(camcorder body only) (fully loaded) 7.4 lb.) Lens Some lens specifications change as shown below when mounting on the XL H1. Angle of View Wide Angle HD 20x L IS Lens 39° 51´ x - Canon XL-H1 | XL H1 Instruction Manual - Page 154
CA-920 Compact Power Adapter Power supply Power consumption Rated output Operating temperature Dimensions Weight BP-950G Battery Pack 100 - 240 V AC, 50/60 Hz 24 W Adapter: 7.2 V DC, 2.0 A, Charger: 8.4 V DC, 1.5 A 0 - 40 °C (32°- 104 °F) 75 x 99 x 51 mm (3.0 x 3.9 x 2.0 in.) 215 g (7.6 oz.) - Canon XL-H1 | XL H1 Instruction Manual - Page 155
,using the camcorder 142 Accessories 9 AE shift 76 Analog-digital converter 112 Aspect guides 45 Aspect ratio signal standards 6 HDV/DV tape recording standards 6 HDV/DV terminal 102, 110, 113 High definition TV, connections 100 I Image stabilizer 68 Index search 106 Index write 91 K Knee - Canon XL-H1 | XL H1 Instruction Manual - Page 156
image, quality and size 114 T Tally lamp 97 Tape protection 141 Temporary autofocus 53 Time code 58 Time code in 60 Time code out 60 Troubleshooting 144 Tv (recording program 72 TV, connections 100 U User bit 62 V VCR STOP 43, 90 Video heads, cleaning 138 Viewfinder 19-22 Viewfinder - Canon XL-H1 | XL H1 Instruction Manual - Page 157
Phone Amp Phone Amp CH 1/3 CH 2/4 ADVANCED Head Amp Head Amp Input Output Audio process 1 INPUT SELECT SW XLR GAIN UP (menu) Pre Amp A / D D / A Digital Process Filters ALC EVR OUTPUT SELECT (MENU) Bilingual PHONE OUT VOL Line Amp XLR GAIN UP SD 2CH 48kHz : CH 1/ CH 2 32kHz : CH 1/ CH - Canon XL-H1 | XL H1 Instruction Manual - Page 158
158 LEVEL METER LCD Driver Monitor Select ; MENU CH 1 RCA CH 1/CH 3 PHONE Lch METER Lch RCA CH 2/CH 4 PHONE Rch METER Rch CH 2 Audio Monitor CH1 CH3 MIX CH2 - Canon XL-H1 | XL H1 Instruction Manual - Page 159
Custom Keys Make a copy of this page and carry it with you as a reminder of the functions that can be assigned to each of the two custom keys in each operation mode. E You can assign frequently used functions to the custom keys. The custom keys can have different functions assigned to them in each - Canon XL-H1 | XL H1 Instruction Manual - Page 160
in the instruction manual; ii) the use of accessories, attachments, products, supplies, parts or devices with this Canon product that do not conform to Canon specifications or that cause abnormally frequent service problems; iii) repairs or services performed by any party other than a Canon Service - Canon XL-H1 | XL H1 Instruction Manual - Page 161
INC. NEW JERSEY OFFICE 100 Jamesburg Road, Jamesburg, NJ 08831 USA CANON U.S.A., INC. CHICAGO OFFICE 100 Park Blvd., Itasca, IL 60143 USA CANON U.S.A., INC. LOS ANGELES OFFICE 15955 Alton Parkway, Irvine, CA 92618 USA CANON U.S.A., INC. HONOLULU OFFICE 210 Ward Avenue, Suite 200, Honolulu, HI
-
 1
1 -
 2
2 -
 3
3 -
 4
4 -
 5
5 -
 6
6 -
 7
7 -
8
-
9
-
10
-
11
-
12
-
13
-
14
-
15
-
16
-
17
-
18
-
19
-
20
-
21
-
22
-
23
-
24
-
25
-
26
-
27
-
28
-
29
-
30
-
31
-
32
-
33
-
34
-
35
-
36
-
37
-
38
-
39
-
40
-
41
-
42
-
43
-
44
-
45
-
46
-
47
-
48
-
49
-
50
-
51
-
52
-
53
-
54
-
55
-
56
-
57
-
58
-
59
-
60
-
61
-
62
-
63
-
64
-
65
-
66
-
67
-
68
-
69
-
70
-
71
-
72
-
73
-
74
-
75
-
76
-
77
-
78
-
79
-
80
-
81
-
82
-
83
-
84
-
85
-
86
-
87
-
88
-
89
-
90
-
91
-
92
-
93
-
94
-
95
-
96
-
97
-
98
-
99
-
100
-
101
-
102
-
103
-
104
-
105
-
106
-
107
-
108
-
109
-
110
-
111
-
112
-
113
-
114
-
115
-
116
-
117
-
118
-
119
-
120
-
121
-
122
-
123
-
124
-
125
-
126
-
127
-
128
-
129
-
130
-
131
-
132
-
133
-
134
-
135
-
136
-
137
-
138
-
139
-
140
-
141
-
142
-
143
-
144
-
145
-
146
-
147
-
148
-
149
-
150
-
151
-
152
-
153
-
154
-
155
-
156
-
157
-
158
-
159
-
160
-
161
 |
 |
Mini
Digital
Video
Cassette
HD VIDEO CAMERA RECORDER
Instruction Manual
CAMÉSCOPE ET LECTEUR VIDÉO HD
Manuel d’instruction
VIDEOCÁMARA Y GRABADORA HD
Manual de Instrucciones
NTSC
A
PUB. DIM-720
English
Fran
ç
ais
Español