Canon XL-H1 XL H1 Instruction Manual - Page 22
Adjusting the Viewfinder, Attaching the Microphone Unit
 |
UPC - 086753092998
View all Canon XL-H1 manuals
Add to My Manuals
Save this manual to your list of manuals |
Page 22 highlights
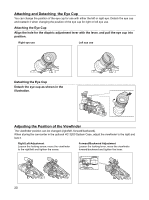
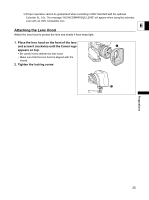
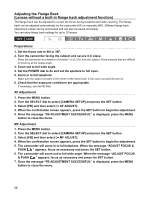
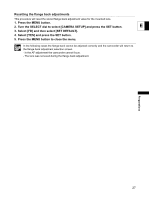
Adjusting the Viewfinder You can adjust the brightness, contrast, color and sharpness of the viewfinder. These adjustments will not affect your recording. MENU ( 31) DISPLAY SETUP / EVF SETUP BRIGHTNESS••• CONTRAST COLOR SHARPNESS•••• 1. Press the MENU button. 2. Turn the SELECT dial to select [DISPLAY SETUP/ ] and press the SET button. 3. Select [EVF SETUP] and then select [BRIGHTNESS], [CONTRAST], [COLOR] or [SHARPNESS]. 4. Adjust the setting with the SELECT dial and press the SET button. • After the adjustment you will return to the [EVF SETUP] submenu. Change additional settings in the same way as necessary. • For more details regarding the [EVF BW MODE] setting refer to ( 92). 5. Press the MENU button to close the menu. Attaching the Microphone Unit 1. Loosen the microphone locking screw on the viewfinder unit, open the microphone clamp and insert the microphone into the microphone clamp. 2. Align the mark on the microphone with the mark on the clamp and tighten the screw. 3. Plug the microphone cable to the camcorder's FRONT MIC terminals. 22
-
 1
1 -
2
-
3
-
4
-
5
-
6
-
7
-
8
-
9
-
10
-
11
-
12
-
13
-
14
-
15
-
16
-
 17
17 -
 18
18 -
 19
19 -
 20
20 -
 21
21 -
 22
22 -
 23
23 -
 24
24 -
 25
25 -
 26
26 -
 27
27 -
28
-
29
-
30
-
31
-
32
-
33
-
34
-
35
-
36
-
37
-
38
-
39
-
40
-
41
-
42
-
43
-
44
-
45
-
46
-
47
-
48
-
49
-
50
-
51
-
52
-
53
-
54
-
55
-
56
-
57
-
58
-
59
-
60
-
61
-
62
-
63
-
64
-
65
-
66
-
67
-
68
-
69
-
70
-
71
-
72
-
73
-
74
-
75
-
76
-
77
-
78
-
79
-
80
-
81
-
82
-
83
-
84
-
85
-
86
-
87
-
88
-
89
-
90
-
91
-
92
-
93
-
94
-
95
-
96
-
97
-
98
-
99
-
100
-
101
-
102
-
103
-
104
-
105
-
106
-
107
-
108
-
109
-
110
-
111
-
112
-
113
-
114
-
115
-
116
-
117
-
118
-
119
-
120
-
121
-
122
-
123
-
124
-
125
-
126
-
127
-
128
-
129
-
130
-
131
-
132
-
133
-
134
-
135
-
136
-
137
-
138
-
139
-
140
-
141
-
142
-
143
-
144
-
145
-
146
-
147
-
148
-
149
-
150
-
151
-
152
-
153
-
154
-
155
-
156
-
157
-
158
-
159
-
160
-
161
 |
 |