Canon XL-H1 XL H1 Instruction Manual - Page 42
Recording
 |
UPC - 086753092998
View all Canon XL-H1 manuals
Add to My Manuals
Save this manual to your list of manuals |
Page 42 highlights
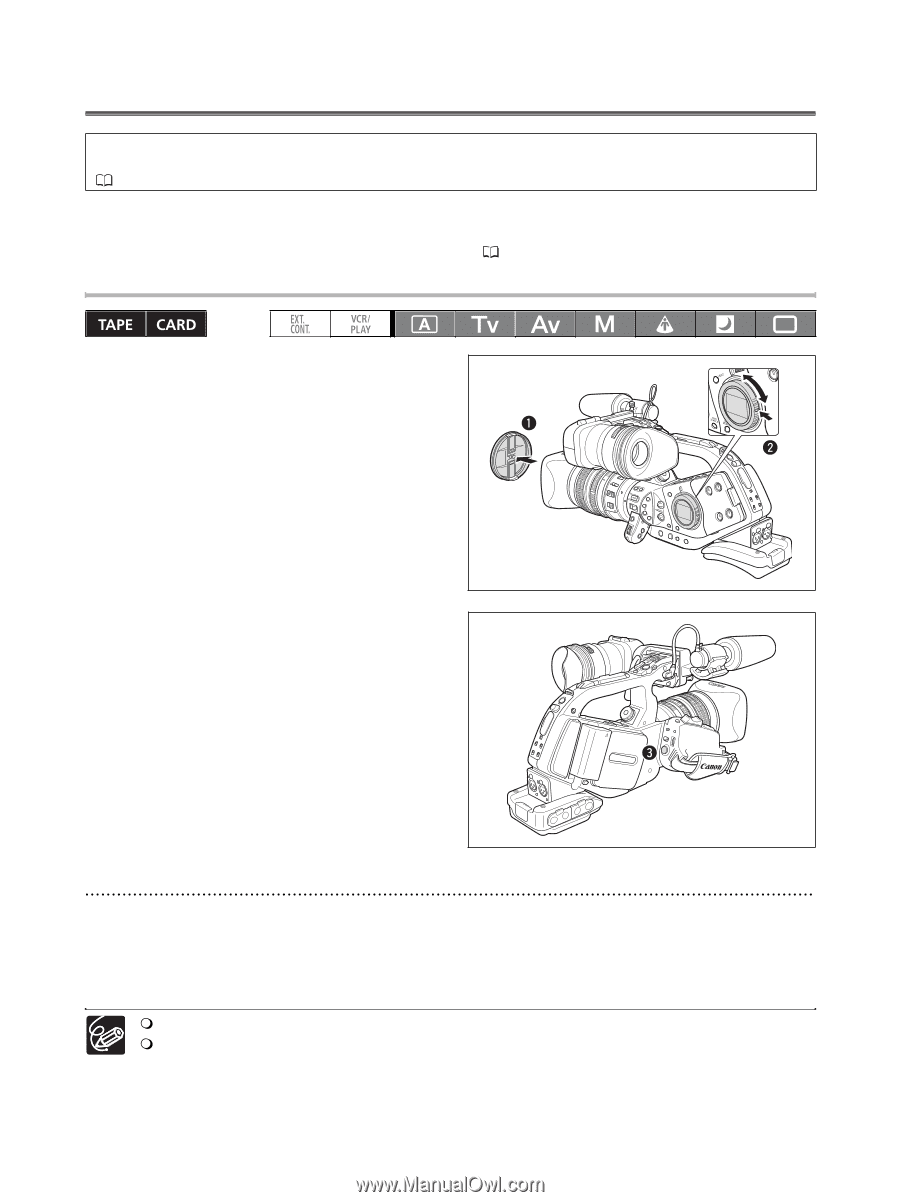
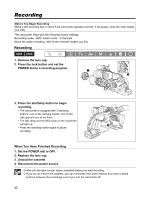
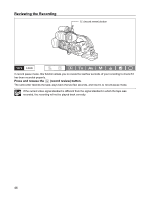
Recording Recording Before You Begin Recording Make a test recording first to check if the camcorder operates correctly. If necessary, clean the video heads ( 138). The camcorder ships with the following factory settings: Recording mode - HDV; Audio mode - 2 channels About the audio recording, refer to the relevant chapter ( 63). Recording 1. Remove the lens cap. 2. Press the lock button and set the POWER dial to a recording program. 3. Press the start/stop button to begin recording. • The camcorder is equipped with 3 start/stop buttons: one on the carrying handle, one on the side grip and one at the front. • The tally lamp and the REC lamp on the viewfinder will light up. • Press the start/stop button again to pause recording. When You Have Finished Recording 1. Set the POWER dial to OFF. 2. Replace the lens cap. 3. Unload the cassette. 4. Disconnect the power source. Wait until the tape counter stops completely before you start recording. If you do not remove the cassette, you can record the next scene without any noise or blank sections between the recordings even if you turn the camcorder off. 42
-
 1
1 -
2
-
3
-
4
-
5
-
6
-
7
-
8
-
9
-
10
-
11
-
12
-
13
-
14
-
15
-
16
-
17
-
18
-
19
-
20
-
21
-
22
-
23
-
24
-
25
-
26
-
27
-
28
-
29
-
30
-
31
-
32
-
33
-
34
-
35
-
36
-
 37
37 -
 38
38 -
 39
39 -
 40
40 -
 41
41 -
 42
42 -
 43
43 -
 44
44 -
 45
45 -
 46
46 -
 47
47 -
48
-
49
-
50
-
51
-
52
-
53
-
54
-
55
-
56
-
57
-
58
-
59
-
60
-
61
-
62
-
63
-
64
-
65
-
66
-
67
-
68
-
69
-
70
-
71
-
72
-
73
-
74
-
75
-
76
-
77
-
78
-
79
-
80
-
81
-
82
-
83
-
84
-
85
-
86
-
87
-
88
-
89
-
90
-
91
-
92
-
93
-
94
-
95
-
96
-
97
-
98
-
99
-
100
-
101
-
102
-
103
-
104
-
105
-
106
-
107
-
108
-
109
-
110
-
111
-
112
-
113
-
114
-
115
-
116
-
117
-
118
-
119
-
120
-
121
-
122
-
123
-
124
-
125
-
126
-
127
-
128
-
129
-
130
-
131
-
132
-
133
-
134
-
135
-
136
-
137
-
138
-
139
-
140
-
141
-
142
-
143
-
144
-
145
-
146
-
147
-
148
-
149
-
150
-
151
-
152
-
153
-
154
-
155
-
156
-
157
-
158
-
159
-
160
-
161
 |
 |