Canon XL-H1 XL H1 Instruction Manual - Page 110
Recording an External Video Signal, Analog Line-In, HDV/DV
 |
UPC - 086753092998
View all Canon XL-H1 manuals
Add to My Manuals
Save this manual to your list of manuals |
Page 110 highlights
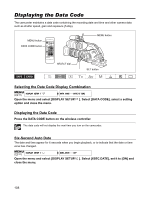
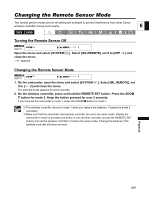
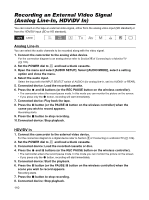
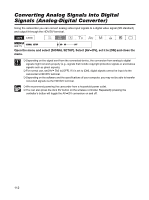
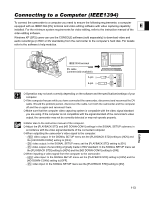
Recording Editing an External Video Signal (Analog Line-In, HDV/DV In) You can record on the tape an external video signal, either from the analog video input (SD standard) or from the HDV/DV input (SD or HD standard). Analog Line-In You can select the audio channels to be recorded along with the video signal. 1. Connect the camcorder to the analog video device. For the connection diagram to an analog device refer to Section 4 of Connecting to a Monitor/TV ( 102). 2. Set the POWER dial to and load a blank cassette. 3. Open the menu and select [AUDIO SETUP]. Select [AUDIO MODE], select a setting option and close the menu. 4. Select the audio input. Select the input with the INPUT SELECT switch of AUDIO1 (for analog line-in, set it to AUDIO1 or REAR). 5. Connected device: Load the recorded cassette. 6. Press the and buttons (or the REC PAUSE button on the wireless controller). • The camcorder enters the record pause mode. In this mode you can monitor the picture on the screen. • If you press only the button, recording will start immediately. 7. Connected device: Play back the tape. 8. Press the button (or the PAUSE button on the wireless controller) when the scene you wish to record appears. Recording starts. 9. Press the button to stop recording. 10. Connected device: Stop playback. HDV/DV In 1. Connect the camcorder to the external video device. For the connection diagram to a digital device refer to Section 3 of Connecting to a Monitor/TV ( 102). 2. Set the POWER dial to and load a blank cassette. 3. Connected device: Load the recorded cassette or disc. 4. Press the and buttons (or the REC PAUSE button on the wireless controller). • The camcorder enters the record pause mode. In this mode you can monitor the picture on the screen. • If you press only the button, recording will start immediately. 5. Connected device: Start the playback. 6. Press the button (or the PAUSE button on the wireless controller) when the scene you wish to record appears. Recording starts. 7. Press the button to stop recording. 8. Connected device: Stop playback. 110
-
 1
1 -
2
-
3
-
4
-
5
-
6
-
7
-
8
-
9
-
10
-
11
-
12
-
13
-
14
-
15
-
16
-
17
-
18
-
19
-
20
-
21
-
22
-
23
-
24
-
25
-
26
-
27
-
28
-
29
-
30
-
31
-
32
-
33
-
34
-
35
-
36
-
37
-
38
-
39
-
40
-
41
-
42
-
43
-
44
-
45
-
46
-
47
-
48
-
49
-
50
-
51
-
52
-
53
-
54
-
55
-
56
-
57
-
58
-
59
-
60
-
61
-
62
-
63
-
64
-
65
-
66
-
67
-
68
-
69
-
70
-
71
-
72
-
73
-
74
-
75
-
76
-
77
-
78
-
79
-
80
-
81
-
82
-
83
-
84
-
85
-
86
-
87
-
88
-
89
-
90
-
91
-
92
-
93
-
94
-
95
-
96
-
97
-
98
-
99
-
100
-
101
-
102
-
103
-
104
-
 105
105 -
 106
106 -
 107
107 -
 108
108 -
 109
109 -
 110
110 -
 111
111 -
 112
112 -
 113
113 -
 114
114 -
 115
115 -
116
-
117
-
118
-
119
-
120
-
121
-
122
-
123
-
124
-
125
-
126
-
127
-
128
-
129
-
130
-
131
-
132
-
133
-
134
-
135
-
136
-
137
-
138
-
139
-
140
-
141
-
142
-
143
-
144
-
145
-
146
-
147
-
148
-
149
-
150
-
151
-
152
-
153
-
154
-
155
-
156
-
157
-
158
-
159
-
160
-
161
 |
 |