Canon XL-H1 XL H1 Instruction Manual - Page 90
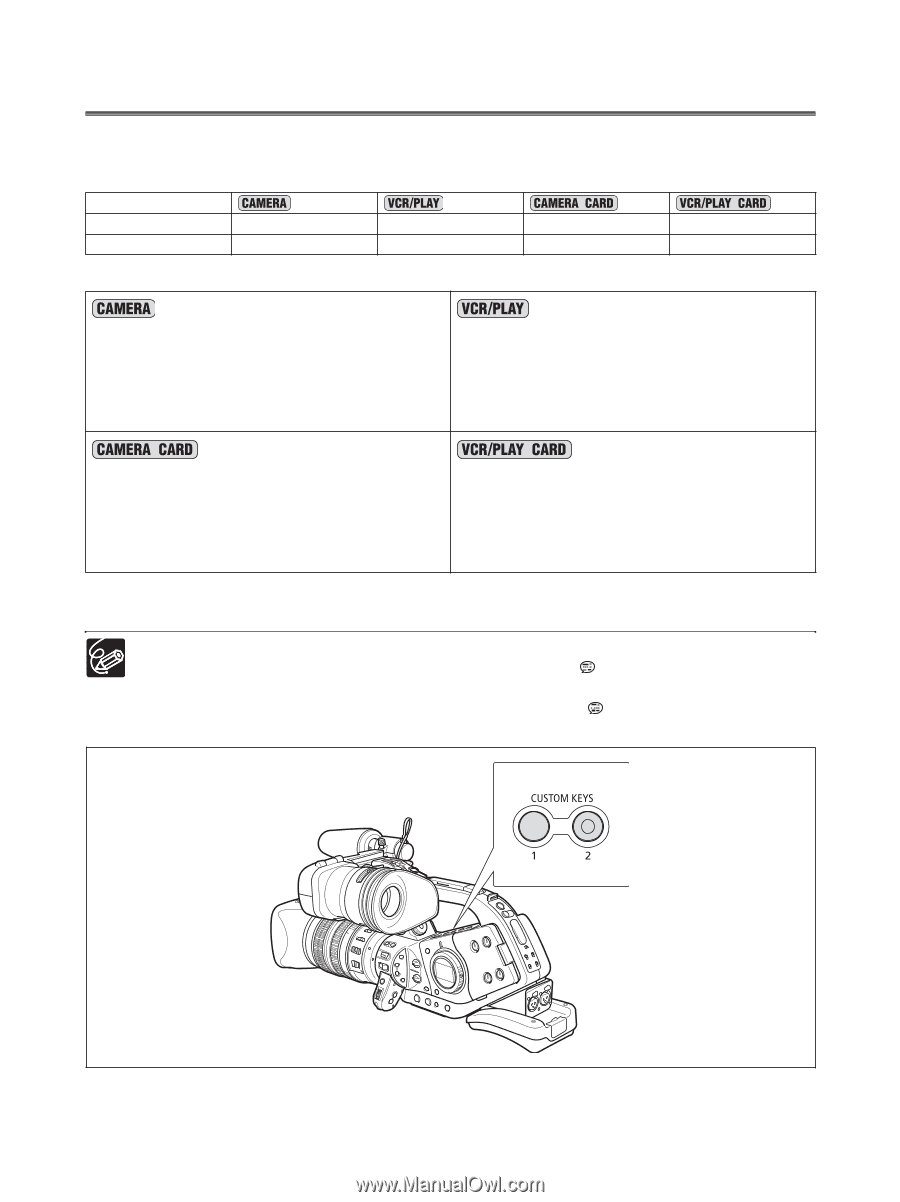
Using the Custom Keys
 |
UPC - 086753092998
View all Canon XL-H1 manuals
Add to My Manuals
Save this manual to your list of manuals |
Page 90 highlights
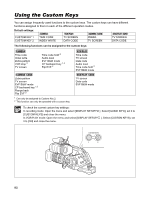
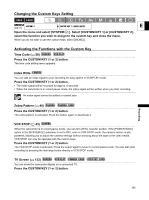
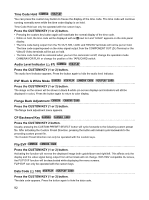
Using the Custom Keys You can assign frequently used functions to the custom keys. The custom keys can have different functions assigned to them in each of the different operation modes. Default settings: CUSTOM KEY 1 CUSTOM KEY 2 TIME CODE INDEX WRITE TV SCREEN DATA CODE ZEBRA TV SCREEN The following functions can be assigned to the custom keys: TV SCREEN DATA CODE Time code Index write Zebra pattern VCR stop 2 TV screen Time code hold 2 Audio level EVF B&W mode CP backward key 1,2 Flip EVF 2 Time code TV screen Data code Audio level Time code hold 2 EVF B&W mode Zebra pattern TV screen EVF B&W mode CP backward key 1,2 Flange back Flip EVF 2 1 Can only be assigned to Custom Key 2. 2 This function can only be operated with a custom key. TV screen Data code EVF B&W mode To check the current custom key settings: In recording mode: Open the menu and select [DISPLAY SETUP/ ]. Select [GUIDE INFO], set it to [CUSTOM KEYS] and close the menu. In VCR/PLAY mode: Open the menu and select [DISPLAY SETUP/ ]. Select [CUSTOM KEYS], set it to [ON] and close the menu. 90
-
 1
1 -
2
-
3
-
4
-
5
-
6
-
7
-
8
-
9
-
10
-
11
-
12
-
13
-
14
-
15
-
16
-
17
-
18
-
19
-
20
-
21
-
22
-
23
-
24
-
25
-
26
-
27
-
28
-
29
-
30
-
31
-
32
-
33
-
34
-
35
-
36
-
37
-
38
-
39
-
40
-
41
-
42
-
43
-
44
-
45
-
46
-
47
-
48
-
49
-
50
-
51
-
52
-
53
-
54
-
55
-
56
-
57
-
58
-
59
-
60
-
61
-
62
-
63
-
64
-
65
-
66
-
67
-
68
-
69
-
70
-
71
-
72
-
73
-
74
-
75
-
76
-
77
-
78
-
79
-
80
-
81
-
82
-
83
-
84
-
 85
85 -
 86
86 -
 87
87 -
 88
88 -
 89
89 -
 90
90 -
 91
91 -
 92
92 -
 93
93 -
 94
94 -
 95
95 -
96
-
97
-
98
-
99
-
100
-
101
-
102
-
103
-
104
-
105
-
106
-
107
-
108
-
109
-
110
-
111
-
112
-
113
-
114
-
115
-
116
-
117
-
118
-
119
-
120
-
121
-
122
-
123
-
124
-
125
-
126
-
127
-
128
-
129
-
130
-
131
-
132
-
133
-
134
-
135
-
136
-
137
-
138
-
139
-
140
-
141
-
142
-
143
-
144
-
145
-
146
-
147
-
148
-
149
-
150
-
151
-
152
-
153
-
154
-
155
-
156
-
157
-
158
-
159
-
160
-
161
 |
 |