Canon XL-H1 XL H1 Instruction Manual - Page 58
Setting the Time Code
 |
UPC - 086753092998
View all Canon XL-H1 manuals
Add to My Manuals
Save this manual to your list of manuals |
Page 58 highlights
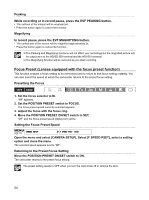
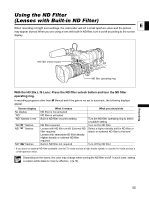
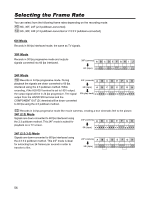
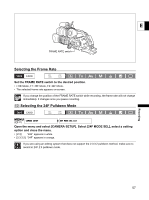
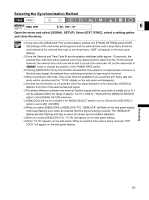
Setting the Time Code Selecting the Frame Setting In 60i and 30F mode, you can select between drop frame or non-drop frame time code. MENU ( 31) SIGNAL SETUP TIME CODE FRAME SETTNG•DROP Open the menu and select [SIGNAL SETUP]. Select the [TIME CODE] submenu and then [FRAME SETTNG]. Select a setting option and close the menu. When you select the [NON DROP] setting or when you select 24F frame rate in SD mode, "NDF" will appear on the side panel display. Selecting the Run Options When recording in a mode other than 24F in SD mode, you can select from record run (REC-RUN), record run preset (REC-RUN PS.) and free-run (FREE-RUN) time codes. In 24F (in SD) mode, you can select from record run or record run preset. With record run, the time code runs only when you are recording. With free run, the time code runs regardless of the operation of the camcorder. You can select the start point for the free-run and the record run preset time codes. MENU ( 31) SIGNAL SETUP TIME CODE COUNT-UP REC-RUN 1. Open the menu and select [SIGNAL SETUP]. Select the [TIME CODE] submenu and then [COUNT-UP]. Select a setting option and close the menu. [REC-RUN]: Close the menu. [REC-RUN PS.], [FREE-RUN]: Continue the procedure below to set the start point. 2. Select [SET]. The hours display flashes. 3. Set the time code's starting value. Turn the SELECT dial to set the value for the hours and press the SET button. The next field of the display starts flashing. Set the value for the minutes, seconds and frames in the same way. 4. Close the menu. About the time code display - [REC-RUN]: The time code will be displayed with an R next to it. - [REC-RUN PS.]: The time code will be displayed in blue with a P next to it. - [FREE-RUN]: The time code will be displayed in blue with an F next to it. - External Time Code: The time code will be displayed in blue with an E next to it. - Time Code Hold: The time code will be displayed in blue with an H next to it. - Playback: No time code display. When setting the free-run time code, the time code starts to run the moment you press the MENU button in the middle of the setting, or when you press the SET button after setting the value for "frames" in step 3. To reset the time code to [00:00:00:00], select [RESET] in step 2. 58
-
 1
1 -
2
-
3
-
4
-
5
-
6
-
7
-
8
-
9
-
10
-
11
-
12
-
13
-
14
-
15
-
16
-
17
-
18
-
19
-
20
-
21
-
22
-
23
-
24
-
25
-
26
-
27
-
28
-
29
-
30
-
31
-
32
-
33
-
34
-
35
-
36
-
37
-
38
-
39
-
40
-
41
-
42
-
43
-
44
-
45
-
46
-
47
-
48
-
49
-
50
-
51
-
52
-
 53
53 -
 54
54 -
 55
55 -
 56
56 -
 57
57 -
 58
58 -
 59
59 -
 60
60 -
 61
61 -
 62
62 -
 63
63 -
64
-
65
-
66
-
67
-
68
-
69
-
70
-
71
-
72
-
73
-
74
-
75
-
76
-
77
-
78
-
79
-
80
-
81
-
82
-
83
-
84
-
85
-
86
-
87
-
88
-
89
-
90
-
91
-
92
-
93
-
94
-
95
-
96
-
97
-
98
-
99
-
100
-
101
-
102
-
103
-
104
-
105
-
106
-
107
-
108
-
109
-
110
-
111
-
112
-
113
-
114
-
115
-
116
-
117
-
118
-
119
-
120
-
121
-
122
-
123
-
124
-
125
-
126
-
127
-
128
-
129
-
130
-
131
-
132
-
133
-
134
-
135
-
136
-
137
-
138
-
139
-
140
-
141
-
142
-
143
-
144
-
145
-
146
-
147
-
148
-
149
-
150
-
151
-
152
-
153
-
154
-
155
-
156
-
157
-
158
-
159
-
160
-
161
 |
 |