Canon i475D i475D Direct Printing Guide - Page 14
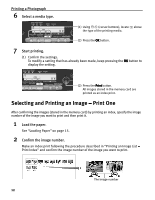
Start printing.
 |
View all Canon i475D manuals
Add to My Manuals
Save this manual to your list of manuals |
Page 14 highlights
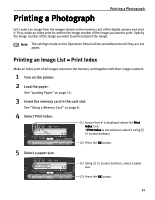
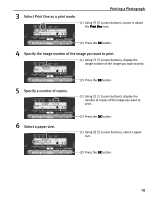
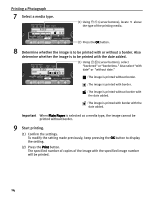
Printing a Photograph 7 Select a media type. (1) Using (cursor buttons), locate above the type of the printing media. (2) Press the OK button. 8 Determine whether the image is to be printed with or without a border. Also determine whether the image is to be printed with the date added. (1) Using (cursor buttons), select "bordered" or "borderless." Also select "with date" or "without date." : The image is printed without border. : The image is printed with border. : The image is printed without border with the date added. : The image is printed with border with the date added. Important When Plain Paper is selected as a media type, the image cannot be printed without border. 9 Start printing. (1) Confirm the settings. To modify the setting made previously, keep pressing the OK button to display the setting. (2) Press the Print button. The specified number of copies of the image with the specified image number will be printed. 14
-
 1
1 -
2
-
3
-
4
-
5
-
6
-
7
-
8
-
 9
9 -
 10
10 -
 11
11 -
 12
12 -
 13
13 -
 14
14 -
 15
15 -
 16
16 -
 17
17 -
 18
18 -
 19
19 -
20
-
21
-
22
-
23
-
24
-
25
-
26
-
27
-
28
-
29
-
30
-
31
-
32
-
33
-
34
-
35
-
36
-
37
-
38
-
39
-
40
-
41
-
42
-
43
-
44
 |
 |
