Canon i475D i475D Direct Printing Guide - Page 26
Printing from a Digital Camera
 |
View all Canon i475D manuals
Add to My Manuals
Save this manual to your list of manuals |
Page 26 highlights
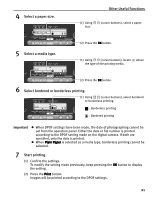
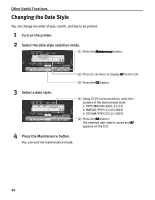
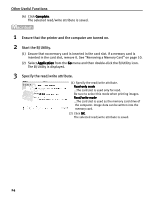
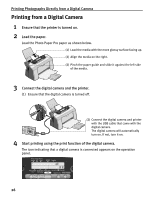
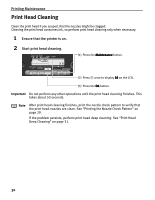
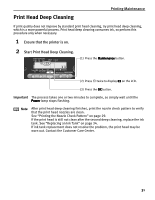
Printing Photographs Directly from a Digital Camera Printing from a Digital Camera 1 Ensure that the printer is turned on. 2 Load the paper. Load the Photo Paper Pro paper as shown below. (1) Load the media with the more glossy surface facing up. (2) Align the media on the right. (3) Pinch the paper guide and slide it against the left side of the media. 3 Connect the digital camera and the printer. (1) Ensure that the digital camera is turned off. (2) Connect the digital camera and printer with the USB cable that came with the digital camera. The digital camera will automatically turn on. If not, turn it on. 4 Start printing using the print function of the digital camera. The icon indicating that a digital camera is connected appears on the operation panel. 26
-
 1
1 -
2
-
3
-
4
-
5
-
6
-
7
-
8
-
9
-
10
-
11
-
12
-
13
-
14
-
15
-
16
-
17
-
18
-
19
-
20
-
 21
21 -
 22
22 -
 23
23 -
 24
24 -
 25
25 -
 26
26 -
 27
27 -
 28
28 -
 29
29 -
 30
30 -
 31
31 -
32
-
33
-
34
-
35
-
36
-
37
-
38
-
39
-
40
-
41
-
42
-
43
-
44
 |
 |
