Canon iP1800 Quick Start Guide - Page 42
Cleaning the Inside of the Printer, Cleaning the Bottom Plate Bottom Plate Cleaning, Sheet Feeder. - photo printer
 |
UPC - 013803078084
View all Canon iP1800 manuals
Add to My Manuals
Save this manual to your list of manuals |
Page 42 highlights
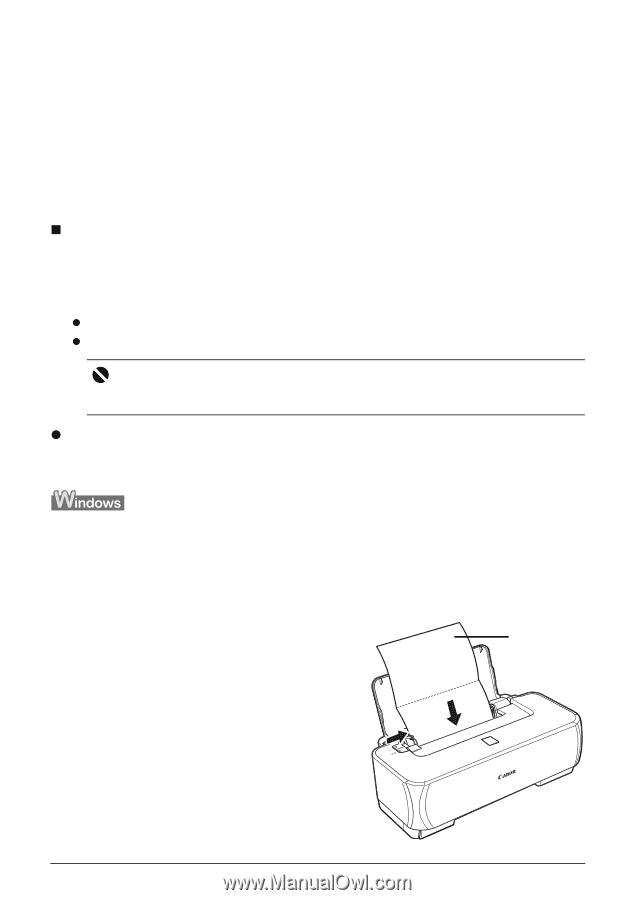
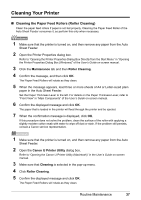
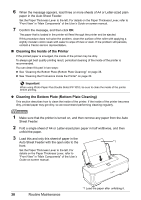
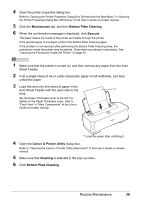
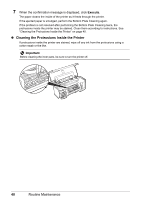
6 When the message appears, load three or more sheets of A4 or Letter-sized plain paper in the Auto Sheet Feeder. Set the Paper Thickness Lever to the left. For details on the Paper Thickness Lever, refer to "Front View" in "Main Components" of the User's Guide on-screen manual. 7 Confirm the message, and then click OK. The paper that is loaded in the printer will feed through the printer and be ejected. If this procedure does not solve the problem, clean the surface of the roller with applying a slightly moisten cotton swab with water to wipe off dust or stain. If the problem still persists, contact a Canon service representative. „ Cleaning the Inside of the Printer If the printed paper is smudged, the inside of the printer may be dirty. To always get best quality printing result, periodical cleaning of the inside of the printer is recommended. You can clean this part in two ways: z See "Cleaning the Bottom Plate (Bottom Plate Cleaning)" on page 38. z See "Cleaning the Protrusions Inside the Printer" on page 40. Important When using Photo Paper Plus Double Sided PP-101D, be sure to clean the inside of the printer before printing. z Cleaning the Bottom Plate (Bottom Plate Cleaning) This section describes how to clean the inside of the printer. If the inside of the printer becomes dirty, printed paper may get dirty, so we recommend performing cleaning regularly. 1 Make sure that the printer is turned on, and then remove any paper from the Auto Sheet Feeder. 2 Fold a single sheet of A4 or Letter-sized plain paper in half widthwise, and then unfold the paper. 3 Load this and only this sheet of paper in the Auto Sheet Feeder with the open side to the *1 front. Set the Paper Thickness Lever to the left. For details on the Paper Thickness Lever, refer to "Front View" in "Main Components" of the User's Guide on-screen manual. 38 Routine Maintenance *1 Load the paper after unfolding it.
-
 1
1 -
2
-
3
-
4
-
5
-
6
-
7
-
8
-
9
-
10
-
11
-
12
-
13
-
14
-
15
-
16
-
17
-
18
-
19
-
20
-
21
-
22
-
23
-
24
-
25
-
26
-
27
-
28
-
29
-
30
-
31
-
32
-
33
-
34
-
35
-
36
-
 37
37 -
 38
38 -
 39
39 -
 40
40 -
 41
41 -
 42
42 -
 43
43 -
 44
44 -
 45
45 -
 46
46 -
 47
47 -
48
-
49
-
50
-
51
-
52
-
53
-
54
-
55
-
56
-
57
-
58
-
59
-
60
-
61
-
62
-
63
-
64
-
65
-
66
-
67
-
68
-
69
-
70
-
71
-
72
 |
 |