Canon imageCLASS D340 imageCLASS D320/D340 Basic Guide - Page 20
Loading Paper
 |
View all Canon imageCLASS D340 manuals
Add to My Manuals
Save this manual to your list of manuals |
Page 20 highlights
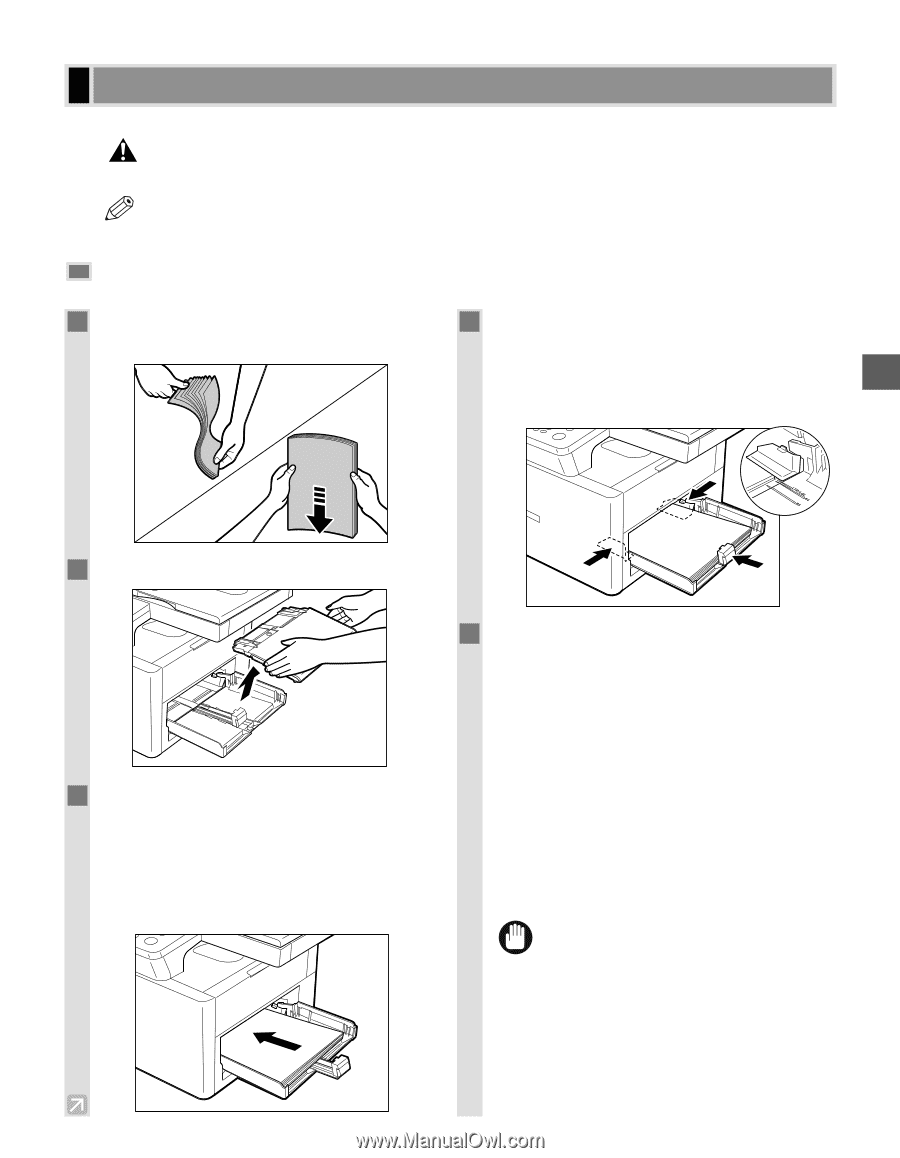
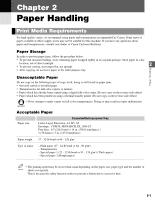
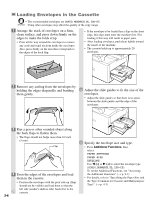
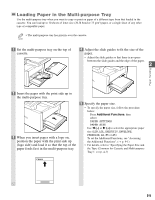
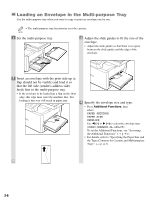
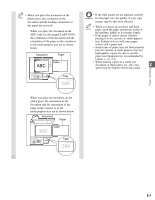
Loading Paper This section describes how to load paper in the cassette and in the multi-purpose tray. • When loading paper, take care not to cut your hands on the edges of the paper. CAUTION • The paper in the multi-purpose tray is fed prior to the paper in the cassette. NOTE • The cassette holds up to approximately 250 sheets of 17 to 20-lb bond (64 g/m2 to 80g/m2). Loading Paper in the Cassette 1 Fan the paper stack first, then tap the edges 4 Adjust the slide guides to fit the size of the on a flat surface to even the stack. paper stack. • Adjust the slide guides so that there is no space 2 between the slide guides and the edge of the paper stack. Paper Handling 2 Remove the multi-purpose tray. 3 Load the paper stack in the cassette. • Insert the paper stack into the cassette as far as it will go. • When you insert paper with a logo on, position the paper with the print side up (logo side) and load it so that the top of the paper feeds first in the cassette. 5 When loading paper other than letter size, specify the paper size. Press Additional Functions, then select: PAPER SETTINGS PAPER SIZE Use 4 (-) or e (+) to select the appropriate paper size (LTR, LGL, EXECUTIV, ENVELOPE, FREESIZE, A4, B5 or A5). To set the Additional Functions, see "Accessing the Additional Functions". (→ p. 9-1) • For details, refer to "Specifying the Paper Size and the Type (Common for Cassette and Multi-purpose Tray)". (→ p. 4-3) • Do not load different kinds of paper at the same time. • IMPORTANT Do not load extra paper when there is still paper left in the cassette. • If you load extra paper while making copies, remove the loaded paper first. Then put it together with the extra paper and tap the edges. After that, reload it in the cassette. 2-3
-
 1
1 -
2
-
3
-
4
-
5
-
6
-
7
-
8
-
9
-
10
-
11
-
12
-
13
-
14
-
 15
15 -
 16
16 -
 17
17 -
 18
18 -
 19
19 -
 20
20 -
 21
21 -
 22
22 -
 23
23 -
 24
24 -
 25
25 -
26
-
27
-
28
-
29
-
30
-
31
-
32
-
33
-
34
-
35
-
36
-
37
-
38
-
39
-
40
-
41
-
42
-
43
-
44
-
45
-
46
-
47
-
48
-
49
-
50
-
51
-
52
-
53
-
54
-
55
-
56
-
57
-
58
-
59
-
60
-
61
-
62
-
63
-
64
-
65
-
66
-
67
-
68
-
69
-
70
-
71
-
72
-
73
-
74
-
75
-
76
-
77
-
78
-
79
-
80
-
81
-
82
-
83
-
84
-
85
-
86
 |
 |