Canon imageCLASS D530 Basic Guide - Page 46
Scan a Document with the MF Toolbox, Canceling Scan Jobs, Default Folder for Saving Scanned Images - install
 |
View all Canon imageCLASS D530 manuals
Add to My Manuals
Save this manual to your list of manuals |
Page 46 highlights
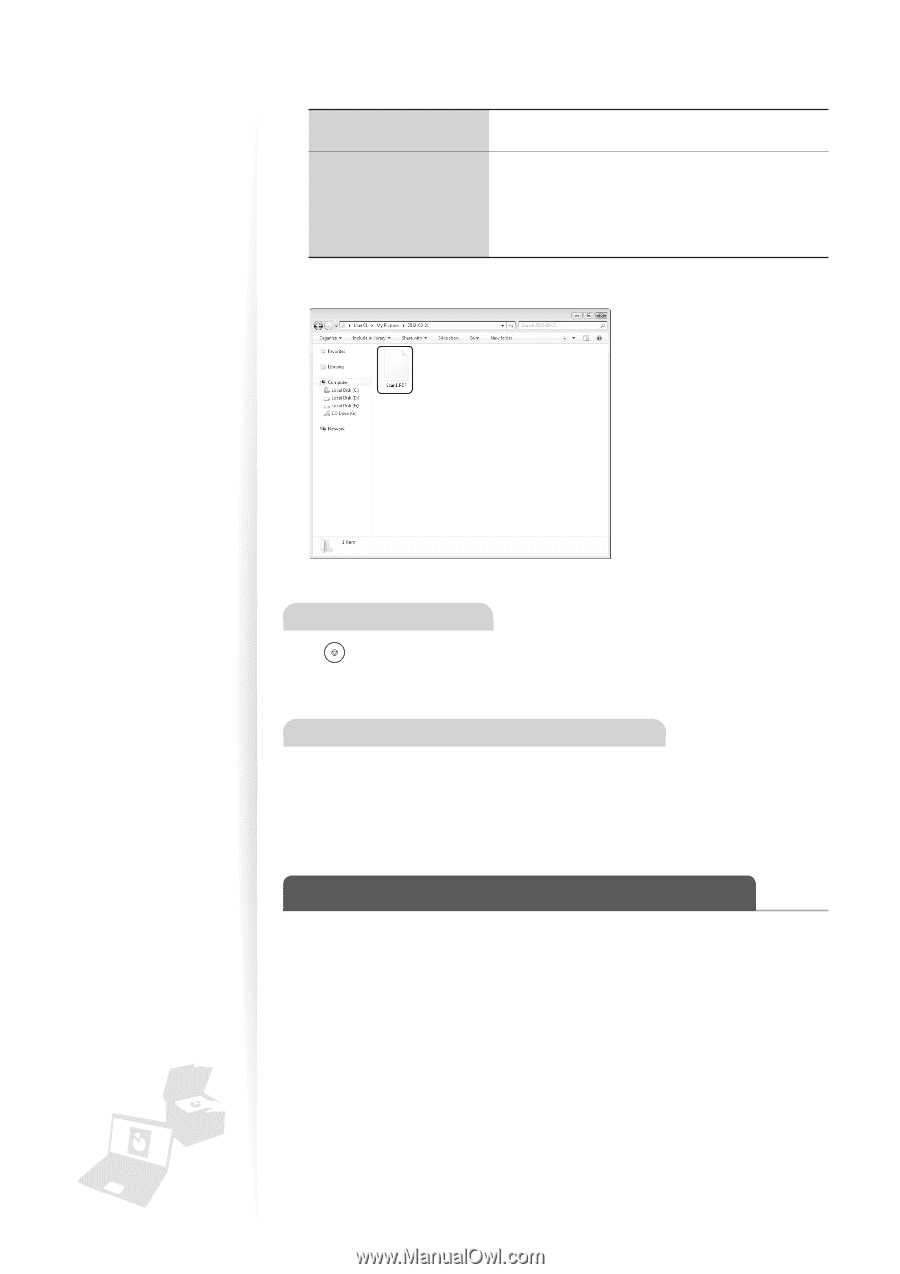
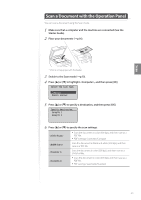
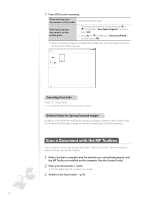
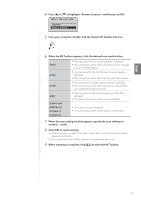
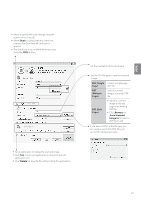
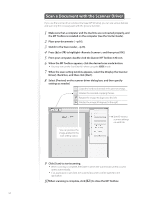
7 Press [OK] to start scanning. When placing your documents in the feeder When placing your documents on the platen glass Scanning operation starts. 1. To continuously scan the document, press [▲] or [▼] to highlight , and then press [OK]. 2. press [▲] or [▼] to highlight , and then press [OK]. • When scanning is complete, the folder that contains the scanned images is opened on the screen of the computer. Canceling Scan Jobs Press [ ] (Stop) twice. * It is valid when only one job is processing or waiting. Default Folder for Saving Scanned Images By default, a new folder named after the date you scanned is created in the [Pictures] folder. (For Windows XP, the folder is created in the [My Pictures] folder in [My Documents].) Scan a Document with the MF Toolbox You can specify various scan settings if you select from the operation panel, and then open the MF Toolbox. 1 Make sure that a computer and the machine are connected properly, and the MF Toolbox is installed on the computer (See the Starter Guide). 2 Place your documents (→p.16). • Use the platen glass for a higher scan quality. 3 Switch to the Scan mode (→p.13). 46
-
 1
1 -
2
-
3
-
4
-
5
-
6
-
7
-
8
-
9
-
10
-
11
-
12
-
13
-
14
-
15
-
16
-
17
-
18
-
19
-
20
-
21
-
22
-
23
-
24
-
25
-
26
-
27
-
28
-
29
-
30
-
31
-
32
-
33
-
34
-
35
-
36
-
37
-
38
-
39
-
40
-
 41
41 -
 42
42 -
 43
43 -
 44
44 -
 45
45 -
 46
46 -
 47
47 -
 48
48 -
 49
49 -
 50
50 -
 51
51 -
52
-
53
-
54
-
55
-
56
-
57
-
58
-
59
-
60
-
61
-
62
-
63
-
64
-
65
-
66
-
67
-
68
-
69
-
70
-
71
-
72
-
73
-
74
-
75
-
76
 |
 |