Canon imageCLASS D530 Basic Guide - Page 50
Scan a Document with the Scanner Driver, When the MF Toolbox appears - driver windows 8
 |
View all Canon imageCLASS D530 manuals
Add to My Manuals
Save this manual to your list of manuals |
Page 50 highlights
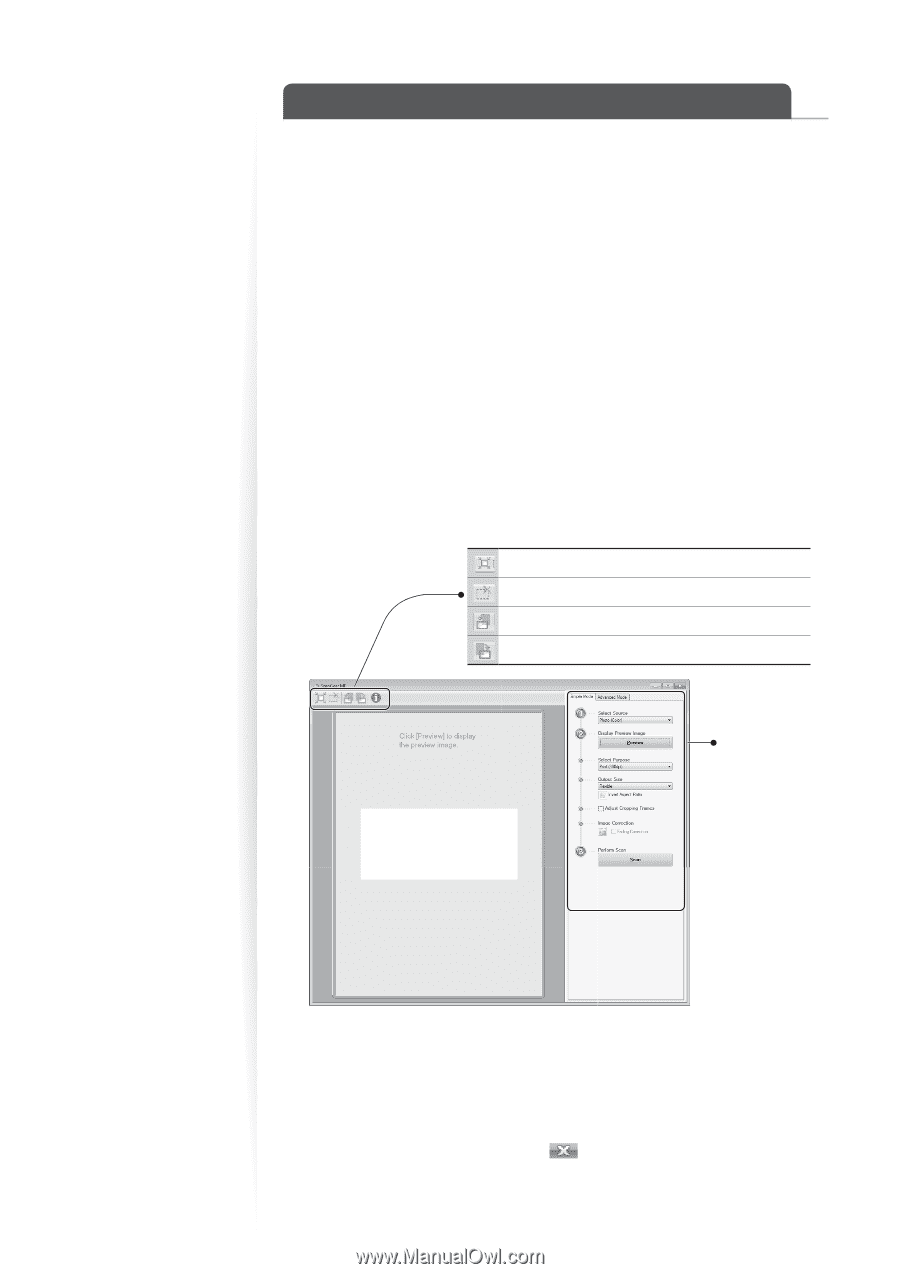
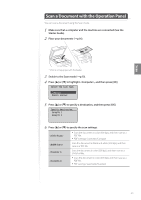
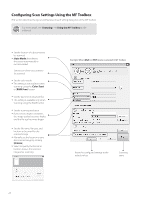
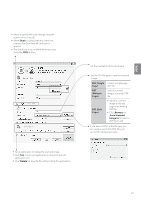
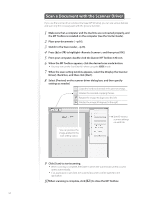
Scan a Document with the Scanner Driver If you use the scanner driver window (ScanGear MF Window), you can use various features and scan only the necessary part with the preview function. 1 Make sure that a computer and the machine are connected properly, and the MF Toolbox is installed on the computer (See the Starter Guide). 2 Place your documents (→p.16). 3 Switch to the Scan mode (→p.13). 4 Press [▲] or [▼] to highlight , and then press [OK]. 5 From your computer, double-click the [Canon MF Toolbox 4.9] icon. 6 When the MF Toolbox appears, click the desired scan mode button. • You may not use the ScanGear MF when using the [OCR] mode. 7 When the scan setting window appears, select the [Display the Scanner Driver] check box, and then click [Start]. 8 Select [Preview] on the scanner driver dialog box, and then specify settings as needed. Crops the borders detected in the preview image. Deletes the selected cropping frames. Rotates the image 90 degrees to the left. Rotates the image 90 degrees to the right. You can preview the image applied to the scan setting values. Specify various scanner settings on each tab. 9 Click [Scan] to start scanning. • When scanning is complete, the folder in which the scanned document is saved opens automatically. • If an application is specified, the scanned document will be opened in the application. 10When scanning is complete, click [ ] to close the MF Toolbox. 50
-
 1
1 -
2
-
3
-
4
-
5
-
6
-
7
-
8
-
9
-
10
-
11
-
12
-
13
-
14
-
15
-
16
-
17
-
18
-
19
-
20
-
21
-
22
-
23
-
24
-
25
-
26
-
27
-
28
-
29
-
30
-
31
-
32
-
33
-
34
-
35
-
36
-
37
-
38
-
39
-
40
-
41
-
42
-
43
-
44
-
 45
45 -
 46
46 -
 47
47 -
 48
48 -
 49
49 -
 50
50 -
 51
51 -
 52
52 -
 53
53 -
 54
54 -
 55
55 -
56
-
57
-
58
-
59
-
60
-
61
-
62
-
63
-
64
-
65
-
66
-
67
-
68
-
69
-
70
-
71
-
72
-
73
-
74
-
75
-
76
 |
 |