Canon imagePROGRAF iPF770 MFP M40 Basics Guide - Page 79
Tab Selection screen, Set./Adj. Menu, Adjust Printer, Head Posi. Adj., AutoStandard, AutoAdvanced
 |
View all Canon imagePROGRAF iPF770 MFP M40 manuals
Add to My Manuals
Save this manual to your list of manuals |
Page 79 highlights
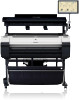
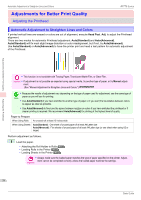
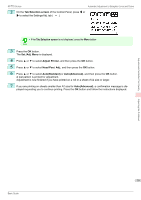
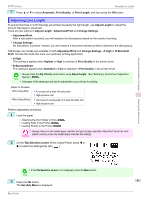
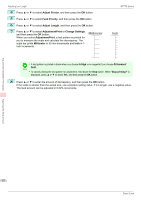
iPF770 Series Automatic Adjustment to Straighten Lines and Colors 2 On the Tab Selection screen of the Control Panel, press ◀ or ▶ to select the Settings/Adj. tab ( ). • If the Tab Selection screen is not displayed, press the Menu button. Note 3 Press the OK button. The Set./Adj. Menu is displayed. 4 Press ▲ or ▼ to select Adjust Printer, and then press the OK button. 5 Press ▲ or ▼ to select Head Posi. Adj., and then press the OK button. 6 Press ▲ or ▼ to select Auto(Standard) or Auto(Advanced), and then press the OK button. A test pattern is printed for adjustment. Adjustment is now finished if you have printed on a roll or a sheet of A2 size or larger. 7 If you are printing on sheets smaller than A2 size for Auto(Advanced), a confirmation message is displayed requesting you to continue printing. Press the OK button and follow the instructions displayed. Adjustments for Better Print Quality Adjusting the Printhead 79 Basic Guide
-
 1
1 -
2
-
3
-
4
-
5
-
6
-
7
-
8
-
9
-
10
-
11
-
12
-
13
-
14
-
15
-
16
-
17
-
18
-
19
-
20
-
21
-
22
-
23
-
24
-
25
-
26
-
27
-
28
-
29
-
30
-
31
-
32
-
33
-
34
-
35
-
36
-
37
-
38
-
39
-
40
-
41
-
42
-
43
-
44
-
45
-
46
-
47
-
48
-
49
-
50
-
51
-
52
-
53
-
54
-
55
-
56
-
57
-
58
-
59
-
60
-
61
-
62
-
63
-
64
-
65
-
66
-
67
-
68
-
69
-
70
-
71
-
72
-
73
-
 74
74 -
 75
75 -
 76
76 -
 77
77 -
 78
78 -
 79
79 -
 80
80 -
 81
81 -
 82
82 -
 83
83 -
 84
84 -
85
-
86
-
87
-
88
-
89
-
90
-
91
-
92
-
93
-
94
-
95
-
96
-
97
-
98
-
99
-
100
-
101
-
102
-
103
-
104
-
105
-
106
-
107
-
108
-
109
-
110
-
111
-
112
-
113
-
114
-
115
-
116
-
117
-
118
-
119
-
120
-
121
-
122
-
123
-
124
-
125
-
126
-
127
-
128
-
129
-
130
-
131
-
132
 |
 |