Cisco VG224 Hardware Installation Guide - Page 42
Wall-Mounting the Chassis, Cisco VG224 Voice Gateway Hardware Installation Guide
 |
UPC - 746320575360
View all Cisco VG224 manuals
Add to My Manuals
Save this manual to your list of manuals |
Page 42 highlights
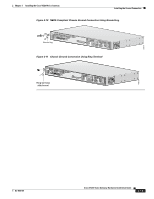
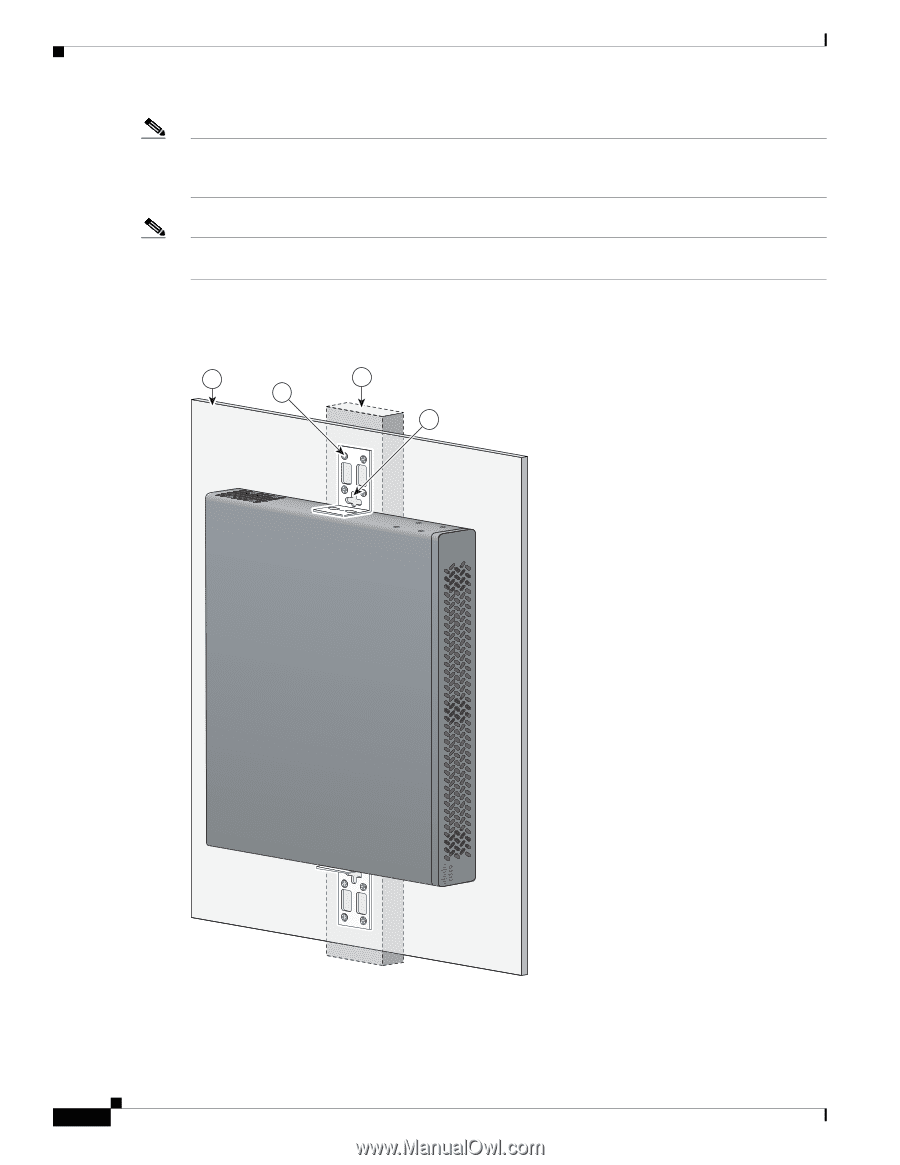
Wall-Mounting the Chassis Chapter 3 Installing the Cisco VG224 Voice Gateway Note For attaching to a wall stud, each bracket requires two #10 wood screws (round- or pan-head) with #10 washers, or two #10 washer-head screws. The screws must be long enough to penetrate at least 3/4 inch (20 mm) into supporting wood or metal wall stud. Note For hollow-wall mounting, each bracket requires two wall anchors with washers. Wall anchors and washers must be size #10. • Figure 3-8 shows the orientation required for installation. Figure 3-8 Wall-Mounting the Chassis 1 2 3 4 CISCO IAD2400 103517 3-10 Cisco VG224 Voice Gateway Hardware Installation Guide OL-5006-04
-
 1
1 -
2
-
3
-
4
-
5
-
6
-
7
-
8
-
9
-
10
-
11
-
12
-
13
-
14
-
15
-
16
-
17
-
18
-
19
-
20
-
21
-
22
-
23
-
24
-
25
-
26
-
27
-
28
-
29
-
30
-
31
-
32
-
33
-
34
-
35
-
36
-
 37
37 -
 38
38 -
 39
39 -
 40
40 -
 41
41 -
 42
42 -
 43
43 -
 44
44 -
 45
45 -
 46
46 -
 47
47 -
48
-
49
-
50
-
51
-
52
-
53
-
54
-
55
-
56
-
57
-
58
-
59
-
60
-
61
-
62
-
63
-
64
-
65
-
66
-
67
-
68
-
69
-
70
-
71
-
72
-
73
-
74
-
75
 |
 |
3-10
Cisco VG224 Voice Gateway Hardware Installation Guide
OL-5006-04
Chapter 3
Installing the Cisco VG224 Voice Gateway
Wall-Mounting the Chassis
Note
For attaching to a wall stud, each bracket requires two #10 wood screws (round- or pan-head) with #10
washers, or two #10 washer-head screws. The screws must be long enough to penetrate at least 3/4 inch
(20 mm) into supporting wood or metal wall stud.
Note
For hollow-wall mounting, each bracket requires two wall anchors with washers. Wall anchors and
washers must be size #10.
•
Figure 3-8
shows the orientation required for installation.
Figure 3-8
Wall-Mounting the Chassis
103517
CISCO
IAD2400
3
1
2
4